Crafting Your Own Brown Ale: A Simplified All-Grain Approach
Delving into homebrewing can seem daunting. Many aspiring brewers face a steep learning curve. However, crafting your own delicious beer is entirely within reach. Below, we expand on the accompanying video, demystifying the process of making a simple yet satisfying brown ale. This guide provides a detailed, expert-level walkthrough for brewing enthusiasts.
The Foundational Ingredients for a Robust Brown Ale
Any great brown ale starts with quality ingredients. For our simplified recipe, we focus on key components. These choices ensure a balanced and flavorful brew. Understanding each ingredient’s role is crucial for success.
Malted Grains: The Heart of Your Beer
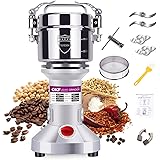
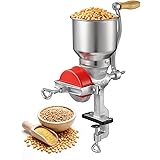
The grain bill dictates much of your beer’s character. We use two primary types here. Two-row barley forms the bulk of the grist. This base malt provides the fermentable sugars. It also offers a clean, neutral canvas for other flavors. Importantly, the barley must be malted and crushed. Whole seeds or unmalted grains will not work. Malting initiates enzyme development. Crushing exposes the starches for conversion.
Crystal malt adds depth and complexity. Specifically, 60L crystal malt is used. The “60L” denotes its Lovibond color rating. This is a very dark crystal malt. It contributes caramel notes, body, and a rich, amber hue. For a 1-gallon batch, a ratio of 80% two-row to 20% crystal malt is ideal. This translates to roughly 2 pounds (32 ounces) total grain. Approximately 6.4 ounces (180 grams) should be crystal malt. The remainder is two-row barley.
Hops: Bitterness, Flavor, and Aroma
Hops are essential for balancing sweetness. They also contribute flavor and aroma. Furthermore, hops act as a natural preservative. Cascade hops are an excellent choice for a brown ale. They offer a pleasant floral and citrusy profile. For a 1-gallon batch, 0.3 ounces of hops are sufficient. Divide this into three equal additions. Each addition serves a distinct purpose during the boil.
The history of hops as a preservative is fascinating. The India Pale Ale (IPA) style originated from this need. English brewers added extra hops to beers. This helped them survive long sea voyages to India. The high hop content prevented spoilage. This is a real-world example of hops’ critical role.
Yeast: The Fermentation Catalyst
Yeast transforms sugars into alcohol and CO2. We use SafAle S-04 for this brown ale. This is a popular English ale yeast strain. It produces a robust fermentation. It also contributes desirable fruity esters. For a 1-gallon batch, approximately one-fifth of a standard packet is enough. For a 5-gallon batch, a full packet is appropriate. Hydrating the yeast beforehand is a simple, effective step. This prepares it for optimal activity.
Water: The Unsung Hero
Water quality significantly impacts beer flavor. Filtered tap water is often suitable. It removes chlorine and sediment. Tap water also contains beneficial minerals. These minerals aid yeast health and overall flavor. Reverse osmosis (RO) water can be too stripped of minerals. This may result in a “flat” tasting beer. Adjusting water chemistry is an advanced topic. For now, good filtered tap water works well.
The Mashing Process: Extracting Sugars from Grains
Mashing is where starches convert to fermentable sugars. This step is critical for your brown ale. It activates enzymes present in the malted barley.
Understanding the Mash-In
Combine your crushed grains with hot water. This creates a porridge-like mixture. Ensure no dry clumps remain. Dry spots can lead to uneven sugar extraction. For a 1-gallon batch, start with about half a gallon of water. More water can be added as needed. The grains absorb a significant amount. A proper mash resembles a thick oatmeal.
Temperature Control: The Enzyme Dance
Temperature control is paramount during mashing. Enzymes alpha-amylase and beta-amylase are at work. Beta-amylase is most active at lower temperatures (145-152°F). It produces highly fermentable sugars. This leads to a drier beer with higher alcohol content. Alpha-amylase thrives at higher temperatures (154-162°F). It creates less fermentable sugars. This results in a beer with more body and mouthfeel, but lower alcohol. A common mash temperature range is 150-165°F (65-74°C).
For this brown ale, target 155°F (68°C). This temperature favors alpha-amylase activity. It results in a beer with excellent mouthfeel. Brian specifically prefers this for a good tasting experience. Maintain this temperature for about one hour. Stir frequently to prevent scorching. Scorched grains impart undesirable off-flavors.
Insulating your mash tun (or pot) helps maintain temperature. Wrapping it in a blanket or towel is effective. Some heat loss is normal and acceptable. Minor fluctuations are part of the homebrewing charm.
Sparging and Lautering: Separating Wort from Grain
After mashing, the liquid (now called wort) must be separated. This process is known as sparging and lautering. It extracts all the valuable sugars.
Straining the Grains
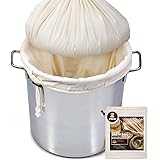
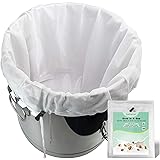
Carefully strain the wort from the spent grains. A large strainer is effective. You can also use a “brew in a bag” system. This method simplifies cleanup significantly. The goal is to collect the sugary liquid. The grains themselves are not needed for the next step.
Rinsing for Maximum Extraction
Sparging involves rinsing the spent grains. Pour hot water over them. This washes off any remaining sugars. The rinse water combines with the initial wort. Aim for a starting volume of 1.5 gallons for a 1-gallon finished beer. This accounts for boil-off and other losses. The collected liquid is now referred to as “wort” for beer. For wine, it would be “must.”
Do not discard the spent grains! They are still useful. Many homebrewers repurpose them. They can be used in baking bread. They also make excellent animal feed. Even beer-flavored dog treats are possible. Remember to dry them thoroughly before storage. This prevents mold and spoilage.
The Boil: Sterilization and Hop Additions
Boiling the wort is a critical step. It sterilizes the liquid. It also isomerizes hop acids. This extracts their bittering properties. Furthermore, it concentrates the wort.
A Full Hour Boil for Best Results
Bring your wort to a vigorous boil. The boiling point is 212°F (100°C). Maintain this rolling boil for a full 60 minutes. While 15 minutes can sterilize, the full hour ensures proper hop utilization. It also drives off unwanted volatile compounds. Ensure the pot remains uncovered. This allows these compounds to escape.
Timed Hop Additions
Hop additions are precisely timed. Each addition yields different results. This layered approach builds complex hop character.
- **First Addition (60 minutes):** Add 0.1 ounce of hops at the start of the boil. This is the bittering addition. Alpha acids in the hops isomerize. This process creates the bitterness perception.
- **Second Addition (30 minutes):** Add 0.1 ounce of hops halfway through the boil. This is the flavor addition. It contributes more nuanced hop flavors.
- **Third Addition (5 minutes):** Add 0.1 ounce of hops five minutes before the boil ends. This is the aroma addition. Volatile hop oils are preserved. These oils provide the beer’s fragrant bouquet.
Observing the aroma change during boiling is fascinating. The kitchen will transition from a malty, oatmeal smell to a distinct beer aroma.
Cooling and Pitching: Preparing for Fermentation
After the boil, the wort must cool rapidly. This prevents bacterial infection. It also prepares the wort for yeast. Yeast cannot tolerate high temperatures.
Rapid Cooling Techniques
The goal is to cool the wort quickly. Temperatures above 100°F (38°C) harm yeast. Placing the pot in an ice bath is effective. Filling a bathtub with cold water works for larger batches. A wort chiller is a specialized tool for this. However, it is not strictly necessary for smaller batches. Aim for temperatures below 100°F (38°C). Ideally, target 65-70°F (18-21°C).
Measuring Specific Gravity
Once cooled, take an original gravity (OG) reading. Use a hydrometer for this measurement. Specific gravity indicates the sugar content of the wort. It predicts the final alcohol by volume (ABV). Our target OG was 1070 for a 6% ABV. However, temperature loss during mash might reduce this. The video shows an actual OG of 1034. This would yield around 4-5% ABV. Even lower gravity beers can be delicious. Taste the wort at this stage. You can discern the grain sweetness and hop character. This “must” (or wort) taste offers a preview of your beer.
Pitching the Yeast
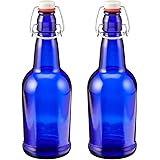
Finally, it is time to pitch the yeast. Ensure your yeast is well-hydrated. Add it directly to your cooled wort. Swirl the fermenter gently to mix. Oxygenation is beneficial at this stage. It helps the yeast multiply. Pouring the wort into the fermenter from a height introduces oxygen. Leave adequate headspace in your fermenter. This prevents blow-offs during active fermentation. Attach an airlock securely. The airlock allows CO2 to escape. It also prevents contaminants from entering. Place your fermenter in a stable temperature environment. Fermentation typically takes one to two weeks. You will see active bubbling in the airlock. This signals healthy yeast activity. If activity is slow, gentle agitation or more yeast can help. This careful process ensures a successful brown ale batch.
From Mash to Glass: Your Brown Ale Questions Answered
What are the main ingredients for homebrewing beer?
The main ingredients for brewing beer at home are malted grains, hops, yeast, and water. Each plays a key role in the beer’s flavor, aroma, and alcohol content.
What is ‘mashing’ in the beer-making process?
Mashing is the step where crushed malted grains are combined with hot water. This process activates enzymes that convert starches in the grains into fermentable sugars.
Why is boiling the wort an important step?
Boiling the wort (the sugary liquid from mashing) is crucial for sterilizing it, which prevents unwanted bacteria from growing. It also helps extract bitterness, flavor, and aroma from the hops.
What does yeast do when you make beer?
Yeast is the fermentation catalyst that transforms the sugars in the wort into alcohol and carbon dioxide (CO2). It also contributes to the beer’s unique flavors and aromas.