Are you among the many aspiring homebrewers who have shelved their dreams due to perceived barriers like insufficient time or a lack of specialized equipment? It is a common misconception that crafting your own beer demands a significant investment in both resources and real estate. However, as demonstrated in the accompanying video, the realm of one-gallon extract brewing offers a remarkably accessible entry point, effectively dismantling these obstacles for enthusiasts eager to produce their own bespoke brews.
Dispelling Homebrewing Myths: The Power of One-Gallon Extract Brewing
The allure of brewing a batch of homemade beer is often tempered by the daunting thought of complex processes and bulky apparatus. Traditional brewing methods, particularly all-grain techniques, typically necessitate larger vessels, extended brew days, and a more intricate understanding of grain bills and mash temperatures. Conversely, the one-gallon extract brewing method, as championed in the video, simplifies the entire operation, making it achievable within a standard kitchen environment and a few focused hours.
This scaled-down approach is not merely a compromise; rather, it is a strategic advantage for beginners. Small-batch brewing reduces the risk and financial commitment associated with larger batches, allowing new brewers to experiment and refine their techniques without fear of wasting significant ingredients. The featured extract kit, such as the Pale Ale variety from Northern Brewer, is meticulously curated to provide all necessary components, thereby streamlining the ingredient acquisition process. This convenience eliminates the guesswork for novices, ensuring a balanced and palatable initial product.
Essential Equipment for Your Small-Batch Brew Day
While the notion of extensive brewing gear is often intimidating, a one-gallon brew day is characterized by its minimalist equipment requirements. A sizable cooking pot, capable of accommodating at least 1.25 gallons of water, is fundamental. This vessel acts as your primary brew kettle, serving as the stage for both steeping and boiling.
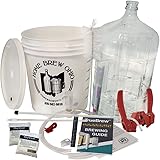
For the critical fermentation phase, a dedicated fermenter is indispensable. As observed in the video, a purpose-built plastic bucket, often affordably priced (e.g., $8.99 from Northern Brewer), provides a hygienic and functional environment. These fermenters are typically pre-drilled with a grommeted hole, facilitating the secure placement of an airlock. The airlock, a deceptively simple device, plays a crucial role in permitting carbon dioxide to escape during fermentation while simultaneously preventing external contaminants from entering the wort, thus maintaining an anaerobic environment essential for yeast activity. Beyond these core items, a reliable thermometer, a long-handled stirring spoon, and a robust sanitizing solution like Star San are considered baseline necessities for maintaining sterile conditions and accurately monitoring temperatures.
The Art of the Steep: Extracting Sugars from Grains
The initial phase of a one-gallon extract brew day often commences with the steeping of specialty grains, a process vividly likened to “making tea” in the accompanying demonstration. This analogy aptly captures the simplicity and essence of the step. Rather than a full mash, which extracts starches from malted barley for enzymatic conversion into fermentable sugars, steeping primarily extracts soluble flavor, color, and unfermentable sugars from pre-malted grains.
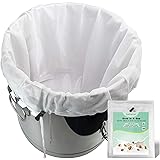
These specialty grains, often provided in a mesh sack within the kit, are submerged in approximately 1.25 gallons of water as it gradually heats. The interaction between the warm water and the grains imparts specific characteristics to the resulting wort. For instance, crystal malts, commonly found in pale ale kits, contribute caramel notes and a reddish hue, alongside dextrins that enhance body and head retention. It is imperative that the steeping process occurs at temperatures below boiling, ideally between 150-170°F (65-77°C), to prevent the extraction of undesirable tannins which can lead to astringency. Once the desired color and aroma are achieved, typically just before the water reaches a boil, the grain bag is carefully removed and allowed to drain, ensuring all valuable sugars are retained for fermentation.
The Transformative Boil: Malt, Hops, and the Birth of Wort
Following the removal of the steeped grains, the liquid, now officially known as “wort,” is brought to a vigorous boil. This 45-minute boil is a pivotal stage in the one-gallon extract brewing process, serving multiple critical functions. Firstly, boiling sanitizes the wort, eliminating any lingering wild yeasts or bacteria that could lead to off-flavors or spoilage. Secondly, it is during the boil that the primary sugar source – the malt extract syrup – is introduced.
The gold malt extract syrup, a concentrated sugar solution derived from malted barley, provides the fermentable sugars that yeast will later convert into alcohol. When adding the viscous syrup, continuous stirring is advised to prevent it from scorching on the bottom of the pot, which can impart burnt flavors. Furthermore, the boil is the crucial period for hop additions, each timed to achieve specific objectives. The Centennial hops, introduced at the 45-minute mark, primarily contribute bitterness, balancing the sweetness of the malt. As the boil progresses, subsequent hop additions, such as the German Perle hops, introduced with 25 minutes remaining, are designed to impart flavor. Finally, a “flame-out” addition of Cascade hops, dumped in immediately after the heat is turned off, maximizes the delicate aroma compounds, as these are highly volatile and would otherwise dissipate during prolonged boiling. Vigilance during the boil is also paramount to prevent boil-overs, which can be messy and wasteful, potentially leading to lost sugars and reduced batch volume.
Rapid Cooling and Rigorous Sanitization: Critical Steps for Success
Once the boil is complete, the hot wort must be cooled rapidly to the yeast pitching temperature, ideally between 60-80°F (15-27°C), with 70°F (21°C) often cited as optimal. This swift cooling, frequently achieved via an ice bath for small batches as demonstrated, is not merely for convenience. It is a critical step in preventing the formation of dimethyl sulfide (DMS), an off-flavor compound that can manifest as a cooked corn or vegetable aroma if the wort cools too slowly. Rapid cooling also helps to prevent “chill haze,” a cosmetic cloudiness in the final beer, and perhaps most importantly, it minimizes the window of opportunity for airborne wild yeasts and bacteria to infect the wort before the cultured yeast can establish dominance.
Equally, if not more, crucial is the unwavering commitment to sanitization for all equipment that will come into contact with the cooled wort. As lucidly stated in the video, “anything that touches it needs to be sanitized.” This applies to the fermenter, airlock, stirring spoons, scissors, and even the exterior of the yeast packet. Sanitizers like Star San are favored in homebrewing due to their efficacy and no-rinse properties. These solutions work by creating an inhospitable environment for microorganisms, thereby safeguarding the integrity of the beer and ensuring a clean, unadulterated fermentation.
Pitching Yeast and the Magic of Fermentation
With the wort successfully cooled and all contact surfaces meticulously sanitized, the next transformative step in your one-gallon extract brewing journey is the pitching of yeast. The yeast, the microscopic workhorses of fermentation, are introduced into the cooled wort, ideally at that precise temperature range of 60-80°F (15-27°C). Pitching yeast outside this optimal range can lead to stressed yeast, resulting in off-flavors, sluggish fermentation, or even a complete lack of activity.
Once pitched, the yeast rapidly consumes the fermentable sugars present in the wort. This metabolic process generates alcohol, carbon dioxide, and a myriad of flavor and aroma compounds that define the beer’s character. The bubbling activity observed in the airlock, a welcome sight for any brewer, serves as tangible evidence that fermentation has commenced, indicating the successful conversion of wort into nascent beer. Typically, this primary fermentation phase for a pale ale will span a period of “a couple weeks,” during which time the yeast diligently performs its magic, slowly transforming a sugary liquid into an alcoholic beverage.
Preparing for Bottling: The Final Frontier of Small-Batch Brewing
Upon the completion of primary fermentation, the nascent beer is ready for the final, critical stage: packaging. For homebrewers, particularly those engaging in one-gallon extract brewing, bottling is the prevalent method. The video sagely advises saving bottles from commercially purchased beers, emphasizing a practical and sustainable approach. Alternatively, purchasing new brown 16-ounce swing-top bottles offers convenience, as they provide both bottle and cap in one unit, circumventing the need for a separate bottle capper.
Regardless of the chosen bottle type, preparing for bottling involves several key considerations. Firstly, all bottles, caps (if using standard crown caps), and any equipment that will come into contact with the beer during transfer (e.g., an auto siphon, bottling wand) must be thoroughly sanitized. Secondly, to achieve the desirable carbonation in your bottled beer, a measured amount of priming sugar, such as the fizz drops mentioned in the video, is added to each bottle or uniformly mixed into the entire batch before bottling. This small dose of sugar provides a final food source for residual yeast, which then consumes it within the sealed bottle, producing carbon dioxide that dissolves into the beer, creating effervescence. This process, known as bottle conditioning, typically requires another one to two weeks at room temperature before the beer is fully carbonated and ready for enjoyment.
The journey through one-gallon extract brewing, as illuminated by the practical guide above, stands as a testament to the accessibility of homebrewing. By demystifying the process and demonstrating that exceptional beer can indeed be crafted with minimal equipment and time, it actively addresses and overcomes the common initial apprehensions. This small-batch approach empowers aspiring brewers to embark on their creative odyssey, ultimately leading to the rewarding experience of enjoying a self-made, perfectly carbonated pale ale.
Still Steeping in Doubt? Your 1-Gallon Extract Pale Ale Q&A
What is one-gallon extract brewing?
One-gallon extract brewing is a simplified method for making beer at home using pre-made malt extract, perfect for beginners with limited time or equipment. It allows you to brew small batches, reducing risk and financial commitment.
What essential equipment do I need to start one-gallon brewing?
You’ll need a large cooking pot, a dedicated fermenter (like a plastic bucket), an airlock, a thermometer, a long stirring spoon, and a sanitizing solution. Many kits provide most necessary components.
What is the purpose of ‘steeping’ grains in the brewing process?
Steeping specialty grains, much like making tea, extracts flavor, color, and unfermentable sugars from the grains to enhance your beer. This is done by submerging grains in warm water before the main boil.
Why is it important to cool the wort quickly after boiling?
Rapidly cooling the wort to yeast pitching temperature (around 60-80°F) prevents off-flavors like cooked corn, reduces chill haze, and minimizes the chance of contamination from unwanted wild yeasts or bacteria.
What happens after I add yeast to the cooled wort?
Once yeast is added (pitched), it consumes the sugars in the wort and converts them into alcohol, carbon dioxide, and flavor compounds during a process called fermentation. This usually takes a couple of weeks, producing visible bubbling in the airlock.