Are you considering an upgrade to your homebrewing setup, or perhaps looking to optimize your current electric brewing process? The Clawhammer Supply Brew In a Bag (BIAB) Electric Beer System has garnered significant attention within the homebrewing community for its streamlined approach and impressive capabilities. As demonstrated in the video above, this all-in-one system offers a potent blend of simplicity and versatility, appealing to brewers who seek consistency and control over their batches.
For those aiming to elevate their brewing game, a comprehensive understanding of the Clawhammer electric brewing system’s features and best practices is essential. This detailed guide will delve deeper into the system’s configurations, walk through an optimized brew day, and explore advanced techniques, all while emphasizing the valuable insights shared by experienced brewers who have logged hundreds of batches on these very systems.
Understanding the Clawhammer Electric Brewing System Configurations
When selecting an electric brewing system, several critical decisions must be made, influencing both the functionality and scalability of your homebrewing operations. The Clawhammer Supply BIAB system provides thoughtful options that cater to various brewing needs and preferences. Understanding these choices is paramount for any brewer considering this powerful electric brewing system.
Batch Size Flexibility: Tailoring Your Homebrew Production
The first pivotal decision revolves around batch size, which directly impacts the scale of your homebrew production. Clawhammer Supply offers two primary kettle sizes, each designed to accommodate different brewing volumes:
-
10-Gallon Kettles: These are typically intended for standard 5-gallon batches of beer, which remains a popular choice for many homebrewers. However, their versatility extends beyond this. It is often found that a 10-gallon kettle can comfortably handle slightly larger volumes, such as a 6-gallon batch, particularly when brewing lower gravity beers. Conversely, these kettles are also adept at managing much smaller batches, with operations regularly conducted for 3.5-gallon batches. This flexibility proves especially useful for brewers desiring smaller experimental batches or specific high-gravity 5-gallon beers, where a larger kettle volume may be required to accommodate substantial grain bills, such as a formidable Triple IPA.
-
20-Gallon Kettles: Engineered for larger-scale brewing, these kettles are generally designated for 10-gallon batches. This option becomes invaluable for brewers looking to increase their output, share with friends, or simply stock up their cellar more efficiently. The increased capacity ensures that even the most ambitious, high-gravity 10-gallon recipes can be executed without concern for volume constraints.
The ability to adapt the system to batches ranging from approximately 2.5 gallons up to 10 gallons demonstrates a significant design advantage. This ensures that the heating element remains fully submerged, a critical factor for operational safety and efficiency. For example, a 10-gallon system has successfully accommodated 16 pounds of grain for an Eisbock, showcasing its robust capacity even for exceptionally large grain bills.
Power Options: 120V vs. 240V for Efficient Brewing
The choice of power system profoundly influences the speed and efficiency of your brew day, particularly concerning heat-up times. Clawhammer Supply provides two distinct power configurations for their electric brewing system, each offering unique benefits:
-
120-Volt System: This configuration includes a controller and a heating element delivering approximately 1650 watts of power. A significant advantage of the 120V system is its compatibility with any standard household electrical outlet, eliminating the need for specialized wiring. This accessibility makes it an excellent choice for brewers seeking convenience and straightforward setup, though heat-up times may be comparatively longer.
-
240-Volt System: For brewers prioritizing speed, the 240-volt system is generally recommended. It comes equipped with a formidable heating element providing 5500 watts of power. This substantial increase in wattage translates to dramatically reduced heat-up times, allowing mash temperatures and boil points to be reached exceptionally quickly. While requiring a dedicated 240V outlet, the time savings realized during a brew day are often considered a worthwhile investment for serious homebrewers.
The efficiency gains from a 5500-watt heating element are considerable, especially when compared to the 1650-watt alternative. A 240V system often means that by the time water additions are complete and other preparations are made, strike temperature has already been achieved, streamlining the initial phases of the brew day considerably.
Kit vs. Starter Kit: Building Your Clawhammer BIAB System
The third decision involves selecting between the standard full kit and the more modular starter kit, each offering a different entry point into the Clawhammer BIAB system:
-
Regular Kit: This comprehensive package includes all the necessary components for a fully recirculating electric brewing system. It provides a complete, integrated experience right out of the box, offering the full benefits of consistent temperature control and efficient wort extraction through recirculation.
-
Starter Kit: Positioned as a more affordable option, the starter kit is designed for those who prefer a traditional brew-in-the-bag method without immediate recirculation capabilities or a built-in heat source. Its key benefit lies in its modularity. Brewers can incrementally add components such as a heating element, pump, and controller over time, eventually upgrading to a full recirculating electric brewing system. This approach provides a flexible pathway for brewers to gradually invest in their equipment as their skills and budget allow, making it an excellent starting point for basic brew-in-the-bag techniques.
The modular nature of the starter kit is particularly appealing for those new to electric brewing, allowing them to ease into the advanced features without a large upfront investment. It facilitates a natural progression from a basic brew-in-a-bag setup to a sophisticated, all-in-one electric brewing system.
Mastering Your Brew Day with the Clawhammer System
Once your Clawhammer Supply Brew In a Bag Electric Beer System is chosen, a well-structured brew day can significantly enhance your experience and the quality of your beer. The integrated design of this single-vessel system inherently simplifies many aspects of brewing, though specific tips and best practices can further optimize the process, ensuring excellent results with every batch.
1. Initial Setup and Calibration for Precision
The beauty of a single-vessel system, such as the Clawhammer electric brewing system, is its minimal setup complexity. Only one tri-clamp is typically required for installing the heating element, simplifying assembly. The controller itself is user-friendly, featuring two plug sockets: one for the heating element and one for the pump, both connecting to a wall outlet. The thermometer probe is securely inserted into the thermowell, ensuring accurate temperature readings. Hoses are connected from the kettle to the pump and then from the pump to the lid, often utilizing quick disconnects for ease and efficiency, a highly recommended upgrade for any brewer.
For precise temperature control, calibrating the controller is a crucial step. It is advisable to calibrate the system using the typical volume of water that will be utilized on brew days. This process “teaches” the controller how to effectively reach and maintain a specific temperature without significant overshoots, ensuring your mash temperatures are consistently accurate. This fine-tuning contributes directly to predictable enzyme activity and ultimately, consistent fermentable sugar profiles.
2. Water Heating and Chemistry
Adding your brewing water, often guided by the etched gallon markers inside the kettle, is the next step. The controller is then activated, and a target temperature is set. A common practice is to set this temperature a few degrees above your desired mash temperature; this accounts for the slight temperature drop that occurs when the cooler grain is added to the water. The controller intelligently cycles the heating element on and off to maintain the set temperature with precision.
While the water is heating, attention can be turned to water chemistry. Measuring out water salts and dissolving them in a small amount of kettle water before reincorporating them ensures uniform distribution. For those with the 240-volt system, strike temperature is reached remarkably fast, often within minutes, allowing for immediate progression to the mashing phase.
3. Grain Management and Mashing Efficiency
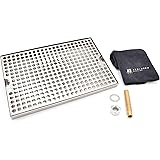
Before adding grains, it is beneficial to begin recirculating the water through the pump. This action helps to ensure the entire system achieves a consistent temperature, preparing it for the grain addition. The Clawhammer system’s integrated grain basket eliminates the need for a separate brew bag, simplifying the process. When using grains milled to a medium crush, typically achieved at local homebrew stores, a brewhouse efficiency of around 68% can be expected. For higher-gravity beers with larger grain bills, this efficiency might slightly decrease, often to about 62%.
For those seeking to maximize brewhouse efficiency, a finer grain crush can significantly elevate results, potentially allowing for a mash that resembles cornmeal. The robust mesh grain basket is designed to handle such fine grists without issues like a stuck mash, offering brewers the flexibility to experiment with milling. Once the water reaches strike temperature, the pump is temporarily turned off, and the grains are carefully added and stirred to prevent dough balls. Upon replacing the lid, the pump is reactivated, initiating the mash recirculation.
During mashing, temperature evening throughout the system can take a few minutes. To prevent temperature overshoots caused by the heating element cycling on too aggressively during this initial period, it is often prudent to keep the heat button off for the first few minutes after starting recirculation. Once temperatures stabilize, the heat can be reapplied. While stirring the mash periodically is an option, the spray nozzle within the lid is designed to effectively distribute water through the mash bed, often negating the need for frequent manual agitation and maintaining consistent efficiency. Standard mash times are typically around 60 minutes, although flexibility is afforded for both shorter (e.g., 20 minutes) and longer durations, depending on recipe requirements and brewer convenience.
4. Post-Mash Procedures: Removing Grains and Boiling
A mash out, where the temperature is raised to approximately 168°F (75.5°C), is not strictly necessary but can be performed for larger beers to enhance the pre-boil original gravity (OG) by a few points. Once mashing is complete, the grain basket is removed from the kettle. The system typically provides three hooks for this task; one hook is often sufficient for lifting and securing the basket, allowing the wort to drain. For extremely heavy grain bills, a pulley system or assistance from another person may be beneficial. Tilting the basket slightly on the kettle’s lip can also aid in draining residual wort more effectively.
While the grain basket is draining, the heating element is engaged to bring the wort to a boil. With a 240-volt system, boiling can be achieved within minutes. Once a rolling boil is established, the power is typically reduced to maintain a vigorous boil, often between 55% to 60% of the element’s full power. For hop additions, using a hop sleeve is highly recommended, as throwing hops directly into the kettle can lead to gunking up the system and filter. Although some argue that hop utilization might be slightly reduced with sleeves, adding a few extra grams of hops can compensate, though often, the impact on bitterness, flavor, and aroma is negligible.
5. Chilling and Transfer to Fermenter
During the boil, the grain basket can be cleaned, usually by dumping the spent grains and rinsing the basket thoroughly with a hose. Approximately 10 minutes before the end of the boil, the plate chiller should be connected. Recirculating the boiling wort through the plate chiller during these final minutes serves a crucial sanitization purpose, effectively killing any potential contaminants within the chiller itself. Upon completion of the boil, the heat is turned off, and cold water is introduced to the plate chiller. The wort is then continuously recirculated through the chiller and back into the kettle, rapidly reducing its temperature. Monitoring the temperature controller allows for precise chilling until the wort reaches the desired pitching temperature for your yeast, or within a few degrees of your groundwater temperature. Once cooled, the wort is transferred directly into your fermenter.
6. Cleaning and System Maintenance
Following the transfer, a thorough rinse of the system components is essential. The plate chiller should be backwashed to dislodge any hop debris or trub. The kettle is then filled with water, and a cleaning solution, such as PBW (Powdered Brewery Wash), is added for an overnight soak. The following day, the cleaning solution is drained through the pump, effectively cleaning the pump and tubing. A final flush of fresh water through the entire system ensures all cleaning agents are removed before disassembly and storage. This systematic cleaning regimen helps to maintain the longevity and sanitary condition of your Clawhammer electric brewing system.
Unlocking Advanced Techniques with Your Clawhammer System
Beyond its capabilities for standard brew days, the Clawhammer Supply Brew In a Bag Electric Beer System truly shines in its flexibility, empowering brewers to explore advanced techniques with remarkable ease and consistency. This versatility allows for greater experimentation and control over complex beer styles.
Extended and Overnight Mashes for Flavor Development
The precise temperature control offered by the Clawhammer system makes it an excellent platform for extended and overnight mashes. While commercial jackets are available to insulate the system, allowing temperatures to drop slowly over many hours, a particularly effective method involves utilizing the temperature controller itself. By setting the controller to your desired mash temperature and foregoing continuous pump recirculation, the heating element will cycle on and off indefinitely, precisely maintaining the mash temperature. This setup proves ideal for brewers who wish to add grains before bedtime and return the next day to a fully mashed wort, ready to proceed directly to the boil. The benefit here is a significantly shortened active brew day, allowing for complex enzymatic reactions to occur over a longer period, potentially influencing body and fermentability.
Kettle Souring: Controlled Acidity for Unique Beers
Taking the overnight mash concept a step further, the Clawhammer electric brewing system is fantastically suited for kettle souring. This technique involves adding Lactobacillus bacteria to the wort and holding it at a specific temperature to produce lactic acid, which imparts a pleasant tartness to the beer. A temperature in the 90°F (32°C) range is typically maintained by the controller, with the lid on and the top sealed with foil to create an anaerobic environment. This setup can hold the target temperature for several days, allowing the Lactobacillus to work efficiently. Once the desired sourness is achieved, the boil phase effectively kills off the bacteria, ensuring no souring bugs are introduced into your fermenters or other brewing equipment. This controlled approach to souring allows for the creation of Goses, Berliner Weisses, and other sour styles without the risk of cross-contamination.
Whirlpooling for Aroma and Clarity
The temperature controller is also highly advantageous for performing precise whirlpool additions. After the wort has been rapidly chilled through the plate chiller, it can be held at a specific temperature, often around 180°F (82°C), for approximately 20 minutes. During this period, late hop additions can be made, extracting maximum aroma and flavor without contributing significant bitterness. While creating a true whirlpool effect with just the pump and tubing can be challenging, manual agitation with a paddle can assist in settling hop matter and trub into a cone at the bottom of the kettle. This technique is invaluable for maximizing the aromatic profile of hop-forward beers and enhancing wort clarity.
After nearly two years of brewing beer on these Clawhammer systems, the inherent simplicity of a single-vessel brewing system combined with its profound flexibility truly stands out. The ability to perform a wide range of tasks, from consistent mashes to advanced techniques like overnight mashes and kettle souring, is a testament to the intelligent design of the Clawhammer Supply Brew In a Bag Electric Beer System. This system consistently delivers both ease of use and the capacity for innovation, allowing brewers to continuously expand their repertoire.
Tapping Into Your Clawhammer BIAB Electric System Questions
What is the Clawhammer Supply BIAB Electric Beer System?
It’s an all-in-one electric brewing system designed for homebrewers. It simplifies the brewing process by combining several steps into a single vessel.
What are the two main kettle sizes available for the Clawhammer system?
You can choose between a 10-gallon kettle, typically for 5-6 gallon batches, or a 20-gallon kettle for larger 10-gallon batches.
What is the difference between a 120-volt and a 240-volt Clawhammer system?
A 120-volt system uses a standard home outlet but heats slower, while a 240-volt system requires a dedicated outlet but heats water much faster, saving time on brew day.
What is a ‘Starter Kit’ for the Clawhammer system?
The Starter Kit is a more affordable, basic version that allows you to start brewing and then add components like a heating element or pump later to upgrade to a full electric system.