Making your own delicious beer at home is incredibly straightforward with a Coopers DIY Beer Kit, as demonstrated in the accompanying video.
Unboxing Your Coopers DIY Beer Kit: The Gateway to Homebrewing
The Coopers DIY Beer Kit provides an all-inclusive starting point. It removes much of the complexity beginners often face. This comprehensive package has everything needed for your first batch. Imagine if you only needed clean water to begin a new hobby. This kit delivers precisely that.
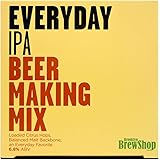
Inside the box, you will discover the essential brewing hardware. There is a robust fermenter, complete with a spigot. This spigot allows for easy transfer of beer to bottles. A Coopers Lager Beer kit is also included. This specific kit contains the malt extract and yeast. Furthermore, a strip thermometer helps monitor fermentation temperatures.
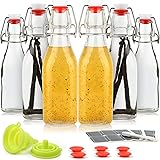
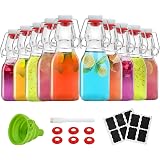
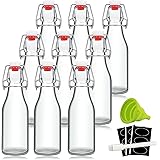
A brew enhancer is another vital component. It boosts the beer’s alcohol content and body. The kit also provides thirty 740 milliliter bottles. This is enough capacity for a full 23-liter batch. Coopers Carbonation Drops are also supplied. These convenient sugar tablets simplify the bottling process. They eliminate the need for bulk priming sugar.
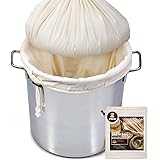
You also receive a mixing spoon for stirring ingredients. A hydrometer and test jar are crucial tools. They allow brewers to measure the beer’s specific gravity. This reading helps determine alcohol by volume (ABV). Finally, a bottle filler attaches to the spigot. This tool ensures mess-free bottling. The krausen collar is a clever addition. It manages the foam created during fermentation. This collar makes cleaning the fermenter much easier.
Mastering the Fundamentals: Sanitation is Key
Sanitation stands as the most critical step in homebrewing. Without proper cleaning and sanitizing, your beer will likely spoil. Off-flavors can develop from microbial contamination. These flavors range from sourness to phenolic notes. Imagine if all your hard work resulted in undrinkable beer. This outcome is precisely what sanitation prevents.
After your initial brew, invest in dedicated cleaning and sanitizing agents. The video mentions Diversol, often called “pink powder.” Diversol is an alkaline cleaner. It effectively removes organic residue from surfaces. Soak your fermenter and bottles for one to two hours. Always rinse thoroughly after using a cleaner. Residual cleaner can also impart off-flavors.
Following cleaning, sanitization is imperative. Star San is a popular no-rinse sanitizer. It is an acidic, food-grade solution. Star San requires only brief contact time. Its foaming action ensures excellent coverage. Simply allow the sanitized items to air dry. Do not rinse Star San off. This approach creates a sterile environment for your beer. This vigilance protects your brew from unwanted bacteria and wild yeasts.
Brew Day Preparations: Mixing Your Wort
Beginning the brewing process involves precise ingredient mixing. First, boil approximately 4 liters of clean water. This hot water helps dissolve the malt extracts. Turn off the heat after boiling. Allow the water to cool slightly before adding it to the fermenter. This step prevents denaturing the yeast later on.
Add 5 liters of hot, chlorine-free water to the fermenter. Chlorine can produce medicinal, band-aid-like flavors in beer. Using filtered tap water or reverse osmosis (RO) water is advisable. A Campden tablet can also neutralize chlorine and chloramine in tap water. Stir in the brew enhancer thoroughly. The brew enhancer typically contains dextrose (corn sugar), dry malt extract, and sometimes maltodextrin. Dextrose ferments completely, boosting ABV. Dry malt extract adds fermentable sugars and malt character. Maltodextrin contributes body and mouthfeel without fermenting.
The Coopers brew can contains concentrated malt extract. This extract is thick, like maple syrup. Place the can in a sink of hot tap water for about 30 minutes. This pre-warming thins the extract. It makes pouring and mixing much easier. Open the can and stir its contents into the fermenter. Scrape out as much extract as possible using a sanitized spatula. This ensures you utilize all the available sugars. Give the mixture a good, vigorous stir. This action incorporates oxygen, which yeast needs to propagate efficiently.
Temperature Control and Hydrometer Readings
Proper temperature control is vital for successful fermentation. Attach the stick-on thermometer near the bottom of the fermenter. This placement gives an accurate reading of the wort’s temperature. Top up the fermenter with clean water to the 23-liter mark. Aim for a wort temperature around 20-22 Celsius. This range is ideal for most ale yeasts. Too high a temperature can produce off-flavors. These include fusel alcohols, which taste harsh or solvent-like. Too low a temperature can stall fermentation.
Before pitching yeast, take an initial hydrometer reading. This measurement is known as the Original Gravity (OG). The hydrometer measures the density of your wort. It indicates the amount of dissolved sugars. For a Coopers kit with enhancer, an OG around 1.040-1.042 is expected. Record this number accurately. It is essential for calculating the final alcohol content. The formula (OG – FG) * 131.25 approximates ABV. Imagine understanding the strength of your beer before even tasting it. The hydrometer provides this insight.
Once the temperature is correct and the OG recorded, it is time to pitch the yeast. Coopers kits include a basic ale yeast. This yeast works well for many styles. For enhanced results, consider upgrading your yeast. SafAle US-05 is a popular choice. It ferments cleanly, producing minimal esters. It suits many American-style ales. SafAle S-04, an English ale yeast, contributes fruity esters. It also flocculates well, meaning it settles out quickly. Nottingham is another excellent all-rounder. It performs reliably across various beer styles. Sprinkle the yeast evenly over the wort’s surface. Do not stir it in. This allows the yeast to rehydrate naturally.
Fermentation and Conditioning: The Waiting Game
After pitching yeast, secure the lid on your fermenter. Place it in a dark location, out of direct sunlight. Maintain a stable ambient temperature, ideally 18-22 Celsius. Within 24-48 hours, fermentation should begin. You will observe bubbling from the airlock. A layer of foam, called krausen, will form on the wort’s surface. This krausen indicates active yeast metabolism. It signifies the yeast converting sugars into alcohol and carbon dioxide.
Allow the beer to ferment for approximately two weeks. This duration ensures complete sugar conversion. Resist the urge to open the fermenter frequently. Exposure to air can introduce contaminants. After two weeks, take a Final Gravity (FG) reading with your hydrometer. An FG around 1.001-1.008 suggests fermentation is complete. This low reading indicates most fermentable sugars are gone. Compare your FG to your OG. This calculation reveals your beer’s alcohol content.
Once fermentation finishes, the beer is ready for bottling. The krausen collar can be removed and cleaned. This simplifies cleanup significantly. The Coopers kit is versatile. It can be used for other malt extract kits as well. Brands like Mangrove Jack’s or Brew Canada are compatible. This flexibility allows for exploring many different beer styles. Imagine brewing an IPA, stout, or amber ale with the same equipment.
The Bottling Process: Carbonation and Enjoyment
The final step is bottling and conditioning your beer. For Coopers 740ml bottles, use two carbonation drops per bottle. These drops provide a precise amount of sugar. This sugar is food for residual yeast. The yeast then produces CO2, carbonating the beer in the bottle. For smaller bottles, adjust the quantity. Use one drop for 355ml bottles. Use one and a half drops for 500ml bottles. Carbonation drops simplify this critical step. They eliminate the guesswork associated with bulk priming.
Ensure all bottles are impeccably clean and sanitized. Place the carbonation drops into each bottle first. Attach the bottle filler to the fermenter spigot. Insert the filler to the bottom of the bottle. Push up the filler’s tongue. This action allows the beer to flow. Fill the bottle almost to the very top. Removing the filler stops the flow. This prevents spills and minimizes oxygen exposure. Cap each bottle immediately after filling. Ensure the caps are TIGHT. Loose caps allow CO2 to escape. This results in flat beer.
Store the capped bottles in a warm place. Maintain a temperature of at least 18 Celsius. This warmth facilitates bottle conditioning. The yeast needs warmth to consume the priming sugar. Allow the bottles to condition for at least two weeks. This period permits carbonation to develop fully. After two weeks, your homemade beer will be ready. You can then enjoy your very own craft brew. This entire process offers a rewarding experience. It provides high-quality beer at a fraction of the cost. A 23-liter batch costs around $30-35. That’s significant savings compared to commercial options.
Fermenting Your Questions: A Coopers DIY Beer Q&A
What is a Coopers DIY Beer Kit?
A Coopers DIY Beer Kit is an all-inclusive package that provides everything you need to start making beer at home, including brewing equipment, ingredients, and bottles.
Why is sanitation so important when making beer at home?
Sanitation is the most critical step because it prevents your beer from spoiling and developing off-flavors caused by unwanted bacteria or wild yeasts.
What is ‘wort’ in homebrewing and how is it made?
Wort is the sugary liquid created by mixing hot water with malt extract and brew enhancer. This liquid will later be fermented into beer by yeast.
What happens during the fermentation process?
During fermentation, yeast consumes the sugars in the wort, converting them into alcohol and carbon dioxide, which creates bubbles and a foam layer called krausen.
How do I carbonate my beer after fermentation?
To carbonate your beer, you add carbonation drops (small sugar tablets) to each bottle. Residual yeast then consumes this sugar to produce carbon dioxide, which naturally carbonates the beer in the sealed bottle.