The rising cost of everyday essentials has many of us looking for clever ways to save, and the price of a good beer is no exception. Perhaps you’ve experienced the sticker shock at the bottle shop, contemplating how quickly those cartons add up. It’s enough to make anyone wonder if there’s a better, more economical path to enjoying a quality brew at home. The video above offers a compelling answer, showcasing how incredibly affordable homebrewing can be, specifically a delicious cheap homebrew lager for a fraction of the price of commercial options.
Imagine crafting 23 liters of refreshing beer for just $17.10. That’s a staggering saving compared to purchasing equivalent volumes from a store. This guide expands on the video’s essential recipe, delving deeper into the ingredients, techniques, and the undeniable financial advantages of embracing affordable homebrewing.
The Undeniable Value of Budget Beer Brewing
Brewing your own beer at home is not just a hobby; it’s a strategic move for the budget-conscious beer lover. While some may associate “cheap beer” with compromising on taste or quality, this innovative approach proves otherwise. By carefully selecting cost-effective ingredients and leveraging smart brewing practices, you can produce a remarkably satisfying brew that rivals many commercial offerings.
Consider the economic impact: two cartons of standard lager can easily set you back $100 or more, depending on your location and brand preference. For less than the price of a single fancy craft beer four-pack, you can create a full 23 liters of your own bespoke lager. This significant cost reduction makes affordable homebrewing an attractive proposition for anyone looking to stretch their dollar further without sacrificing their enjoyment of a cold one.
Breaking Down the Cost: A Real-World Comparison
Let’s put the video’s $17.10 figure into perspective. A standard carton of 24 x 375ml beers contains 9 liters. At typical bottle shop prices, you’d likely pay between $50-$70 per carton. If you were to buy 23 liters commercially, you would need approximately 2.5 cartons, costing upwards of $125 to $175. The savings realized by this cheap homebrew recipe are not marginal; they are substantial, often amounting to more than 80% reduction in cost.
Furthermore, the satisfaction of creating something with your own hands adds an invaluable element to the experience. This isn’t just about saving money; it’s about empowerment, learning a new skill, and enjoying the fruits of your labor.
The Simple Recipe for a Budget-Friendly Lager
The beauty of this particular cheap lager recipe lies in its simplicity and accessibility. It utilizes readily available ingredients, many of which can be found at local supermarkets or homebrew stores. Below is a breakdown of the key components mentioned in the video and their specific roles in creating this delightful brew.
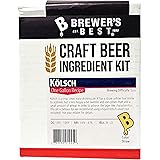
- One Tin of Woolworths Home Brew Lager: This forms the base of your beer. These tins typically contain hopped malt extract, providing the essential fermentable sugars and some bitterness. The included yeast packet is a convenient starter, ensuring you have everything you need to kick off fermentation.
- 250 Grams of Light Malt Extract: Malt extract is derived from malted barley and provides fermentable sugars, contributing to the beer’s body, color, and flavor. Adding extra light malt extract boosts the fermentable sugar content without significantly darkening the beer, making it ideal for a lager profile.
- 250 Grams of Maltodextrin: This non-fermentable carbohydrate is a secret weapon for improving mouthfeel and head retention. Unlike other sugars, maltodextrin doesn’t ferment into alcohol. Instead, it adds a pleasant body and fullness to the beer, ensuring a satisfying drinking experience with a stable, frothy head.
- Half a Kilo (500 Grams) of Dextrose: Also known as corn sugar, dextrose is a pure, highly fermentable sugar. Its primary role here is to “bump up that ABV” efficiently. Dextrose ferments completely, leaving no residual sweetness and contributing to a clean, crisp finish, which is highly desirable in a lager.
- 40 Grams of Galaxy Hops (Dry Hopped): This is where the “craft beer” element truly shines. Galaxy hops are renowned for their vibrant, fruity aroma, often described as passionfruit, citrus, and peach. Dry hopping involves adding hops to the fermenter after the primary fermentation has largely subsided. This technique extracts aromatic oils without adding significant bitterness, infusing the beer with an incredible sensory dimension.
Combined, these ingredients ferment to produce approximately 23 liters of refreshing lager, showcasing how a modest investment in brewing supplies can yield a substantial volume of enjoyable beer.
Understanding the ABV and Dry Hopping Process
The video highlights that this recipe will achieve an Alcohol By Volume (ABV) of “around about that 3.7 mark.” This percentage makes for a sessionable beer, perfect for enjoying at home without being overly potent. The balance of fermentable sugars from the malt extract and the highly fermentable dextrose is carefully calculated to hit this sweet spot. A lower ABV often means you can enjoy more of your homebrew responsibly, aligning perfectly with the concept of an accessible, everyday beer.
The Art of Dry Hopping with Galaxy Hops
Dry hopping with 40 grams of Galaxy hops on day five or six of fermentation is a critical step for enhancing the aroma profile of your budget beer. The timing is crucial; by adding hops during the latter stages of fermentation, you maximize the extraction of volatile hop oils responsible for aroma, while minimizing the contribution of bitterness that occurs from boiling hops. Galaxy hops are a fantastic choice for this application due to their intense and distinct tropical and citrus notes.
When you introduce the hops, they should be sanitized or added directly to the fermenter. Ensure your fermenter is sealed well, as dry hopping can sometimes reactivate some fermentation, causing a slight pressure build-up. After a few days (typically 3-7 days), the hops can be removed or left in, depending on your preference for hop intensity and clarity. This relatively simple step elevates a basic lager into a flavorful, aromatic experience, bridging the gap between traditional homebrewing and modern craft beer aesthetics.
Essential Tips for Your Affordable Homebrewing Journey
While the video provides a concise recipe, success in affordable homebrewing hinges on a few fundamental practices. Mastering these will ensure your $17.10 investment yields delicious results every time.
- Sanitation is Paramount: This cannot be stressed enough. All equipment that will come into contact with your wort (unfermented beer) or beer after it’s cooled must be meticulously cleaned and sanitized. Bacteria and wild yeast are the enemies of good beer and can quickly spoil an entire batch.
- Temperature Control: Yeast performance is highly dependent on temperature. For lagers, maintaining a consistent cooler temperature during fermentation (often around 10-13°C or 50-55°F) is crucial for a clean fermentation profile, minimizing off-flavors. If you’re using an ale yeast with a lager profile (sometimes included in kit yeasts), follow its specific temperature recommendations.
- Accurate Measurements: While the video provides clear amounts, precise measuring of ingredients, especially sugars and hops, contributes to consistent results.
- Patience is a Virtue: Homebrewing requires patience. Fermentation takes time, and conditioning (the period after fermentation where the beer clarifies and flavors mature) is equally important. Don’t rush the process; allow your beer to fully develop its character.
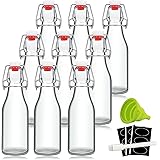
- Priming and Bottling/Kegging: Once fermentation is complete, your beer needs carbonation. This is typically achieved by adding a small amount of sugar (priming sugar) to each bottle or to a keg before sealing. The residual yeast will consume this sugar, producing CO2 and naturally carbonating your beer.
By following these guidelines, even a beginner can achieve excellent results with a cheap homebrew, proving that great beer doesn’t have to come with a hefty price tag.
Expanding Your Homebrew Horizons with Cost-Effective Ingredients
Once you’ve mastered this straightforward budget beer recipe, the world of affordable homebrewing opens up for further experimentation. The beauty of extract brewing is its flexibility. You can easily modify hop varieties, swap out different types of malt extracts, or even incorporate other sugars to create unique flavor profiles without significant added cost.
For instance, try substituting the Galaxy hops with other affordable, aromatic varieties like Cascade for a more piney, grapefruit note, or Willamette for a spicy, floral character. Explore different base lager tins from other brands, which might offer slightly varied malt profiles. The key is to understand how each ingredient contributes to the final product, allowing you to tailor your cheap homebrew to your personal taste preferences while still keeping costs low.
Uncapping the Secrets of Frugal Fermentation: Your Q&A
What is this article teaching me to do?
This article teaches you how to make a large batch of affordable homebrew lager using simple ingredients and techniques.
How much beer can I make and for what cost?
You can make approximately 23 liters of refreshing lager for around $17.10, which is significantly cheaper than buying it commercially.
Why should a beginner try homebrewing?
Homebrewing offers substantial cost savings compared to purchasing beer from a store and provides the satisfaction of crafting your own beverage.
What does ‘dry hopping’ mean in this recipe?
Dry hopping is when you add hops, like Galaxy hops, to your beer during fermentation to give it a strong, fruity aroma without adding bitterness.
What is the most important tip for successful homebrewing?
Sanitation is paramount; all equipment that touches your beer must be meticulously cleaned and sanitized to prevent spoilage.