The world of homebrewing can often seem daunting, a complex dance between art and science. However, as demonstrated in the insightful video above from DIY Fermentation, crafting your own delicious brews doesn’t require a commercial brewery or an endless budget. Instead, the focus here is on simplicity, accessibility, and the immense satisfaction of making something truly your own. If you’ve ever dreamt of brewing your own beer without the overwhelming investment, a one-gallon batch of simple Pilsner beer is an excellent place to begin your journey.
This approach strips away the perceived complexities, focusing on essential steps and minimal equipment. It’s perfect for beginners transitioning from extract kits or those new to brewing altogether, offering a low-risk, high-reward entry point into the hobby. The charm of a one-gallon batch Pilsner lies in its manageability; you can learn the fundamental processes, experiment with ingredients, and quickly see the fruits of your labor without committing to large volumes. Additionally, it allows you to refine techniques and recipes before scaling up, making every step of the learning curve more approachable and enjoyable.
Embracing the Shoestring Brewing Philosophy: Your Simple Pilsner Beer Journey
For many aspiring homebrewers, the initial hurdles often involve specialized equipment and a seemingly endless list of ingredients. The DIY Fermentation philosophy cuts through this, proving that “doing fermentation on a shoestring budget” is not only possible but incredibly rewarding. Imagine if every hobby required thousands of dollars in upfront costs; many would never even start! This budget-friendly mindset encourages using readily available items and focusing on the core principles of brewing, rather than getting bogged down by high-end gear.
Brewing a simple Pilsner beer on a smaller scale provides a fantastic educational opportunity. You learn to appreciate each ingredient’s role, from the malt’s sweetness to the hops’ bitterness and the yeast’s transformative power. This intimate process builds confidence, allowing you to gradually understand the nuances of fermentation without the pressure of producing a full-sized keg. Moreover, small batches mean less waste if things don’t go perfectly the first time, fostering a healthy environment for experimentation and continuous improvement.
Your Essential Pilsner Recipe for a One-Gallon Batch
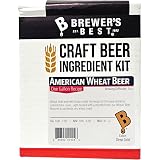
Crafting a flavorful homebrew Pilsner begins with a carefully selected, yet simple, ingredient list. Each component plays a vital role in defining the beer’s final character, from its color and body to its aroma and taste. For our one-gallon batch of Pilsner, the video highlights a straightforward recipe designed to deliver classic Pilsner characteristics without unnecessary frills. This minimalist approach ensures that even first-time brewers can achieve a respectable result.
Here’s a breakdown of the core ingredients and their contributions:
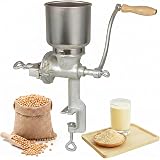
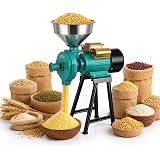
- Belgian Pilsner Malt (2 pounds): This forms the backbone of your beer, providing fermentable sugars, a light golden color, and a clean, slightly sweet base flavor characteristic of Pilsners. Milling the grain is crucial as it breaks open the husks, exposing the starches for easier conversion during mashing.
- Saaz Hop Pellets (1 ounce): A quintessential hop for traditional Pilsners, Saaz imparts a distinct spicy, floral, and earthy aroma and flavor. Hops are vital not only for bitterness to balance the malt sweetness but also for their aromatic qualities.
- Saflager S-23 Dry Lager Yeast (1 packet, ~3 grams or 1 teaspoon): Lager yeast like S-23 is essential for producing the crisp, clean profile expected of a Pilsner. Unlike ale yeasts, lager yeasts ferment at colder temperatures and produce fewer fruity esters, resulting in a smoother, more refined taste. Using dry yeast offers convenience and a longer shelf life compared to liquid yeast.
- Priming Sugar (about 1 cup): Added at bottling, this sugar provides a food source for the remaining yeast, which then produces CO2 to naturally carbonate your beer in the bottles. Without it, your beer would be flat.
- Spring Water (1.5 gallons): The foundation of any beer, water quality is paramount. Spring water is often preferred for its clean taste and mineral profile, which can subtly influence the final beer flavor. While you start with 1.5 gallons, the goal is to boil it down to approximately one gallon of finished wort.
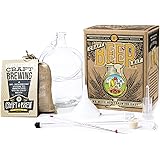
Gathering Your Brewing Tools: Minimalist Equipment for DIY Beer
One of the appealing aspects of starting with a one-gallon batch Pilsner is the reduced need for specialized equipment. Many items can be found around your home or purchased affordably. The key is to have tools that are clean, functional, and, most importantly, sanitized. Proper sanitation is not just a suggestion; it’s the absolute bedrock of successful homebrewing, preventing unwanted bacteria and wild yeasts from spoiling your creation. Imagine if you skipped this step – your efforts would literally go sour!
Here’s what you’ll need to get started:
- Fine Mesh Straining Bags (Brew in a Bag, BIAB): These are critical for holding your milled grain during the mashing process, acting as a giant teabag. They simplify grain removal, eliminating the need for a separate mash tun or Lauter tun.
- Large Pot (8-quart or larger): Essential for heating your water and boiling the wort. A bigger pot provides more headspace, reducing the risk of boil-overs and ensuring efficient evaporation.
- Fermenter with Spigot: A container (glass carboy, plastic bucket, or specialized fermenter) where your wort will ferment. A spigot makes transferring the beer much easier, minimizing exposure to air and sediment.
- Airlock: A device that allows CO2 produced during fermentation to escape without allowing external contaminants or oxygen to enter. Many fermenters come with built-in airlocks, but S-style or 3-piece airlocks are common alternatives.
- Thermometer: Absolutely indispensable for accurate temperature control during mashing and cooling. Precision here ensures proper enzyme activity and yeast health.
- Siphoning Hose: Useful for transferring wort or beer between vessels, especially from a fermenter without a spigot or for bottling.
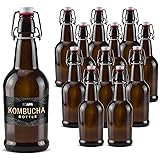
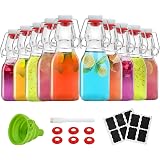
- Bottles (Flip-top tops recommended): Sturdy bottles that can withstand the pressure of carbonation are a must. Flip-top bottles offer convenience and reusability, but crown-capped bottles also work.
- Sanitizer of Choice: From Star San to Iodophor, a good sanitizer is non-negotiable for cleaning all equipment that will come into contact with your wort after the boil. This ensures a clean slate for your yeast to work its magic.
The Brewing Process: From Grain to Glass
With your ingredients and equipment ready, it’s time to dive into the hands-on process of making your Pilsner homebrew. Each step builds upon the last, contributing to the final character of your beer. Following these stages diligently will set you on the path to a successful and enjoyable brew day.
Mastering the Mash: The Heart of Your Beer
The mashing process is where the magic truly begins. This step involves steeping your milled grain in hot water, allowing enzymes naturally present in the malt to convert complex starches into fermentable sugars. For your simple Pilsner beer, the goal is to maintain a precise temperature for a specific duration. You start by carefully transferring your milled Belgian Pilsner malt into the straining bags, taking care to minimize the fine powder mess. Imagine if you just dumped it in without thought; you’d have a cloud of malt dust everywhere!
Next, heat your 1.5 gallons of water in your large pot to an initial temperature between 158-160°F. Once the water is at temperature, carefully submerge your grain bags. The key is to bring the temperature down and maintain it around 150°F for 90 minutes. This temperature range is optimal for enzyme activity that produces a balance of fermentable and unfermentable sugars, contributing to the beer’s body and final dryness. If the temperature starts to drop, simply turn on low heat to gently bring it back up, ensuring consistency throughout the mash. This consistent temperature ensures maximum sugar extraction and a predictable fermentation.
The Boil: Sanitize, Concentrate, and Flavor
After your 90-minute mash, it’s time to remove the grain bags, allowing them to drain thoroughly. This liquid, now rich in sugars, is called “wort.” Turn up the heat and bring your wort to a rolling boil. At this stage, you no longer need the lid, as the goal is to reduce the volume from approximately 1.5 gallons down to one gallon. This concentration intensifies the flavors and ensures you have the correct volume for fermentation and bottling.
The boil serves several crucial purposes: it sanitizes the wort, ensuring no wild yeasts or bacteria can thrive; it coagulates proteins (the “hot break”) that can cause haze; and it’s when you typically add your hops. In this Pilsner recipe, your Saaz hops are added during the boil to impart their characteristic bitterness and aroma. Moreover, frequent stirring during the boil is highly recommended. The sugars in the wort tend to settle and can easily stick and scorch on the bottom of the pot, creating off-flavors. Think of it like making spaghetti sauce; constant stirring prevents burning and ensures even heat distribution.
Rapid Cooling and Pitching Your Yeast
Once the boil is complete, it’s imperative to cool your wort down as quickly as possible. This rapid cooling, often called a “cold break,” helps to precipitate out more haze-forming proteins and, crucially, minimizes the risk of infection from airborne contaminants. Imagine if you let it cool slowly for hours; it would be an open invitation for unwanted microorganisms! A common method is an ice bath: place your pot in a sink filled with ice water, stirring the wort gently to help dissipate heat. The target temperature for pitching your Saflager S-23 yeast is between 60-70°F. This specific temperature range is vital for lager yeast to ferment cleanly and efficiently, producing the crisp, smooth profile desired in a Pilsner.
After cooling, carefully transfer your wort from the pot to your sanitized fermenter. This is a delicate step where minimizing splashing is important to prevent oxidation, which can lead to stale flavors in the finished beer. Once transferred, it’s an excellent time to take an Original Gravity (OG) reading with your hydrometer. This measurement, like the 1.060 recorded in the video, tells you the density of the sugars in your wort before fermentation, providing a baseline for calculating your beer’s alcohol content. Finally, evenly distribute your measured Saflager S-23 yeast (approximately 3 grams or 1 teaspoon) over the surface of the wort. Secure the fermenter lid and airlock, and label your creation with basic information like beer style, date, and OG. Then, tuck it away in a dark place to ferment for about two weeks.
Fermentation, Priming, and Bottling Your Homebrew Pilsner
During the two-week fermentation period, your Saflager S-23 yeast will diligently consume the sugars in the wort, producing alcohol and carbon dioxide. Maintain a consistent, cool temperature for your fermenter, ideally within the yeast’s recommended range for a clean lager fermentation. After two weeks, take a Final Gravity (FG) reading; the video noted an FG of 1.018. Comparing the OG and FG allows you to calculate the alcohol by volume (ABV) of your freshly fermented beer. For example, an OG of 1.060 and an FG of 1.018 indicates an ABV of approximately 5.5%.
The next step is preparing for bottling. You’ll add your priming sugar (about 1 cup) to the fermented beer, which will provide the necessary fuel for secondary fermentation in the bottles, creating carbonation. Carefully siphon the beer into your sanitized bottles, leaving a small amount of headspace at the top. Seal the bottles securely, especially if using flip-tops, to ensure no CO2 escapes. The video produced one 40-ounce and four 16-ounce bottles from the one-gallon batch. These bottles should then be stored in a cool, dark place for several days, typically 4-5 days, to allow carbonation to develop, before moving them to the refrigerator for another three days to chill and help clarify the beer.
Evaluating Your First Batch: Learning and Improving Your DIY Beer
The moment of truth arrives when you finally crack open your simple Pilsner beer. As the host honestly shares, your first batch may not be perfect, but it will be unequivocally *yours*. The video highlights a few common observations for beginners: a cloudy appearance and potential carbonation issues. For instance, the beer was “incredibly cloudy” and not filtered, and the carbonation was “not a lot of the CO2 carbonation that I would have liked.” These are valuable learning points, not failures.
The cloudiness, in this case, was due to not filtering the beer and possibly not allowing sufficient time for cold conditioning and sediment to settle. The host also mentions “small whitish floaties” and “sludge” at the bottom of the fermenter, known as trub. This consists of yeast sediment, hop particles, and coagulated proteins. While not harmful, leaving out a lot of the trub during transfer to the fermenter and then again during bottling can significantly improve clarity and prevent off-flavors. Imagine if you could remove all that particulate; your beer would be much cleaner!
Regarding carbonation, issues often stem from leaky bottle seals, insufficient priming sugar, or not allowing enough conditioning time at an appropriate temperature. The host suggests checking seals and notes the larger 40-ounce bottle might have a better seal. These are all part of the discovery process in beginner homebrewing. Ultimately, the host confirms that he did “make beer from grain,” and it had “a fair amount of flavor,” despite the minor imperfections. This is the true triumph of a DIY project: the satisfaction of creation.
Key Takeaways and Future Enhancements for Your Homebrew Pilsner
Every brewing experience offers valuable lessons. The host reflects on several potential improvements for future batches, providing excellent advice for any aspiring brewer:
- Use a Bigger Pot: An 8-quart pot for 1.5 gallons of water can be a tight squeeze, especially during a vigorous boil. A larger pot offers more room for error and reduces the risk of boil-overs, ensuring a safer and cleaner brewing process.
- Filter Prior to Bottling: Running the beer through a fine mesh strainer or using clarifiers like gelatin (though the host chose not to) can significantly improve clarity and remove unwanted floaties.
- Minimize Trub Transfer: Being meticulous when transferring wort and beer to leave behind as much “sludge” as possible will lead to a cleaner, clearer final product with fewer potential off-flavors.
- Consider Different Beer Styles: While a Pilsner recipe is a fantastic starting point, exploring other styles, such as a darker beer with more body or bitterness, can expand your brewing horizons and help you discover new preferences. The host expressed interest in making something with “a touch bit more bite to it.”
- Refine Carbonation Techniques: Experimenting with different amounts of priming sugar or ensuring perfectly sealed bottles can lead to ideal carbonation levels. Consistent carbonation transforms a good beer into a great one.
The biggest takeaway, as the host articulates, is the immense satisfaction of creating something with your own hands. While a one-gallon batch of Pilsner might be slightly more expensive than buying a grocery store beer, the joy of saying “I made this” is priceless. This initial experiment serves as a foundation for future brews, allowing you to tweak, adjust, and continuously improve your craft. The ability to make small adjustments and test them quickly makes the one-gallon batch an invaluable tool for any dedicated DIY brewer looking to perfect their Pilsner beer or venture into new styles.
Pilsner Ponderings: Your Small-Batch Brewing Q&A
What is ‘shoestring brewing’ for a simple Pilsner, and why is it good for beginners?
Shoestring brewing focuses on making beer with minimal equipment and a tight budget. It’s ideal for beginners because it reduces upfront costs and helps you learn fundamental processes without overwhelming investment.
What are the key ingredients for making a simple 1-gallon Pilsner beer?
You’ll primarily need Belgian Pilsner Malt for sugars, Saaz hops for flavor and bitterness, Saflager S-23 yeast for fermentation, priming sugar for carbonation, and spring water as the base.
What kind of basic equipment do I need to start brewing a 1-gallon batch?
Essential equipment includes fine mesh straining bags, a large pot, a fermenter with an airlock, a thermometer, and bottles. Most importantly, you’ll need a good sanitizer to keep everything clean.
Why is proper sanitation crucial when homebrewing beer?
Sanitation is absolutely vital because it prevents unwanted bacteria and wild yeasts from contaminating your beer. Without it, your brew could go sour and be completely ruined.