Welcome, fellow brewers! If you’ve been searching for a detailed guide to craft your own exceptional Australian Pale Ale, you’ve landed in the right place. The accompanying video from Flying Wombat TV walks you through an entire brew day, sharing invaluable insights and their unique recipe. This article complements their visual demonstration, diving deeper into the science and art behind each step, ensuring you have all the knowledge to brew an Australian Pale Ale that truly stands out.
Homebrewing offers a fantastic blend of science, creativity, and delicious results. This recipe for an Australian Pale Ale is designed to be approachable yet sophisticated, delivering a balanced profile of subtle bitterness, vibrant hop aroma, and a clean finish. Whether you’re working with a sophisticated all-in-one system or a more traditional setup, this comprehensive guide will help you navigate the process with confidence, turning simple ingredients into a truly satisfying brew.
Crafting Your Australian Pale Ale: The Ingredient Foundation
Every great beer begins with a carefully selected array of ingredients. For this Australian Pale Ale, we focus on simplicity and quality to build a clean canvas for our hops. The Flying Wombat TV team emphasizes the importance of a well-chosen grain bill, a potent hop blend for both bittering and aroma, a clarifying agent, and a robust yeast strain.
Your grain bill provides the fermentable sugars, body, and color for the beer. Our recipe features a dominant 96% two-row Pale Ale malt, serving as the foundational sweetness and body. This malt type is renowned for its clean, slightly biscuity flavor, making it an ideal base for many ale styles. Complementing this, 4% medium crystal malt contributes subtle caramel notes, a touch of residual sweetness, and a beautiful golden hue to the final Australian Pale Ale. While Gladfield grains are used in the video, feel free to use high-quality malt available in your region, adjusting for any slight differences in flavor profile or yield.
Hops are the soul of any Pale Ale, providing bitterness, aroma, and flavor. For this Australian Pale Ale, a combination of Azacca, Galaxy, and El Dorado hops creates a complex and aromatic profile. A modest 8 grams of Galaxy hops are added at the beginning of the boil purely for bittering, aiming for an approachable, rather than aggressive, bitterness. The bulk of the hops – a substantial 180 grams of the Azacca, Galaxy, and El Dorado blend – enters the whirlpool for maximum flavor and aroma extraction without increasing bitterness. This technique is crucial for achieving that bright, fruity, and tropical character typical of modern Australian Pale Ale styles.
To ensure a clear, professional-looking Australian Pale Ale, three Whirlfloc tablets are included. These Irish moss derivatives aid in clarifying the wort by coagulating proteins during the boil, which then settle out, leaving a brighter beer. Finally, the choice of yeast significantly impacts the beer’s character. The video highlights a cultured Kveik yeast, known for its ability to ferment efficiently at higher temperatures and produce unique fruity esters. If Kveik is unavailable, popular alternatives like S04 (English Ale Yeast) or US05 (American Ale Yeast) will also work excellently, though they require different fermentation temperatures and impart slightly different flavor profiles.
Essential Brewing Equipment & Flexibility
While the Flying Wombat TV team utilizes a 65-liter BrewZilla system and an SS Brewtech fermenter, their core message resonates with all homebrewers: you can brew an Australian Pale Ale on almost any system. Equipment should never be a barrier to entry. The key is understanding the process and adapting it to what you have.
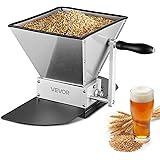
For grain milling, a dedicated mill with a precise gap setting (around 1 millimeter for this recipe) is ideal. However, your local homebrew shop can pre-crush grains for you, or many online retailers offer this service. Mashing can occur in a dedicated mash tun, an insulated cooler (esky), or even a large pot with a “brew in a bag” (BIAB) setup. The principle remains the same: holding grains at a specific temperature to extract sugars.
For the boil, a large kettle or pot is sufficient. While a hop spider helps contain hop debris, simply adding hops directly to the boil works just as well. Cooling the wort can be achieved with an immersion chiller, plate chiller, or even by placing your pot in an ice bath. The goal is to rapidly reduce the temperature to prevent off-flavors. Finally, fermentation requires a clean, sealable vessel. From plastic buckets to sophisticated stainless steel conical fermenters like the 62-liter SS Brewtech unit shown, any fermenter that can maintain the appropriate temperature will suffice for your Australian Pale Ale.
The Art of Grain Milling: Precision for Efficiency
The crushing of your grains might seem like a minor detail, but it profoundly impacts your brewing efficiency and the quality of your wort. When preparing to brew an Australian Pale Ale, achieving the right grain crush is a balancing act. The ideal gap setting for your mill, as suggested, is approximately 1 millimeter. This creates a crush where the husks are mostly intact but the starchy endosperm is fractured and exposed.
Crushing your grains too finely, producing a powdery consistency, can lead to several problems. While it might seem to increase sugar extraction, it often results in a “stuck sparge.” This occurs when the fine particles compact into a dense, porridgy layer, preventing the wort from draining through the grain bed. This leads to frustratingly slow run-offs and can even leach undesirable tannins from the husks, imparting astringency to your Australian Pale Ale. Imagine trying to filter water through wet flour; it’s a similar challenge.
Conversely, if the crush is too coarse, with larger gaps in the rollers, the grains will remain largely unbroken. This means a significant portion of the fermentable sugars will remain trapped within the kernels, leading to poor efficiency and a lower-than-expected yield for your Australian Pale Ale. It’s like leaving valuable treasure locked away in an inaccessible vault. The 1-millimeter sweet spot ensures the husks form a natural filter bed during sparging while allowing maximum access to the starches for conversion into sugars during the mash.
Mashing In: Unlocking the Sugars for Your Australian Pale Ale
Mashing is where the magic truly begins for your Australian Pale Ale, as enzymes in the malt convert complex starches into fermentable sugars. This process is highly dependent on precise temperature control. For this recipe, the strike water is heated to 70 degrees Celsius, which is four degrees above the target mash temperature of 66 degrees Celsius. This differential accounts for the cooling effect of adding the cooler grains to the hot water. Hitting 66°C is critical, as this temperature favors beta-amylase activity, an enzyme that produces highly fermentable sugars, contributing to a drier, crisper Australian Pale Ale with a good mouthfeel without being overly sweet.
As you add the crushed grains to the strike water, thorough mixing is paramount to prevent “dough balls.” A dough ball forms when the outer layer of a clump of grains becomes wet and seals off the dry interior, preventing proper starch conversion. This directly reduces your brewing efficiency. Using a mixing paddle, a large spoon, or even a whisk, ensures all grains are evenly hydrated and submerged. The video demonstrates a useful technique: adding grains gradually while stirring, which helps prevent these efficiency-robbing clumps from forming. Achieving a uniform, porridgy consistency ensures that all the starches are exposed to the enzymatic action, setting the stage for a successful Australian Pale Ale.
For systems equipped with recirculation capabilities, like the BrewZilla, recirculating the wort through the grain bed during the mash offers several benefits. It helps maintain a consistent temperature throughout the mash, ensuring uniform enzyme activity. More importantly, it acts as a continuous lautering process, clarifying the wort by filtering out grain particles and husks. This results in a remarkably clear wort even before the boil, contributing to the visual appeal of your final Australian Pale Ale.
Sparging: Maximizing Your Yield
After the mashing phase, the next critical step for your Australian Pale Ale is sparging. This process involves rinsing the grain bed with hot water to extract any remaining fermentable sugars that might still be clinging to the grains. Essentially, it’s about getting “more beer for your buck,” maximizing your yield and ensuring you don’t leave any delicious potential behind.
The recommended temperature for your sparge water, housed in a hot liquor tank, is 78 degrees Celsius. This temperature is carefully chosen to be high enough to reduce the viscosity of the wort, allowing sugars to flow freely, but not so high that it extracts undesirable tannins from the grain husks. Tannin extraction, known as astringency, can lead to a harsh, dry, and sometimes puckering sensation in your finished Australian Pale Ale. Imagine the difference between steeping tea leaves just right versus over-steeping them; the latter can become bitter and unpleasant.
The process involves gently running this hot sparge water over the drained grain bed. The goal is to rinse the sugars down into your boil kettle, enriching the wort before boiling. If your system allows for it, a slow and even flow across the entire grain bed ensures optimal extraction. Once all the sparge water has passed through, you’re left with a sweet wort, now ready to be brought to a rolling boil, transitioning you to the next exciting stage of brewing your Australian Pale Ale.
The Boil: Bittering, Clarifying, and Preparing for Fermentation
With a full kettle of sweet wort, the boil serves multiple crucial functions in brewing your Australian Pale Ale. This vigorous, hour-long process sterilizes the wort, drives off undesirable volatile compounds like Dimethyl Sulfide (DMS), concentrates the sugars, and is where bittering hops and clarifiers are added.
The first hop addition comes early in the boil: 8 grams of Galaxy hops for bittering. These hops contribute alpha acids, which isomerize during the heat of the boil, creating the characteristic bitterness in beer. For an approachable Australian Pale Ale, the goal is a gentle bitterness that balances the malt sweetness without overwhelming the palate. Around 45 minutes into the boil, three Whirlfloc tablets are introduced. These tablets, derived from red seaweed, act as a fining agent. They help coagulate proteins and other haze-forming particles, promoting a clearer, brighter Australian Pale Ale. This action is similar to how a snow globe settles, making the suspended particles gather and fall out of solution.
As the boil concludes, an extender tube on the boiler, if using a system like KegLand’s, can be a lifesaver. This simple addition provides extra head-space, crucial for preventing messy boil-overs. A boil-over can not only create a significant cleaning challenge but also scald and create potential fire hazards. It’s a small measure that provides significant peace of mind, allowing you to focus on the next step: rapidly cooling your Australian Pale Ale wort.
Cooling and Whirlpooling: Capturing Hop Aroma
Once the boil is complete, rapid cooling of the wort is essential for two primary reasons: to prevent the formation of DMS and to minimize the risk of bacterial contamination. Ideally, the wort for your Australian Pale Ale should be cooled quickly, usually within 20-30 minutes, to prevent any lingering DMS (which can create a cooked corn flavor) from forming. Equipment like immersion chillers or plate chillers accelerate this process significantly. If these are unavailable, simply letting your pot sit in an ice bath or even cooling naturally can work, though it requires more patience and vigilance.
Once the wort reaches 75 degrees Celsius, it’s time for the whirlpool stage, a critical step for maximizing hop aroma and flavor in your Australian Pale Ale without adding significant bitterness. The video details this carefully, explaining that a whirlpool is created by stirring the wort vigorously, either with a pump, a drill-mounted paint mixer, or even a large spoon. This centrifugal force gathers hop debris and other solids into a cone at the center of the kettle, aiding in clarity later.
During this whirlpool, a substantial amount of aroma hops – 180 grams of the Azacca, Galaxy, and El Dorado blend – are added. The key here is the temperature: 75°C is hot enough to extract the delicate aromatic oils from the hops but below the temperature threshold where alpha acids isomerize into bittering compounds. This “no-boil” hop addition is vital for achieving the vibrant, fresh, and complex fruity and tropical aromas that define a modern Australian Pale Ale. After a 20-minute stand in the whirlpool, the wort is then further cooled to pitching temperature, ready for yeast.
Fermentation: The Yeast’s Domain
With the wort chilled to the appropriate temperature, it’s time to transfer it to the fermenter and pitch your yeast. This stage is where your Australian Pale Ale truly comes to life, as the yeast consumes the fermentable sugars and produces alcohol, CO2, and a myriad of flavor-contributing compounds. The choice of yeast and the temperature at which it ferments are paramount.
If you’re using Kveik yeast, as featured in the video, its unique characteristics allow for a much higher pitching temperature of 35 degrees Celsius. Kveik strains are known for their incredibly fast fermentation, tolerance to high temperatures, and ability to produce clean or distinctly fruity ester profiles depending on the strain. This makes it an excellent choice for a quick turnaround on your Australian Pale Ale. However, if you opt for more traditional English or American ale yeasts like S04 or US05, a lower pitching temperature of around 18-19 degrees Celsius is crucial. These yeasts perform optimally in this range, producing their characteristic clean or slightly fruity flavors without generating unwanted off-flavors that can arise from fermenting too warm.
Regardless of your fermenter type—be it a basic bucket or a sophisticated SS Brewtech conical—the primary goals are sanitation and temperature control. A clean environment prevents contamination, while maintaining the correct temperature ensures the yeast performs optimally, leading to a high-quality Australian Pale Ale. Once the yeast is pitched, seal the fermenter and allow it to work its magic. For several days, the yeast will vigorously ferment, converting the wort into beer, laying the foundation for the final flavor profile of your Australian Pale Ale.
Dry Hopping: Boosting Aroma and Preventing Hop Creep
Dry hopping is the final flourish for your Australian Pale Ale, a technique employed to significantly enhance the beer’s hop aroma and flavor without increasing bitterness. This process involves adding hops directly to the fermenter after the primary fermentation has largely subsided. The timing of this addition is crucial, as the video explains, to achieve maximum aromatic impact while also preventing a phenomenon known as “hop creep.”
The ideal time to dry hop your Australian Pale Ale is when its gravity reading reaches approximately 1.014. This usually occurs when only a few points remain before final attenuation, typically around day 10 for this specific recipe, though it can vary based on yeast strain and fermentation temperature. By adding 60 grams each of Azacca, El Dorado, and Galaxy hops at this stage, you capture their potent aromatic compounds effectively. The remaining yeast activity helps scrub any oxygen introduced during the dry hop addition, while the fermenting environment aids in biotransformation, where yeast enzymes convert hop compounds into new, desirable aromatic precursors, amplifying the fruity characteristics.
Dry hopping too early can lead to excessive hop creep, where enzymes present in the hops break down unfermentable dextrins in the beer into fermentable sugars, potentially restarting fermentation. This can result in an over-attenuated, thinner beer and even diacetyl production (a buttery off-flavor). Dry hopping too late, after fermentation has completely ceased, increases the risk of oxygen ingress, which can lead to oxidation and a stale, papery flavor in your Australian Pale Ale. The use of advanced systems that allow for zero-oxygen dry hopping, as shown in the video, further preserves these delicate hop aromatics, delivering an Australian Pale Ale with unparalleled freshness and bouquet.
Tap Into Our Answers: Your Pale Ale Brewing Q&A
What kind of beer is an Australian Pale Ale?
An Australian Pale Ale is a craft beer known for its balanced profile, featuring subtle bitterness, a vibrant hop aroma, and a clean finish. It typically offers bright, fruity, and tropical characteristics.
What are the main types of ingredients used in this Australian Pale Ale recipe?
The key ingredients are specific malts (Pale Ale and crystal malt) for sugar and color, a blend of hops (Azacca, Galaxy, and El Dorado) for bitterness and aroma, a clarifying agent, and yeast (such as Kveik).
Do I need special or expensive equipment to brew this Australian Pale Ale?
No, you don’t need expensive equipment. The guide emphasizes that you can brew this beer on almost any system, from simple setups to advanced ones, making homebrewing accessible to everyone.
What is the purpose of ‘mashing’ when brewing beer?
Mashing is a critical step where crushed grains are mixed with hot water. This allows enzymes in the malt to convert complex starches into fermentable sugars, which the yeast will later turn into alcohol.
Why is ‘dry hopping’ done for this Australian Pale Ale?
Dry hopping is performed by adding hops directly to the fermenter after primary fermentation. This technique enhances the beer’s hop aroma and flavor significantly without increasing its bitterness, creating a fresh, vibrant bouquet.