Many aspiring brewers dream of crafting their own delicious all-grain beer at home, yet the process can often seem intimidating and complex. Transitioning from extract brewing to all-grain can feel like a significant leap, demanding new equipment and precise techniques. However, with the right system and a clear, step-by-step guide, mastering your first all-grain brew day becomes an achievable and immensely rewarding experience.
This article serves as your comprehensive companion to the video above, offering an in-depth, beginner-friendly walkthrough for brewing your inaugural batch on the Anvil Foundry all-grain brewing system. We will demystify the process, from initial water preparation to pitching yeast, ensuring you gain the confidence to create high-quality beer right in your own home. Imagine effortlessly producing your favorite styles, confident in every step you take.
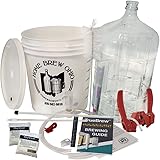
Understanding the Anvil Foundry All-Grain Brewing System
The Anvil Foundry system stands out as an excellent entry point for new all-grain brewers, simplifying many traditional complexities. Its design integrates heating, mashing, and boiling into a single, compact unit, making it perfect for smaller spaces or those seeking a streamlined process. This integrated approach reduces the amount of equipment needed, offering a more approachable brewing experience.
While the Anvil Foundry brewing system is user-friendly, familiarizing yourself with its core components and functions is essential for a smooth brew day. The manual provides crucial details, guiding you through each stage without requiring complex brewing software. Embracing this manual-driven approach can significantly enhance your learning curve.
Setting Up Your First Brew: Water and Grains
Begin your brewing journey by accurately preparing your water, a fundamental step for any successful batch. For our inaugural Haze Craze New England IPA, the recipe called for 13 pounds, 4 ounces of grain, necessitating a precise water volume for mashing. We initiated the mash with 6.7 gallons of water, ensuring proper grain saturation and enzyme activity.
Considering water chemistry can dramatically impact your beer’s flavor profile, even for beginners. For this New England IPA, we slightly adjusted the Pale Ale water profile to emphasize chloride over sulfates. Specifically, we used 0.5 grams per gallon of gypsum (for sulfates) and 1 gram per gallon of chloride, aiming for a softer, fuller mouthfeel characteristic of the style. Imagine how these minor adjustments can elevate the final taste of your homebrew.
Pre-Heating and Mash-In: Getting Started Right
The Anvil Foundry’s pre-heat function is a valuable feature, allowing you to heat your strike water efficiently before the brew day officially begins. We set the target strike temperature to 160°F for a mash temperature of 152°F, ensuring the mash-in process would quickly reach the desired temperature. We engaged the elements at 100% power for rapid heating, using the “hour mode” to set a nine-hour pre-heat period overnight.
After reaching the strike temperature, the next critical step involves mashing in, carefully adding your grains to the heated water. It is crucial to stir continuously and thoroughly as you introduce the grains, preventing dough balls and ensuring even saturation. Imagine trying to mash in without proper stirring; you would end up with dry pockets of grain, significantly reducing your sugar extraction.
Mastering the Mash: Circulation and Temperature Control
After mashing in and allowing a 10-minute rest, initiating wort circulation through your grain bed is essential for optimal sugar extraction. We placed the screen on top of the malt pipe and attached the return tube, clamping the pump hose to about 50% flow. This controlled circulation ensures clear wort and efficient sugar conversion during the mash.
During the mash, diligent temperature monitoring and occasional stirring are vital for consistent results. We set the Anvil Foundry to maintain 152°F, initially using 30% power (on a 240V system) but adjusted to 40% when a slight temperature drop occurred. Every 15 minutes, we gently “raked” the top third of the grain bed to prevent channeling and promote uniform flow, observing a consistent wort clarity and level within the malt pipe.
Mash Out and Sparge: Preparing for the Boil
Once your mash concludes, the mash-out step raises the temperature to 170°F, halting enzyme activity and making the sugars more soluble. We increased the power to 50% for a slower, controlled ramp-up to avoid scorching the wort. This crucial step prepares your grain bed for efficient sparging, maximizing sugar extraction for a higher yield.
Sparge water is then slowly poured over the grain bed, rinsing the remaining sugars into your kettle. We heated a separate gallon of water to 170°F on an induction plate, gradually adding about three-quarters of a gallon over the grains. This method, known as batch sparging, effectively collects a target volume of slightly over 7 gallons of sweet wort before the boil, considering the significant boil-off rate on a 240V system.
Boiling and Hop Additions: Flavor and Aroma
With your wort collected, it’s time to bring it to a vigorous boil, typically setting the Anvil Foundry to 212°F and 100% power. While the wort heats up, consider adding a “first wort hop” addition; we added 0.5 ounces of Warrior hops directly into the kettle during sparging. This technique, performed before the boil even begins, is believed to contribute a smoother, less harsh bitterness to the final beer.
As the boil progresses, subsequent hop additions are timed to achieve specific bitterness, flavor, and aroma profiles. For this IPA, we added 1 ounce of Citra hops at the 5-minute mark of a 60-minute boil. Furthermore, at flame out (element off), another 1 ounce of Citra and 2 ounces of Mosaic whole hops (contained in a hop bag to prevent pump clogging) were introduced. Imagine the layers of citrus and tropical fruit these additions contribute to the Haze Craze IPA.
Chilling and Transfer: The Final Steps
Rapidly chilling your wort after the boil is crucial to prevent off-flavors and prepare for yeast pitching. We immersed our wort chiller during the final 15 minutes of the boil to sanitize it, then connected the cold water supply to begin chilling. Manual stirring of the wort significantly speeds up this process, bringing the temperature down in about 15-20 minutes. Imagine the frustration of waiting hours for your wort to cool naturally, risking bacterial contamination.
Once chilled, the wort is ready for transfer to your fermenter and yeast pitching. We transferred approximately 5.5 gallons of finished wort from the Anvil Foundry to a Blichmann Conical fermenter for a pressurized fermentation. Our final gravity reading was 1.061, perfectly hitting the target range of 1.061-1.063 provided by the kit, affirming the system’s 70% efficiency calculation. Always double-check your fermenter’s sampling valve before filling; neglecting this small detail could lead to unexpected spills, as one brewer humorously learned!
Optimizing Your Anvil Foundry Brewing Experience
The Anvil Foundry all-grain brewing system offers remarkable control and efficiency, particularly when operating at 240 volts and 2800 watts, allowing for faster heat-up times and a more vigorous boil. However, the system performs admirably on 120 volts as well; simply adjust your boil-off expectations and heating times accordingly. Its ultra-low wattage density elements effectively prevent scorching, ensuring a clean brew every time.
For new all-grain brewers, staying organized is paramount; lay out your recipe and ingredients in sequence to streamline your brew day. Preparing your yeast in advance, like smacking a smack pack for London Ale 3, minimizes last-minute scrambling. The Anvil Foundry brewing system consistently delivers on its promises, providing a reliable and enjoyable platform for crafting your perfect homebrew.
Demystifying Your First Anvil Foundry Brew: Q&A
What is the Anvil Foundry All-Grain Brewing System?
The Anvil Foundry system combines heating, mashing, and boiling into a single, compact unit. It’s designed to simplify all-grain brewing, making it an excellent entry point for beginners.
What does ‘all-grain brewing’ mean for a beginner?
All-grain brewing is a method of making beer from scratch using raw grains, rather than pre-made malt extracts. It allows brewers more control over their beer’s flavor and characteristics.
Why is water preparation important when brewing beer?
Accurately preparing your water is crucial because its chemistry can significantly impact your beer’s flavor profile. Minor adjustments can help achieve desired tastes, like a softer mouthfeel.
What are ‘mash-in’ and ‘mash-out’ in the brewing process?
Mash-in is when you add grains to heated water to convert starches into fermentable sugars. Mash-out is a step that raises the temperature to stop enzyme activity and prepare the grain bed for efficient sugar extraction.