Brewing American Pale Ale: A Beginner’s Guide to Small Batch Success
The American Pale Ale (APA) stands as a cornerstone of the craft beer revolution, celebrated for its balanced bitterness, vibrant hop aromas, and refreshing drinkability. Its widespread appeal makes it an ideal starting point for aspiring homebrewers, offering a rich reward for a relatively straightforward process. While large-scale brewing might seem daunting, opting for a one-gallon batch, as demonstrated in the video above, is an excellent way to dip your toes into the rewarding world of homebrewing. This approach minimizes equipment needs, reduces ingredient costs, and provides a manageable volume for experimentation.
Brewing your own American Pale Ale is more than just following a recipe; it’s an immersive experience that teaches you about ingredients, chemistry, and patience. It’s about crafting something delicious from scratch, understanding the nuances of flavor development, and ultimately, enjoying the fruits of your labor. The following guide expands upon the video’s instructions, providing deeper insights and practical tips to ensure your first small batch of American Pale Ale is a resounding success.
Understanding Your Ingredients: The Building Blocks of Flavor
Crafting a delicious American Pale Ale begins with a thoughtful selection of ingredients, each playing a critical role in the final beer’s character. The Brewer’s Best kit simplifies this by pre-selecting key components, but understanding their function is crucial for any budding brewer.
1. Malts: The Heart of Your Pale Ale
The malts provide the fermentable sugars that yeast convert into alcohol, but they also contribute significantly to the beer’s color, body, and flavor profile. In this recipe, you’re using a combination of malt extracts and specialty grains:
- Dry Malt Extract (DME) & Light Spray Dried Malt: These are concentrated forms of wort, offering a clean, fermentable sugar base without the need for an all-grain mash. They contribute a light, bready sweetness and form the bulk of your beer’s fermentable sugars. Using both dry and liquid extracts can sometimes offer subtle differences in character, though for a beginner, their primary function is consistent sugar contribution.
- Crushed Cara Red Malt: This is a specialty grain that adds color (a lovely reddish hue), body, and complex caramel and toffee notes. Unlike base malts, specialty grains are typically steeped rather than mashed, as their sugars have already been converted during the malting process.
The combination of these malts creates a balanced foundation, allowing the hop character to shine without being overshadowed by excessive sweetness.
2. Hops: The Soul of American Pale Ale
Hops are what truly define the American Pale Ale style, imparting bitterness, aroma, and flavor. The video highlights three distinct hop varieties:
- Chinook: Known for its pungent, piney, and spicy aroma, often with grapefruit notes. It’s a dual-purpose hop, used for both bittering and aroma.
- Columbus: Also known as CTZ (Columbus, Tomahawk, Zeus), this hop offers a strong, pungent, and resinous character with notes of black pepper and sometimes citrus. It’s a powerhouse bittering hop and contributes a robust hop presence.
- Lemon Drop: A newer variety, celebrated for its distinctive lemon-citrus, mint, and green tea characteristics. It’s often used as a late-addition hop for aroma and flavor, contributing a bright, refreshing quality.
These hops are strategically added at different points in the boil to achieve specific effects: early additions for bitterness and late additions for flavor and aroma. This layered approach is key to the complex hop profile of an APA.
3. Yeast: The Fermentation Engine
Dry ale yeast is the microbial marvel responsible for converting sugars into alcohol and carbon dioxide. A good quality ale yeast will also contribute subtle fruity or spicy esters that complement the hop profile. The specific strain will influence the final flavor, but generally, ale yeasts for APAs are chosen for their clean fermentation profile, allowing the malt and hop character to dominate.
4. Priming Sugar: For Natural Carbonation
Priming sugar (often dextrose or corn sugar) is added at bottling to provide a small amount of additional sugar for the yeast to consume, creating natural carbonation within the sealed bottles. This process results in a pleasant fizz and a more enjoyable drinking experience.
Essential Equipment and Setup for Your Small Batch
While the video succinctly lists the required tools, understanding their purpose underscores the importance of proper setup for brewing an American Pale Ale. Investing in a few key items ensures both efficiency and quality.
1. The Brewing Vessel: Stock Pot and Carboy
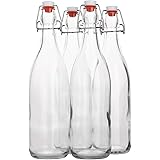
A 12-quart stock pot is perfectly sized for a one-gallon batch, allowing ample headspace to prevent boil-overs when working with 1.5 gallons of water. For fermentation, a one-gallon glass carboy is ideal, providing a clean, non-reactive environment for the yeast to work its magic. Glass carboys are durable and easy to sanitize, making them a popular choice among homebrewers.
2. Sanitation Station: Sprayer, Funnel, and Measuring Tools
Sanitation cannot be overstated in brewing; it is the single most critical factor in preventing off-flavors and spoilage. A dedicated sprayer filled with an approved sanitizer (like Star San or a similar no-rinse solution) is indispensable. Every piece of equipment that touches the wort after the boil—from your funnel and stirring spoon to the carboy and blow-off assembly—must be meticulously sanitized. The funnel with a strainer aids in transferring the wort cleanly to the carboy, catching any hop debris or sediment.
3. Hop Management: Hop Spider and Cheese Cloth
The hop spider is a highly recommended tool for containing hops during the boil. It prevents loose hop material from entering the fermenter, which can lead to clogged spigots or undesirable grassy flavors. Similarly, cheese cloth is used for steeping specialty grains, ensuring they impart their flavors without releasing unwanted particulates into the wort. Mike’s “pro tip” of pouring grains into the cheese cloth within its box is excellent for minimizing mess and preventing loss.
4. Fermentation Control: Blow-Off Assembly and Airlock
The blow-off assembly, used for the initial, vigorous phase of fermentation, is critical. It allows the rapid expulsion of CO2 and krausen (fermentation foam) without clogging, preventing pressure buildup that could rupture your carboy. After three days, it’s replaced by an airlock, which permits CO2 to escape while preventing airborne contaminants from entering the fermenter. Both should always be filled with sanitizer or clean water.
The Steeping Process: Extracting Specialty Grain Character
The steeping of specialty grains is the first step in building the flavor profile of your American Pale Ale, and precision here is key. The video correctly identifies the crucial temperature range and duration for this process.
1. Water Volume and Temperature Management
Starting with 1.5 gallons of water allows for evaporation during the steep and subsequent boil, ensuring you hit your target final volume of one gallon. Heating the water to between 150-160 degrees Fahrenheit is vital. This temperature range is optimal for extracting desirable colors and flavors from the Cara Red malt without drawing out harsh tannins, which can contribute an astringent, tea-like flavor to your beer. Think of it like making a perfect cup of tea – too hot, and it becomes bitter.
2. The Role of the Cheese Cloth
Placing the crushed Cara Red malt in a cheese cloth bag allows for easy removal after steeping. Ensure the bag is tied securely, leaving enough room for the grains to circulate and steep effectively. The toothpick “pro tip” demonstrated in the video is a simple yet effective way to secure the grain bag to the side of the pot, preventing it from sinking and making retrieval easier without digging into hot water.
3. Steeping Duration and Tannin Avoidance
Steep the grains for approximately 20 minutes, diligently monitoring the water temperature throughout. It’s crucial not to let the temperature exceed 160°F. Once the steeping is complete, gently lift the grain bag out of the water. Avoid squeezing the bag, as this can force out those undesirable tannins, compromising the smooth flavor of your American Pale Ale. The liquid at this point is no longer just water; it’s now known as “wort” – unfermented beer.
The Crucial Boil: From Wort to Hopped Goodness
Once your specialty grains have been steeped, the brewing process moves to the boil, a critical phase where you sterilize the wort, add malt extract for fermentable sugars, and introduce the distinctive hop character of your American Pale Ale.
1. Bringing the Wort to a Rolling Boil
After removing the grains, bring your wort to a vigorous rolling boil, reaching 212°F (100°C) at sea level. This boiling process serves several essential functions: it sterilizes the wort, denatures unwanted enzymes, and helps to concentrate the sugars as water evaporates. Ensure everything from this point forward that comes into contact with the wort is sanitized.
2. Dried Malt Extract Addition
Once boiling, remove the pot from the heat before slowly adding the dried malt extract (DME). Stir continuously to dissolve the DME and prevent it from scorching on the bottom of the pot. Scorched DME can impart an off-flavor, so this step requires attention. Adding it off the heat prevents excessive foaming (a “hot break”) and reduces the chance of scorching.
3. The One-Hour Boil and Hop Schedule
Return the pot to the burner and bring it back to a rolling boil. The total boil time for this American Pale Ale recipe is one hour. During this hour, hops are added at specific intervals to achieve different effects:
- 60 Minutes (First 15 minutes of boil, i.e., at 45 minutes remaining): Columbus Hops. These are your bittering hops. Hops boiled for a longer duration (typically 60 minutes) contribute primarily alpha acids, which provide the bitterness that balances the sweetness of the malt. While the video says “first 15 minutes,” it likely refers to adding them at the *start* of the main 60-minute boil for full bittering potential. For clarity, let’s assume they mean *with* 60 minutes left on the timer for the most significant bittering.
- 10 Minutes Left: Chinook Hops. These are added later in the boil to contribute flavor and some aroma, as the volatile oils responsible for these characteristics evaporate rapidly in longer boils.
- 5 Minutes Left: Lemon Drop Hops. These are aroma hops. Added very late in the boil, their delicate volatile oils are preserved, providing intense hop aroma in the finished American Pale Ale.
The use of a hop spider is invaluable here, keeping the hop material contained and making cleanup significantly easier. Simply drop the spider with the measured hops into the boiling wort at the designated times.
Rapid Cooling and Yeast Pitching: Setting the Stage for Fermentation
After the boil, swift and efficient chilling of the wort is paramount. This prevents contamination from airborne bacteria, reduces the risk of undesirable off-flavors, and most critically, prepares the wort for yeast inoculation. Pitching yeast into wort that is too hot will kill the yeast, halting fermentation before it even begins.
1. The Ice Bath: Chilling to 70 Degrees Fahrenheit
As soon as the boil is complete, immediately place your hot wort pot into an ice bath. Fill a sink or a larger container with ice and cold water, immersing the pot as much as possible. Stir the wort gently and occasionally replenish the ice. The goal is to rapidly cool the wort down to 70°F (21°C). This temperature is ideal for most ale yeasts, allowing them to begin fermentation safely and efficiently. Chilling to this specific temperature protects the delicate yeast cells from thermal shock, ensuring they are vibrant and ready to convert sugar into alcohol.
2. Transferring to the Carboy and Aeration
Once the wort reaches 70°F, it’s time to transfer it to your sanitized one-gallon carboy. Use your sanitized funnel with a strainer to ensure a clean transfer, leaving behind any hop debris or trub (sediment). If your volume is slightly below the one-gallon mark, as noted in the video, simply top it off with sanitized, cool water to the desired level. The next crucial step is aeration: adding oxygen to the wort. Yeast needs oxygen in the initial phase of fermentation to multiply rapidly. Shake the carboy vigorously for one minute, as demonstrated. This introduces dissolved oxygen into the wort. However, avoid over-aeration once fermentation begins, as excessive oxygen exposure can lead to oxidation, resulting in stale, cardboard-like off-flavors.
3. Pitching the Yeast: The Spark of Fermentation
With the wort chilled and aerated, it’s time to “pitch” the yeast. Carefully measure one teaspoon of the dry ale yeast and gently sprinkle it onto the surface of the wort in the carboy. Ensure the carboy lid and any tools used for this step are sanitized. The yeast will begin to rehydrate and, within hours, will start the magical process of fermentation, transforming your sugary wort into a delicious American Pale Ale.
The Art of Fermentation: Nurturing Your American Pale Ale
Once the yeast is pitched, the brewing process transitions from active hands-on work to a period of patient waiting, as the microorganisms diligently convert sugars into alcohol and CO2. This fermentation phase is where your wort truly becomes beer, and proper management is essential for developing clean, desirable flavors in your American Pale Ale.
1. Initial Fermentation: The Blow-Off Assembly
For the first three days, the video correctly advises setting up a blow-off assembly. This consists of a sanitized tube connected to the carboy’s lid, with the other end submerged in a jar of sanitizer or water. During the initial, most vigorous phase of fermentation, yeast activity produces a substantial amount of CO2 and a thick layer of foam called krausen. The blow-off tube safely channels these out of the fermenter, preventing pressure buildup that could rupture the carboy and allowing spent krausen to exit, thus reducing potential for off-flavors from yeast autolysis.
2. Secondary Fermentation: The Airlock
After three days, when the most intense CO2 production has subsided, replace the blow-off assembly with a sanitized airlock, filled with sanitizer solution. The airlock serves a similar purpose, allowing CO2 to escape while creating a barrier against airborne contaminants, protecting your American Pale Ale from spoilage during the remaining fermentation period. The gentle bubbling of the airlock is a satisfying visual indicator of ongoing fermentation.
3. The Fermentation Environment: Cool and Dark
The total fermentation process will typically last about two weeks. Throughout this period, it is crucial to store your fermenter in a nice, cool, dark place. Consistent temperature control, ideally around 65-70°F (18-21°C) for most ale yeasts, is vital. Fluctuations or excessively high temperatures can lead to off-flavors such as fruity esters (too high) or diacetyl (butterscotch flavor, often from too low or fluctuating temperatures). Darkness protects the beer from “skunking,” a light-struck flavor caused by hops reacting to UV light. A closet, basement, or temperature-controlled fermentation chamber are all excellent options.
Enjoying Your Handcrafted American Pale Ale
Congratulations on completing the brewing of your American Pale Ale! The journey from grain and hops to a delicious, fermented beverage is truly satisfying. By understanding each step, from the precise temperatures for steeping to the critical role of sanitation and the magic of yeast, you’ve gained valuable insight into the art of homebrewing. This small-batch approach is an ideal way to master the fundamentals and prepare for future brewing adventures. Remember, every brew is a learning experience, and the more you practice, the better your American Pale Ale will become.
Brewing Your Best American Pale Ale: Q&A
What is an American Pale Ale (APA)?
The American Pale Ale is a popular craft beer style known for its balanced bitterness, vibrant hop aromas, and refreshing taste. It’s an ideal starting point for aspiring homebrewers due to its widespread appeal and relatively straightforward brewing process.
Why is brewing a one-gallon batch good for beginners?
Brewing a one-gallon batch is excellent for beginners because it minimizes the amount of equipment needed and reduces ingredient costs. It also provides a manageable volume for learning and experimentation without being overwhelming.
What are the main ingredients used to make beer?
The primary ingredients for beer are malts, which provide fermentable sugars and color; hops, which contribute bitterness, flavor, and aroma; yeast, which converts sugars into alcohol; and priming sugar, added at bottling for natural carbonation.
Why is sanitation so important when homebrewing?
Sanitation is the most critical factor in homebrewing because it prevents off-flavors and spoilage caused by unwanted bacteria or wild yeasts. Any equipment that touches the wort after it has been boiled must be meticulously cleaned and sanitized.
What happens during the fermentation stage of brewing?
During fermentation, yeast converts the sugars in the wort (unfermented beer) into alcohol and carbon dioxide, transforming it into actual beer. It’s crucial to store the fermenter in a cool, dark place during this time to develop clean and desirable flavors.