For many aspiring homebrewers, the initial excitement of crafting your own beer can quickly give way to frustration. Inconsistent results, tedious processes, and the sheer volume of information available often lead to what the experts above refer to as a “beer slump.” However, navigating the intricate world of homebrewing doesn’t have to be a trial-and-error odyssey fraught with suboptimal batches. With a few strategic adjustments and a commitment to refining your practices, you can dramatically elevate the quality of your beer and enhance your overall brewing experience.
The insightful discussion above from Mauri and CH offers ten pivotal tips designed to accelerate your journey from novice brewer to proficient artisan. This accompanying guide delves deeper into these crucial pieces of advice, providing expanded context, technical insights, and actionable strategies to help you brew faster, stronger, and with superior quality. Let’s explore how mastering these fundamentals can transform your homebrewing endeavors.
1. The Precision of Your Thermometer Game
Temperature control stands as a cornerstone of successful brewing, influencing everything from mash efficiency to yeast health and fermentation characteristics. As highlighted in the video, an uncalibrated thermometer can lead to significant discrepancies, rendering precise temperature management an exercise in futility. CH’s anecdote of a thermometer being 15 degrees off underscores a common pitfall: assuming accuracy without verification.
Why Calibration is Non-Negotiable
In the mash, specific temperature ranges activate different enzymes, converting starches into fermentable sugars. Mashing too low (e.g., 135°F as in CH’s experience) favors beta-amylase, producing a highly fermentable wort with a thin body and potentially lower alcohol by volume (ABV). Conversely, mashing too high emphasizes alpha-amylase, yielding a less fermentable wort rich in dextrins, resulting in a fuller-bodied, sweeter beer. An accurate thermometer ensures you target and achieve the precise enzymatic activity required for your desired beer profile. Furthermore, during fermentation, maintaining the correct temperature range for your yeast strain is paramount for preventing off-flavors and ensuring complete attenuation.
Achieving Thermal Mastery
Calibrating your thermometer is a simple yet critical step. An ice bath calibration (32°F / 0°C) and a boiling water calibration (212°F / 100°C at sea level) are standard methods. Deviations should be noted and accounted for, or the thermometer replaced. Beyond basic calibration, integrating a thermowell into your fermenter is a significant upgrade. This stainless steel sleeve allows a probe to be immersed directly into the wort, providing an accurate, real-time temperature reading without risking contamination. Paired with an affordable temperature controller like an Inkbird or Anvil (often available for $20-$30), you can maintain a remarkably stable fermentation environment, leading to cleaner, more consistent beers.
2. Transitioning Swiftly to Kegging
The manual labor and logistical challenges associated with bottling are cited as a primary reason many homebrewers abandon the hobby. The process—cleaning, sanitizing, filling, capping—is undeniably tedious and time-consuming. Moreover, the quality of bottled beer can suffer from oxygen exposure during transfer and inconsistent carbonation levels. Moving to a kegging system offers a profound improvement in efficiency, beer quality, and overall enjoyment.
The Advantages of Draft Delivery
Kegging streamlines the post-fermentation process dramatically. Instead of handling 50+ individual bottles, you transfer your finished beer to a single, sanitized Cornelius keg. This significantly reduces oxygen ingress, a major culprit of stale, cardboard-like flavors in homebrew. Carbonation is also simplified and controlled; using CO2 tanks, you can force carbonate your beer to precise levels, eliminating the uncertainty of bottle conditioning. The accessibility of beer on tap, with less sediment and consistent presentation, makes the drinking experience far more enjoyable. As the video asserts, the convenience of kegging not only saves time but also often translates into a greater desire to brew more frequently, escaping the “bottling slump.”
3. Prioritizing System Mastery Over Recipe Hopping
The allure of experimenting with diverse beer styles and complex recipes is strong for beginning homebrewers. However, as Mauri and CH wisely counsel, focusing on your brewing “system” and refining your foundational techniques (protocol) far outweighs the immediate gratification of trying a new recipe every brew day. This principle is analogous to a chef mastering their knife skills and fundamental cooking methods before attempting haute cuisine; without a solid base, even the finest ingredients and recipes will disappoint.
Cultivating Consistency and Reproducibility
Brewing the same recipe multiple times, perhaps four or five consecutive batches, allows you to identify and mitigate variables inherent in your specific setup. This iterative process helps you understand your equipment’s quirks: how long it takes to heat strike water, your system’s mash efficiency, the evaporation rate during the boil, and how your chiller performs. Documenting these parameters meticulously enables you to predict and control outcomes, making adjustments with precision rather than guesswork. When you eventually transition to new recipes, you’ll possess a reliable, predictable system that minimizes unexpected deviations, allowing the unique characteristics of the new ingredients to shine through without systemic interference. Even commercial breweries often require two to three trials to perfect a new recipe on their large-scale systems, underscoring the importance of this disciplined approach.
4. Harnessing the Power of a Dry Erase Board
Organization is a silent hero in the brewing process. While paper notes can suffice, their ephemeral nature often leads to lost data and missed deadlines. A large, visible dry erase board acts as a central command center for your brewing operations, providing a persistent and dynamic visual aid for tracking critical information.
Your Brewing Command Center
A dry erase board serves multiple functions. It can host your brew day checklist, ensuring no step is overlooked. Gravity readings, yeast pitch rates, hop additions, and fermentation temperatures can be updated in real-time. Beyond the specifics of a single batch, it can track your brewing schedule, ingredient inventory, or even a budget. For homebrewers aiming for continuous improvement, it can be an invaluable tool for noting observations and adjustments for subsequent batches, fostering a continuous feedback loop that is essential for refining your system. The constant visibility of these notes provides an unwavering reminder of tasks and goals, minimizing forgetfulness and enhancing overall efficiency.
5. The Savvy Art of Buying Used Equipment
Establishing a homebrewery can be a significant financial investment, especially when purchasing all new equipment. The video sagely advises that “flashy stuff” is not a prerequisite for making excellent beer. Embracing the used market is a brilliant strategy for acquiring high-quality gear at a fraction of the cost, making the hobby more accessible and sustainable.
Unlocking Value in Pre-Owned Gear
Platforms like Craigslist, OfferUp, Facebook Marketplace, and local homebrew club forums are treasure troves for used equipment. Stainless steel kettles, fermenters, and kegs, being durable and non-reactive, retain their value and functionality exceptionally well. As the video points out, stainless steel is inherently resilient and can be thoroughly cleaned and sanitized, making it a safe and long-lasting investment. Many aspiring homebrewers invest in equipment only to find the hobby isn’t for them, leading to a vibrant secondary market where items are often “flipped” for pennies on the dollar. This approach not only saves money but also promotes a circular economy within the homebrewing community, allowing more resources to be allocated towards quality ingredients rather than depreciating assets.
6. Mastering Wort Cooling with a Pre-Chiller
Efficiently cooling your wort after the boil is not merely a matter of convenience; it’s a critical step in producing clean, stable beer. Prolonged cooling times expose the hot wort to potential contaminants, increase the risk of DMS (dimethyl sulfide) production, and can create a “chill haze” in the final product. The recommendation to use a pre-chiller significantly accelerates this process.
Expediting the Chill Phase
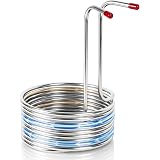
Traditional immersion chillers, while effective, can take upwards of 45 minutes to an hour to bring 5 gallons of wort down to yeast pitching temperature, especially in warmer climates. A pre-chiller, typically a second immersion or counter-flow chiller submerged in a cooler filled with ice water, rapidly cools the incoming tap water before it flows into your primary wort chiller. This dramatically lowers the temperature differential, allowing your main chiller to work far more effectively. CH’s claim of cooling 10-gallon batches in approximately 15 minutes with a pre-chiller exemplifies the profound efficiency gains. Rapid chilling (often called a “cold break”) also helps precipitate proteins and tannins, resulting in a clearer, more stable beer, less susceptible to undesirable flavors.
7. Scaling Up Your Batch Size Swiftly
The argument for scaling up your batch size quickly, from 5 gallons to 10, 15, or even 20 gallons, is compelling when considering the time investment involved in brewing. A 5-gallon batch, which yields roughly 40 pints, can easily disappear in a single social gathering. Yet, the time commitment for a 5-gallon batch (6-8 hours) is nearly identical to that of a 10-gallon batch.
Maximizing Your Brewing Return on Investment
The incremental cost of ingredients for a larger batch is typically modest compared to the value of your time. By doubling your output for roughly the same time investment, you effectively halve the frequency of your brew days. This means less cleaning, less setup, and more beer available for enjoyment. For dedicated homebrewers who brew once or twice a month, transitioning to 10-gallon batches (or more) provides a consistent supply of beer, reduces the pressure to constantly brew, and ultimately offers a better return on your brewing labor. This expansion should be considered once your system mastery (Tip #3) is established, ensuring you can scale up successfully without introducing new variables.
8. Cultivating a Solitary Brew Day Experience
While the initial appeal of homebrewing often involves sharing the experience with friends, turning brew day into a party can significantly detract from the quality of your beer. As Mauri and CH candidly admit, distractions, accidental spills, and potential contamination by well-meaning but inebriated guests are real risks that undermine the meticulous process required for superior brewing.
Precision Through Focus
Homebrewing demands focus, precision, and adherence to protocol. Measurements, temperature readings, hop additions, and sanitation steps all require undivided attention. Brew day is an intricate sequence of chemical reactions and biological processes that are highly sensitive to deviation. Brewing solo, or with one equally dedicated and qualified brewing partner, allows for a controlled environment where errors are minimized, notes are accurately taken, and the critical steps are executed without interruption. This focused approach is instrumental in identifying areas for improvement in your process and consistently producing high-quality beer. Consider brew day a laboratory session, and the tasting of the finished product the celebration.
9. Embracing the “Clean As You Go” Mantra
Sanitation is often cited as the most crucial, yet frequently overlooked, aspect of homebrewing. The old joke, “You’re a janitor that brews beer sometimes,” rings true because meticulous cleaning and sanitizing are foundational to preventing bacterial infections that can ruin a batch. The video’s emphasis on cleaning as you brew is a pragmatic strategy to combat post-brew day fatigue and maintain pristine equipment.
The Microbiologist’s Golden Rule
The difference between cleaning and sanitizing is vital: cleaning removes visible organic matter, while sanitizing eliminates microscopic organisms. Leaving fermenters or kettles with dried wort and trub makes the cleaning process exponentially harder and increases the risk of tenacious biofilms. By rinsing and cleaning equipment immediately after use, such as cleaning the mash tun during the boil, you prevent stubborn residues from forming. This proactive approach ensures that when your next brew day arrives, your equipment is already clean, ready for sanitization, and free from potential sources of infection. Neglecting immediate cleanup can lead to a dreaded “beer slump,” where the thought of tackling a messy cleanup outweighs the desire to brew, effectively halting your progress as a homebrewer. Treating your brewing space like a professional kitchen, where everything is cleaned at the end of the shift, is a habit that yields immense dividends in beer quality and personal motivation.
10. The Strategic Advantage of a Spigoted Fermenter
Gone are the days when fermenting beer was a static, two-week waiting game. Modern homebrewing emphasizes data-driven decision-making, and central to this is monitoring fermentation progress through gravity readings. A fermenter equipped with a spigot (or ball valve) transforms this process, offering unparalleled ease and accuracy in sampling.
Decoding Fermentation Through Data
The rate of fermentation is influenced by numerous variables: yeast health, pitch rate, oxygenation, and temperature. Relying on an arbitrary two-week timeline is often inaccurate and inefficient. A spigot allows for hygienic, non-invasive collection of wort samples, which are then used with a hydrometer to measure specific gravity. By tracking the decline in specific gravity, you can precisely determine when fermentation has completed (when gravity stabilizes over several days) and when your beer is ready for kegging. This means your beer might be ready in three or four days, rather than the traditional two weeks, as noted in the video. The faster you can verify fermentation completion and package your beer, the sooner you can enjoy your creation and start your next homebrewing project, keeping the momentum of your brewing journey alive and fostering continuous improvement.
Fermenting Your FAQs
Why is it important to calibrate my thermometer when homebrewing?
Calibrating your thermometer ensures accurate temperature readings, which are crucial for mash efficiency and healthy yeast fermentation to produce the desired beer profile and prevent off-flavors.
Should I bottle my beer or use a kegging system as a beginner?
Transitioning to kegging can save a lot of time and reduce the manual labor of bottling. It also helps prevent oxygen exposure and provides more consistent carbonation, leading to better-tasting beer.
Is it okay to buy used equipment when starting out with homebrewing?
Yes, buying used equipment like stainless steel kettles, fermenters, and kegs is a great way to save money. These items are durable, easy to clean, and retain their functionality exceptionally well.
Why should I focus on brewing the same recipe multiple times as a new homebrewer?
Brewing the same recipe allows you to master your equipment and techniques, identify variables, and consistently improve your process. This leads to more predictable and higher-quality results before experimenting with new recipes.
What does “Clean As You Go” mean in homebrewing, and why is it important?
“Clean As You Go” means rinsing and cleaning equipment immediately after use during your brew day. This prevents stubborn residues from forming, making cleanup easier and crucially preventing bacterial infections that can spoil your beer.