Crafting exceptional cold brew coffee at home is surprisingly accessible, as effectively demonstrated in the accompanying video. This method provides a deliciously rich concentrate, far surpassing the often-diluted offerings found in many commercial establishments. Understanding the precise methodologies and nuances of the cold brewing process allows for the consistent production of a superior coffee beverage, characterized by its low acidity and smooth flavor profile. This detailed guide expands upon the video’s foundational instructions, delving into the scientific principles and advanced techniques that elevate home cold brew from a simple endeavor to an art form.
Optimizing Your Grind: The Crucial First Step for Cold Brew Coffee
The initial preparation of the coffee grounds fundamentally dictates the efficiency of extraction and the final flavor of your cold brew coffee. As illustrated in the video, a coarse grind is specifically recommended for this immersion method. Conversely, finely ground coffee would result in over-extraction, leading to a bitter, muddy concentrate and complicating the filtration process significantly.
Understanding Particle Size and Surface Area
The surface area of coffee particles directly influences the rate at which solubles are extracted. For cold brew, the extended steeping time, typically 24 hours as specified in the video, necessitates a larger particle size to prevent over-extraction. When coffee grounds are too fine, their increased surface area allows for rapid extraction, which in a prolonged cold water immersion could pull undesirable bitter compounds and excessive astringency into the concentrate. Therefore, a grind size resembling coarse sea salt or breadcrumbs is generally considered optimal, ensuring a balanced extraction of desirable flavors without the harshness.
Precision Grinding Techniques
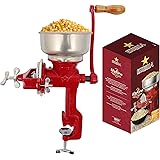
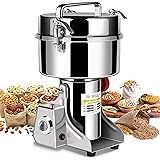
Achieving a consistent coarse grind often requires a quality burr grinder. Blade grinders, which chop rather than grind, produce an uneven distribution of particle sizes—a mix of very fine dust and large chunks. This inconsistency leads to uneven extraction; fines over-extract quickly, contributing bitterness, while larger particles remain under-extracted, lacking flavor. Conversely, a burr grinder ensures uniformity, allowing for a predictable and controlled extraction process. Calibration of the burr grinder to specific settings ensures repeatable results, a critical factor for home baristas seeking consistency in their cold brew coffee.
Water Quality and Coffee Ratios for Superior Cold Brew
While the video aptly demonstrates filling the Mason jar with cold water, the quality of this water plays a paramount role in the final taste of your cold brew coffee. Impurities, chlorine, and excessive mineral content in tap water can significantly detract from the coffee’s inherent flavors, introducing off-notes or dulling its vibrancy. Therefore, filtration of the water is a highly recommended practice.
The Significance of Filtered Water
Reverse osmosis or activated carbon filtered water is typically preferred for coffee brewing. These methods effectively remove chlorine and other contaminants without stripping away essential minerals that contribute to coffee’s body and flavor complexity. The chemical reactions involved in extraction are sensitive to water chemistry, meaning that superior water quality directly translates to a cleaner, more aromatic cold brew concentrate. This seemingly minor detail can profoundly impact the overall sensory experience of the final beverage.
Optimal Coffee-to-Water Ratios
The video utilizes one cup of coffee grounds in a one-liter or four-cup Mason jar, filled to the top with water. This equates to a ratio of approximately 1:8 or 1:9 (coffee to water by weight, assuming a standard coffee density). This concentration produces a robust cold brew suitable for dilution. However, personal preferences and specific bean characteristics might necessitate adjustments. For instance, some connoisseurs prefer a stronger concentrate at ratios of 1:4 or 1:5, which allows for greater flexibility in dilution and serving. These higher concentrations often require an extended steeping time or a slightly finer coarse grind to ensure full flavor development, underscoring the interplay between variables.
The Art of Steeping: Time, Temperature, and Agitation
The steeping phase is where the magic of cold brew coffee truly unfolds, involving a gradual extraction of flavors without the harshness associated with hot water. The video specifies a 24-hour refrigeration period for steeping, a widely accepted standard. This extended contact time at a lower temperature is responsible for cold brew’s characteristic smoothness and reduced acidity.
Temperature’s Impact on Extraction
Steeping in the refrigerator, as demonstrated, offers a controlled environment where the extraction rate is slower and more selective. Cold water extraction pulls out fewer acidic compounds and oils than hot water, resulting in a brew that is significantly less bitter and has a naturally sweeter profile. While room temperature steeping can accelerate extraction, it also carries a slightly higher risk of undesirable flavors developing and a shorter shelf life for the concentrate. The consistent cool temperature in a refrigerator ensures a clean, stable extraction over the full 24-hour period, contributing to the superior quality of the cold brew coffee.
Agitation: Enhancing the Extraction Process
The video recommends tipping the Mason jar back and forth a few times throughout the 24-hour steeping period. This simple act of agitation serves an important purpose: it ensures that all coffee grounds are consistently saturated and exposed to the water. In a static immersion, grounds can settle or clump, leading to uneven extraction. Gentle mixing periodically re-distributes the grounds, promoting a more uniform and efficient transfer of soluble compounds into the water. However, excessive or vigorous shaking should be avoided, as it can cause over-agitation of the grounds, potentially leading to increased fines and a cloudy final product. A gentle inversion or swirl is typically sufficient for optimal results.
Advanced Filtration Techniques for Pristine Cold Brew Concentrate
Filtering the steeped cold brew coffee concentrate is a critical step in achieving a clean, sediment-free beverage. The video effectively uses a metal strainer lined with cheesecloth for this purpose, a practical and accessible method for home brewers. However, various techniques can further refine the concentrate, improving its clarity and extending its shelf life.
Multi-Stage Filtration Strategies
While cheesecloth is effective for initial separation of large grounds, it often permits fine particles to pass through, resulting in a slightly cloudy cold brew. A multi-stage filtration process is often employed by experienced baristas. The first stage, as shown, might involve cheesecloth or a fine-mesh strainer. Subsequently, the liquid can be poured through a paper filter, such as a coffee filter or even a pour-over filter, which traps much finer sediment. Some enthusiasts even use specialized cold brew filters or nut milk bags, which offer a finer weave than standard cheesecloth. Employing a double filtration approach ensures a remarkably clear and smooth cold brew coffee, free from any gritty texture.
Considerations for Filtration Speed and Method
Filtering cold brew can be a slow process, especially with finer filters. Patience is key; attempting to rush the process by pressing or squeezing the grounds can force undesirable bitter compounds and fine sediment into the concentrate. Gravity filtration, where the liquid is allowed to slowly drip through the filter, is always preferred. The type of vessel used for filtration also matters; a funnel with a broad opening or a dedicated cold brew system can simplify this stage. Proper filtration not only enhances the sensory experience but also prevents sediment from accumulating, which could otherwise accelerate spoilage of the cold brew concentrate.
Dilution and Serving: Customizing Your Cold Brew Experience
The final step in enjoying your homemade cold brew coffee, as the video demonstrates, involves dilution and serving. The concentrate produced through the cold brewing process is intentionally potent, designed to be diluted to taste. The suggestion of half a cup cold brew to half a cup water provides a balanced starting point, but this ratio can be finely tuned to personal preference.
Achieving the Perfect Dilution Ratio
A common dilution ratio is 1:1, meaning one part cold brew concentrate to one part water, which the video exemplifies. However, some prefer a lighter beverage, opting for a 1:2 or even 1:3 ratio, especially when consuming it black. For those who enjoy a richer, bolder flavor, a 2:1 cold brew to water ratio might be preferred. Experimentation with different ratios allows for the discovery of an individual’s ideal strength, underscoring the versatility of cold brew coffee. The type of coffee bean used and its roast level can also influence the preferred dilution, as darker roasts often yield a more intense concentrate.
Versatile Serving Suggestions and Customizations
Beyond simply adding water, cold brew offers a myriad of serving possibilities. The video mentions heating it (“just nuke it”) for a hot beverage, providing a low-acidity alternative to traditionally hot brewed coffee. Other popular additions include milk or plant-based alternatives, sweetening agents like simple syrup or honey, or even incorporating it into cocktails. Consider adding a splash of vanilla syrup for a sweet treat or a dash of cinnamon for a warming spice. The smooth, chocolatey, and nutty notes frequently found in cold brew make it an excellent base for a wide array of customized drinks, from a classic iced latte to an adventurous espresso martini. The inherent low acidity of cold brew coffee also makes it a gentler option for those with sensitive stomachs, allowing for broader enjoyment.


