Ready to embark on a rewarding journey that culminates in a frosty, custom-brewed pint? As demonstrated in the comprehensive video above, making great beer at home is an accessible and incredibly satisfying hobby, especially with a Premium Homebrew Starter Kit. This guide expands on the essential steps and insights shared by Vito Delucchi from MoreBeer!, ensuring your first venture into homebrewing is smooth, enjoyable, and leads to truly delicious results.
Understanding the Beer Brewing Process: From Wort to Wonderful
The journey to making beer is often broken down into three main phases: the Brew Day, Fermentation, and Bottling. While the video guides you visually, let’s dive deeper into what each stage entails and why understanding them is crucial for your homebrew success.
The Brew Day: Laying the Foundation for Flavor
Your brew day is the most hands-on part of the process, typically lasting about four hours. During this time, you’re not actually making beer yet; instead, you’re creating what brewers call “wort.” Think of wort as the sweet, unfermented predecessor to beer—essentially, malt sugar water. The yeast will later transform this into alcohol and CO2, creating your finished homebrew beer. Conversely, neglecting proper preparation can introduce off-flavors.
Preparation is Paramount: Setting Up for Success
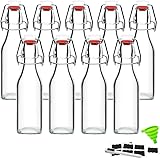
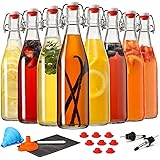
Before your brew day begins, take a moment to unpack your entire homebrew starter kit. Read through all instructions and recipe sheets. This isn’t just about familiarizing yourself with the equipment, but also about understanding the specific nuances of your chosen recipe, whether it’s a Pale Ale, IPA, or another style. Ensure you have all necessary components. One item not included in most kits, as mentioned in the video, are bottles. You’ll need about 50-54 standard crown-cap bottles, which you can collect from local breweries or purchase. Remember, steer clear of twist-off caps, as they don’t seal properly for bottle conditioning. You’ll have two to three weeks before these are needed, so you have ample time to gather them.
Cleaning vs. Sanitizing: Your Brewing Golden Rule
Perhaps the most critical aspect of homebrewing, emphasized by Vito, is the distinction between cleaning and sanitizing. These are two separate, non-negotiable steps. Cleaning involves removing any visible dirt, grime, or debris. This might mean scrubbing your kettle or rinsing your fermenter. However, sanitizing goes a step further by killing invisible bacteria and wild yeasts that could otherwise infect your wort and ruin your beer. Imagine spending four hours brewing, two weeks fermenting, only to discover a sour, off-tasting beer because you skipped sanitization. It’s a common beginner mistake with a simple prevention: always clean *then* sanitize.
A no-rinse sanitizer like Star San is invaluable. The recommended ratio is one ounce of Star San solution to five gallons of water. Remember, “don’t fear the foam!” The foam is an acidic environment that inhibits microbial growth. Just ensure any excess liquid is drained, as large amounts could alter the flavor profile of your beer. Anything that touches your wort after it’s cooled below 180°F must be sanitized with at least one minute of contact time.
Water: The Unsung Hero of Your Homebrew
Water makes up the vast majority of your beer, so its quality profoundly impacts the final taste. If your tap water tastes good to drink, it’s likely suitable for brewing. If not, consider using filtered or bottled water. Chlorine, often found in tap water, can react with yeast to create medicinal or plastic-like off-flavors. A simple activated carbon filter (like those found in refrigerator dispensers) can effectively remove chlorine. You’ll need about six gallons of good-tasting water for a standard five-gallon batch.
Steeping Grains: Adding Depth and Color
Once your water is in the kettle and heating up, it’s time to add your steeping grains. These grains, typically provided in a mesh bag, are steeped in the hot water much like making a large tea bag. This process extracts flavor, color, and some fermentable sugars, contributing to the beer’s overall character. For a Pale Ale, you might be steeping crystal malts, which lend a touch of caramel sweetness and a golden hue. The key is temperature control: remove the grains before the water reaches 170°F, ideally after about 30 minutes. Going above this temperature can extract unwanted tannins, leading to an astringent, bitter flavor in your beer. Resist the urge to squeeze the grain bag; simply let it drain naturally over the kettle to avoid scorching yourself and extracting more tannins.
Reaching a Rolling Boil: The Heart of the Brew
After removing the grains, crank up the heat to bring your wort to a rolling boil. At sea level, this happens around 212°F. A rolling boil isn’t just a gentle simmer; it’s a vigorous, churning boil, like when you cook pasta. This stage serves several critical purposes:
- Sanitization: The high temperature kills any remaining microbes.
- Hop Utilization: Bitterness and aroma from hops are extracted.
- Evaporation: Excess water is boiled off, concentrating sugars.
- Hot Break: Proteins from the malt coagulate and rise to the surface, eventually falling back into solution. This clarifies the beer.
- Volatilization: Unwanted volatile compounds that could cause off-flavors are boiled away.
Crucially, never put a lid on your kettle during the boil. This traps those volatile compounds you want to escape, and can also lead to boilovers as the hot break foams up.
Malt Extract: The Sugar Foundation
Once your wort reaches a rolling boil, it’s time to add the malt extract—the primary source of fermentable sugars for your beer. First, turn off the heat. Malt extract is heavier than water and can easily scorch on the bottom of the kettle if the heat is on, leading to burnt flavors. Stir gently as you add the entire packet, ensuring it dissolves completely. Once mixed, return the heat to high to bring the wort back to a rolling boil. This will likely take some time as the added extract cools the solution.
Hops: Bitterness and Aroma
Hops are added at different stages of the boil to achieve specific characteristics. The longer hops are boiled, the more bitterness they impart, due to the isomerization of alpha acids. Shorter boil times, typically at the end of the boil or at flameout, contribute more to aroma and flavor. A common recipe calls for a 60-minute bittering hop addition, which you’ll add once your wort is at a rolling boil and then start a timer for the remaining boil. Later additions, such as a 20-minute addition for flavor or a 5-minute addition for aroma, are added accordingly. Flameout additions are added after the heat is turned off, providing maximum hop aroma without significant bitterness. Imagine the difference between a strongly bitter West Coast IPA and a juicy, aromatic New England IPA—it’s all about hop timing!
Chilling the Wort: The Crucial Cold Side Transition
After the boil is complete, it’s vital to rapidly chill your wort down to below 80°F before transferring it to the fermenter. This is where your wort chiller comes into play, as demonstrated in the video. A wort chiller, which is essentially a heat exchanger, uses cold tap water flowing through a coil submerged in the hot wort to quickly cool it. The faster you chill your wort, the less chance airborne bacteria or wild yeasts have to infect your beer (this is often called the “cold break”). While chilling, keep your kettle covered to protect the wort from contaminants.
During this chilling phase, which can take anywhere from 20 to 45 minutes depending on your groundwater temperature, consider adding a wort clarifier like Irish moss or a Whirlfloc tablet (often referred to as a “kick tablet”). These additions help bind proteins and other solids, resulting in a clearer finished beer. Some kits also include yeast nutrient, which can be added at this stage to give your yeast a healthy start. Remember that once the wort drops below 180°F, it’s on the “cold side,” meaning every piece of equipment that touches it must be thoroughly sanitized.
Transferring to Fermenter: Preparing for Yeast Action
Once your wort is cooled, typically below 80°F (and ideally closer to 65-70°F for ales), it’s time to transfer it from the kettle into your sanitized fermenter. Your kettle’s spigot and sanitized tubing make this process straightforward. Simply attach the tubing to the spigot, direct the other end into your fermenter, and open the valve. Gravity will do the rest. As the wort transfers, it will also aerate, which is beneficial for yeast health. This introduction of oxygen is critical for yeast reproduction in the initial stages of fermentation.
Measuring Original Gravity: Calculating Your Future ABV
After transferring the wort, you’ll take your “original gravity” (OG) reading using a hydrometer. A hydrometer measures the density of the wort, which corresponds to its sugar content. Higher sugar content means a higher specific gravity. This reading, combined with a “final gravity” (FG) reading taken after fermentation, allows you to calculate the alcohol by volume (ABV) of your finished beer. Hydrometers are calibrated for readings at around 65-70°F, so taking your sample after chilling ensures accuracy. Fill your sanitized hydrometer jar, leaving a couple of inches at the top, gently drop in the hydrometer, and give it a slight spin to release any air bubbles that might cling to it. Read the measurement at the liquid’s meniscus (the bottom of the curve).
Fermentation: Where Yeast Works Its Magic
With your wort safely in the fermenter and its OG recorded, the focus shifts to the yeast. This is where your wort transforms into beer. As Vito states, “Brewers make wort, yeast make beer.”
Pitching the Yeast: Activating the Conversion
Before pitching your yeast, sanitize the yeast packet and a pair of scissors. Quickly cut the packet open and carefully pour the yeast into your wort. Replace the fermenter lid and airlock, ensuring the airlock is filled to the line with sanitizer solution or vodka. This allows CO2 to escape while preventing airborne contaminants from entering. Give the fermenter a good shake for about 30 seconds. This helps mix the yeast thoroughly and, crucially, re-aerates the wort, providing the oxygen yeast needs for initial growth before it switches to anaerobic fermentation, producing alcohol.
Temperature Control: Guiding Yeast Behavior
Yeast are highly sensitive to temperature, and maintaining the right range is essential for producing clean, flavorful beer. For most ales, the ideal fermentation temperature is between 65-68°F. If the temperature is too high, yeast can produce excessive “esters” (fruity flavors) and “fusel alcohols” (harsh, solvent-like flavors). If it’s too low, the yeast can become sluggish or even stall, leading to incomplete fermentation. Imagine brewing a delicate lager at 75°F—you’d likely end up with something resembling a fruity ale, not the crisp, clean profile you desired.
Find a cool, dark place for your fermenter, such as an interior closet or basement. Direct light can cause “skunking,” leading to off-flavors. If your ambient temperature is too warm, simple methods like placing the fermenter in a bin with a few inches of ice water and wrapping a wet towel around it can help keep temperatures down through evaporative cooling.
The Phases of Fermentation: From Krausen to Clean-Up
Fermentation is typically a two-week process, but the visible activity peaks early. The first few days (roughly days 1-3) are characterized by vigorous bubbling in the airlock and the formation of a “krausen” layer—a thick, foamy head of yeast and proteins on top of the beer. This is the yeast actively consuming sugars and reproducing. After this initial burst, the krausen will begin to recede, and bubbling will slow down (days 4-12). While less visibly active, this secondary phase is equally important. During this period, the yeast cleans up many of the compounds it produced earlier, mellowing flavors and creating a smoother, more refined beer. It’s okay for the temperature to rise slightly during this clean-up phase, but avoiding large swings is still best practice.
Confirming Fermentation Completion: Patience and Precision
To ensure fermentation is truly complete, you need to take final gravity (FG) readings. Visible signs like a dropped krausen and no airlock activity are good indicators, but not definitive. Take a hydrometer reading, then another 24-48 hours later. If the reading remains unchanged, your yeast has finished its work, and the beer is ready for bottling. If it continues to drop, let it sit longer.
Bottling: Capturing the Fizz and Flavor
After a successful fermentation, your homemade beer is almost ready to enjoy! The final stage involves bottling and “bottle conditioning,” which creates that beloved carbonation.
Preparing for Bottling Day: Organization is Key
Before you begin bottling, gather all your sanitized equipment: your bottling bucket, vinyl tubing, bottle filler, caps, and the 50-54 bottles you collected. Elevate your fermenter onto a sturdy table or counter edge. This allows gravity to assist in transferring the beer to the bottling bucket. After moving the fermenter, let it sit for at least 20 minutes. This crucial waiting period allows any yeast or sediment disturbed during the move to settle back to the bottom, ensuring a clearer final product.
Priming Sugar: The Secret to Carbonation
During fermentation, all the CO2 produced by the yeast escapes through the airlock. To get that fizzy carbonation in your bottles, you’ll reintroduce a small amount of sugar, called “priming sugar,” which the yeast will ferment again within the sealed bottle. In a small saucepan, boil two cups of water and add the priming sugar packet from your kit, stirring until dissolved. Cover the solution and allow it to cool to room temperature. This ensures it’s sterile and won’t introduce heat or contaminants to your beer.
Sanitizing Your Bottling Equipment and Bottles
Prepare five gallons of Star San solution in your bottling bucket (valve closed!). Use this solution to sanitize your vinyl tubing, bottle filler, and especially your caps. Remember, one minute of contact time for everything. Pull a final gravity sample from your fermenter using its spigot before moving the beer. This allows you to calculate your final ABV later using the formula: (Original Gravity – Final Gravity) * 131.
After sampling, empty the sanitizer from your bottling bucket. Don’t worry about residual foam; it’s harmless. Pour the cooled priming sugar solution into the bottom of the bottling bucket. Attach your sanitized tubing to the fermenter spigot, ensuring the other end goes into the bottling bucket, ideally below the liquid surface to minimize splashing and oxidation. Open the fermenter spigot and gently transfer your beer into the bottling bucket. The flow of beer will naturally mix with the priming sugar, ensuring even carbonation across all your bottles. Cover the bottling bucket opening with foil to maintain sanitation.
While the bottling bucket is filling, start sanitizing your bottles. Submerge them in the Star San solution for at least one minute. A bottle tree is incredibly handy for draining and air-drying, but if you don’t have one, simply invert them briefly to drain, then place them upright with a small piece of foil over the opening to keep them sanitary.
Filling and Capping: Sealing the Deal
Once your beer is in the bottling bucket with the priming sugar, move the bottling bucket to a higher surface (like the one where your fermenter sat). Attach your sanitized bottling wand to the spigot of the bottling bucket. The wand has a spring-loaded tip that opens when pressed against the bottom of a bottle and closes when lifted, making filling easy and mess-free.
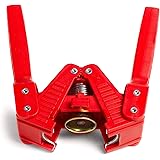
Fill each bottle, leaving about an inch of headspace at the top. This space is crucial for the CO2 to dissolve into the beer during bottle conditioning. Grab your sanitized caps, place them on the bottles, and use your bottle capper to seal them securely. You’ll feel a distinct “pop” as the cap crimps into place. Rinse off any sticky residue from the outside of the bottles.
From your five-gallon batch, you should yield approximately 50 to 54 standard 12-ounce bottles of delicious homemade beer. Place these bottles back into their cases or a dark box, protecting them from sunlight. Store them in a steady, moderate temperature environment (similar to fermentation temperatures) for another one to two weeks. This “bottle conditioning” allows the yeast to consume the priming sugar, producing CO2 that dissolves into the beer, creating carbonation.
Conditioning and Enjoyment: The Final Reward
After one to two weeks of bottle conditioning, your beer should be carbonated. To check, place one bottle in the refrigerator overnight (at least 24 hours). The cold temperature helps the CO2 dissolve better. The next day, open it up! Look for a good fizz, a stable head of foam, and clear beer. If it’s perfectly carbonated, move the rest of your bottles to the refrigerator to halt further conditioning and lock in that perfect carbonation. However, if it’s under-carbonated, give the remaining bottles another week at room temperature before testing again.
Congratulations! You’ve successfully navigated the exciting world of homebrewing, transforming simple ingredients into a complex and satisfying beverage. Now it’s time to share your creations with friends and family, savoring the fruits of your labor. The journey of making beer is one of continuous learning and experimentation, and with each batch, you’ll hone your skills and discover new flavors. Cheers to your homebrew adventure!
Fermenting Your Questions: A Homebrew Q&A
What are the main steps in making beer at home?
Making beer at home generally involves three main phases: the Brew Day, where you create the unfermented sweet liquid called wort; Fermentation, where yeast transforms the wort into beer; and Bottling, which carbonates and packages your finished beer.
Why is it important to clean and sanitize equipment when brewing?
Cleaning removes visible dirt, while sanitizing kills invisible bacteria and wild yeasts. These steps are critical to prevent infections that can ruin your beer and introduce unwanted off-flavors.
What is ‘wort’ in homebrewing?
Wort is the sweet, unfermented liquid created on your brew day, essentially malt sugar water. It’s the predecessor to beer, which yeast will later ferment into alcohol and CO2.
What happens during the fermentation stage of beer making?
During fermentation, yeast consumes the sugars in the wort and converts them into alcohol and carbon dioxide. This process turns the sweet wort into beer and typically lasts about two weeks.
Why do I add sugar to my beer when bottling?
You add a small amount of ‘priming sugar’ during bottling to create carbonation. The yeast in the sealed bottle will ferment this sugar, producing CO2 that dissolves into the beer, giving it fizz.