The journey of homebrewing often begins with a focus on fermentation. Yeast activity transforms wort into a delightful alcoholic beverage. However, the final stage, carbonation, presents its own set of considerations. While bottling offers an accessible entry point for many brewers, its limitations quickly become apparent. Hours are often spent cleaning, sanitizing, and capping dozens of bottles. This labor-intensive process can become a significant hurdle. Furthermore, inconsistent carbonation and the risk of “bottle bombs” sometimes diminish the brewing experience. Embracing a homebrew kegging system provides a compelling upgrade. It transforms the final steps of brewing, ensuring efficiency and consistent quality. This method offers bubbling brews on demand, directly from a personal tap. Such an upgrade significantly enhances the homebrewing lifestyle, making the entire process more enjoyable.
The Evolution from Bottles to Homebrew Kegging Systems
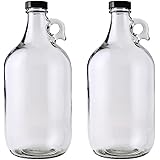
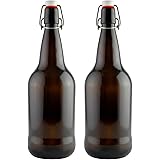
Moving from bottle conditioning to kegging homebrew represents a natural progression for many enthusiasts. Bottling is initially economical and fosters a deep appreciation for the brewing timeline. However, the manual effort involved can be extensive. Cleaning and sanitizing countless bottles consumes valuable time. Filling and capping each bottle further adds to the workload. These tasks can deter brewers from pursuing larger batches or more frequent brewing. Moreover, the risk of over-carbonated “bottle bombs” poses a real threat to safety and hard work. Kegging simplifies this entire procedure. It shifts the focus from many small containers to a single, larger vessel. This change allows for precise carbonation control. It eliminates the hazards associated with bottle bombs entirely.
The perceived initial cost of a homebrew kegging setup often discourages new adopters. Glass bottles and caps are undeniably inexpensive. Yet, the long-term benefits of kegging quickly outweigh this initial investment. Significant time savings are realized with each batch. The enjoyment of draught beer at home is also unparalleled. Furthermore, equipment costs can be managed through strategic sourcing. Used components are frequently available at reasonable prices. The learning curve for kegging is surprisingly gentle. Basic equipment familiarity is all that is required. Therefore, anyone can successfully transition to kegging. This system is designed for both convenience and quality.
Essential Homebrew Kegging Equipment Dissected
A functional homebrew kegging system relies on several core components. At its most basic, a keg, a CO2 tank, a pressure regulator, and a pouring mechanism are indispensable. These elements work in concert to carbonate and dispense beverages. Each component plays a specific role in the system. Understanding their individual functions is critical for successful operation. This foundational knowledge ensures efficient setup and troubleshooting. Furthermore, proper selection of these items contributes significantly to the system’s longevity. Brewers should prioritize quality and compatibility in their choices. This ensures a reliable and enjoyable kegging experience.
Understanding Cornelius Kegs
The Cornelius keg, often called a “Corny keg,” is the most popular choice for homebrew kegging. These stainless steel vessels were originally designed for soda syrup. They have since found a robust second life in homebrewing. Two main types exist: ball lock and pin lock. Consistency in type is advisable for part interchangeability. Most Corny kegs hold five gallons, suitable for standard homebrew batches. Smaller or larger options are also available for specialized needs. New kegs can be expensive, often exceeding $100. Used kegs, however, offer significant savings, typically priced between $30 and $60. Local homebrew shops, Craigslist, or online marketplaces like OfferUp are excellent sources for these. Older kegs might benefit from new gaskets and O-rings; these ensure a tight seal under pressure. This small investment prevents leaks and maintains carbonation.
A Cornelius keg operates on a simple principle. Gas enters through one post, and liquid exits through the other. The liquid post features a dip tube extending to the keg’s bottom. Conversely, the gas tube is short, allowing CO2 to pressurize the headspace. This design facilitates efficient gas absorption and liquid dispensing. Ball lock and pin lock posts feature distinct connections. Ball lock systems are generally more common and versatile. Pin lock kegs, with their specific connections, are often found at lower prices. Brewers should select a type and stick with it. This simplifies future equipment purchases and maintenance. Proper connection ensures gas flow and beer dispense.
CO2 Tanks and Pressure Regulation
Carbon dioxide (CO2) is essential for giving beer its characteristic bubbly mouthfeel. CO2 tanks typically come in 5 or 10-pound capacities. These sizes are ideal for most homebrew kegging setups. Larger or smaller tanks can also be acquired based on usage. Sourcing used tanks, similar to kegs, can yield substantial savings. Prices for used tanks often hover around $50. Homebrew shops and community boards are valuable resources for these acquisitions. Once obtained, tanks require filling; welding supply shops commonly offer this service. Some homebrew shops also provide CO2 refills. It should be noted that tanks are usually swapped rather than refilled directly. Thus, personal tank identification, like stickers, might be lost. A 10-pound tank typically lasts six to nine months for active brewers.
The pressure regulator is a critical component in any homebrew kegging system. It attaches directly to the CO2 tank. This device meticulously controls the gas pressure entering the keg. The set pressure directly influences the beer’s carbonation level. Reliable regulators are an important investment, costing approximately $70. Accuracy in pressure measurement is paramount for consistent carbonation. A durable regulator should provide many years of service. It is crucial to detach the regulator before taking the CO2 tank for refilling. This precaution protects the sensitive internal mechanisms. Proper use of the regulator ensures perfect carbonation. It also prevents over-pressurization of the keg.
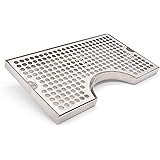
Components of a Dispense System
A complete homebrew kegging setup requires specific accessories for pouring. Tubing connects the regulator to the keg; this is generally sold as gas line. Gas quick connects are then used to attach the gas line to the keg’s gas post. The type of quick connect depends on the keg (ball lock or pin lock). Another length of tubing, known as beer line, runs from the liquid quick connect on the keg. This line then leads to a tap, which facilitates dispensing. Vinyl tubing is a common and affordable choice for starters. Hose clamps secure all tubing connections. These prevent leaks of precious beer or gas. A quick leak check can be performed by spraying Star San solution on connections. Bubbles indicate a leak, which requires tightening. This simple process ensures system integrity.
Mastering Carbonation Techniques for Homebrew
The primary goal of homebrew kegging is achieving ideal carbonation. This process involves the absorption of CO2 into the liquid. The amount of pressure applied determines the level of fizziness. Personal preference and beer style guide the desired carbonation. Many online charts and calculators assist brewers. These tools consider temperature and desired carbonation volume. Typically, a pressure of 10 PSI is applied. Full carbonation is generally achieved within seven days at this setting. The cold temperature of the liquid is crucial for CO2 absorption. A cold keg greatly enhances carbonation efficiency. Therefore, refrigeration of the keg is highly recommended. Consistent temperature control is key to consistent results.
Achieving Consistent Carbonation
For consistent and controlled carbonation, patience is often rewarded. A steady application of 10 PSI over approximately seven days is a widely accepted method. This allows the CO2 to gradually dissolve into the beer. The liquid must be maintained at a cold temperature throughout this period. Cold beer absorbs CO2 more efficiently than warm beer. Monitoring the pressure gauge on the regulator is essential. Any significant drops might indicate a leak in the system. Regular checks ensure the desired carbonation level is reached. This methodical approach minimizes risks. It also produces reliably carbonated beer, batch after batch. The wait is a small price for perfection.
Accelerated Carbonation Methods
Occasionally, faster carbonation is desired in homebrew kegging. Burst carbonating is a popular technique. This involves setting the PSI significantly higher, perhaps to 40 PSI. This elevated pressure is maintained for a shorter duration, typically 24 hours. After this period, the high pressure is released. The regulator is then dialed back to a standard serving pressure, around 10 PSI. Good carbonation can often be achieved within a day or two. Another rapid method is the “rock and shake” technique. Pressure is applied to the keg. The keg is then gently rocked or shaken for several minutes. This increases the liquid’s surface area exposed to CO2. Carbonation can be achieved in as little as 30 minutes. However, this method carries risks of over-carbonation or accelerated oxidation. Such rapid techniques require careful monitoring. Over-carbonation is manageable by simply pulling the pressure relief valve. Depressing the poppet on the gas post also works. Repeatedly venting small amounts of pressure reduces the internal PSI. This easy fix alleviates any concerns. Choose the method that best suits your timeline and comfort level.
Optimizing Pour Quality
Achieving a perfect pour is just as important as proper carbonation in homebrew kegging. The length of the liquid line plays a crucial role. A 10-foot beer line is considered the sweet spot for a 10 PSI serving pressure. This specific length provides sufficient restriction to the flow. It prevents excessively foamy pours. Insufficient line length results in turbulent flow and excessive head. Conversely, overly long lines can reduce flow to a trickle. Flow regulators for taps offer additional control. These devices allow fine-tuning of dispensing speed. Gas lines, however, are less sensitive to length. They can be cut to whatever length is necessary to reach the keg. Proper line management ensures a smooth, consistent pour every time. This attention to detail elevates the overall drinking experience.
Crafting Your Own Homebrew Kegerator System
While basic homebrew kegging can be done with a keg in a regular fridge, a dedicated kegerator offers superior convenience. For optimal results, beer must be kept cold for CO2 absorption and serving. A simple workaround involves chilling the keg in a standard refrigerator. Pressure is then applied. The keg is disconnected and returned to the fridge for storage. This back-and-forth process might extend carbonation time. However, a kegerator consolidates all components. It creates a dedicated cold environment. This setup ensures consistent temperature and readily available beer. Kegerators improve both performance and aesthetic appeal. They represent a significant upgrade for serious homebrewers.
DIY Kegerator Construction Basics
Constructing a DIY kegerator typically begins with a mini-fridge. The interior dimensions must accommodate the chosen keg(s). Second-hand mini-fridges can be found economically online. A separate temperature controller is then added. This device plugs into the fridge. It uses a thermometer probe to maintain the desired cold temperature. A tap tower and tap are also necessary. These components are available from homebrew suppliers. The DIY process involves drilling a large hole in the fridge top. This allows for tap tower attachment. The CO2 tank can reside inside the kegerator. Alternatively, a smaller hole can be drilled in the side or back for the gas line. This arrangement keeps the tank external, saving internal space. Prior research on fridge coil locations is critical. Accidental drilling into cooling coils can destroy the appliance. Thriftiness can yield a high-quality, customized homebrew kegging setup. Patience and careful planning are vital for success.
Exploring Pre-Built Kegerator Solutions
For those less inclined towards DIY projects, pre-built kegerators offer a convenient alternative. These units arrive fully equipped and ready for assembly. Today’s market provides excellent options for homebrew kegging. The Newair Single-Tap Kegerator, model NKR058MB00, exemplifies such a solution. It includes a CO2 tank, pressure regulator, and a comprehensive temperature control panel. All necessary parts for a single-tap tower assembly are provided. Pre-drilled holes in the back allow for external CO2 tank placement. This design maximizes internal storage capacity. These kegerators are spacious, often accommodating larger kegs or multiple smaller ones. A pre-built unit offers peace of mind. It bypasses the potential challenges of custom construction. While a keg is typically not included, the overall convenience is undeniable. Such systems streamline the setup process significantly. They deliver professional-grade performance immediately.
Maintaining Your Homebrew Kegging Setup
Once a homebrew kegging system is established, proper maintenance is crucial. Time saved on bottling is significant; a 5-gallon batch can be kegged in about 15 minutes. Fully carbonated beer can be enjoyed by the next day. This represents a time saving of at least two weeks compared to traditional bottling. Ongoing costs are minimal, primarily gas refills and occasional replacement parts. Tubing, both gas and liquid lines, should be replaced annually. This practice prevents off-flavors and maintains sanitation. Regular cleaning and sanitization of the entire keg are essential between brews. This minimizes contamination risks and ensures optimal beer quality. The posts on the keg can be disassembled for thorough cleaning. However, a full disassembly is not required for every batch. A good soak with PBW (Powdered Brewery Wash), followed by Star San, usually suffices. Diligent cleaning preserves beer quality. It also extends the lifespan of the equipment. Enjoying your own pub at home quickly becomes addictive.
Dispensing Wisdom: Your Home Brew Kegging Q&A
What is homebrew kegging?
Homebrew kegging is a method of storing and carbonating homemade beer in a single large container, called a keg, instead of bottling it. This process allows for efficient carbonation and dispenses beer directly from a tap.
What essential equipment do I need to start kegging my homebrew?
For a basic homebrew kegging setup, you will need a Cornelius keg, a CO2 tank, a pressure regulator, and a dispense system consisting of tubing, quick connects, and a tap. These components work together to carbonate and pour your beer.
What is a Cornelius keg?
A Cornelius keg, also known as a “Corny keg,” is a popular stainless steel vessel, usually holding five gallons, used by homebrewers to store, carbonate, and dispense their beer. It has separate posts for gas input and liquid output, making it easy to use.
How do I carbonate my beer in a keg?
To carbonate beer in a keg, you connect a CO2 tank with a regulator to the keg and apply pressure, typically around 10 PSI, while keeping the keg cold. The beer will absorb the CO2 over several days, making it fizzy.