Embarking on the journey of homebrewing can seem daunting at first, but with the right guidance and a quality starter kit, it becomes an incredibly rewarding hobby. Imagine crafting your own delicious beer, tailored to your tastes, right in your kitchen. The process is simpler than you might think, especially for beginners who are looking to create their first batch of craft beer. This guide expands on the excellent visual instructions provided in the video above, offering a detailed, step-by-step walkthrough for brewing your first ale.
Many aspiring brewers worry about the complexity, but modern kits streamline the process, making homebrewing accessible to everyone. From understanding the essential equipment to the subtle art of fermentation, we’ll break down each stage. You’ll gain confidence in creating your own unique brew, discovering the satisfaction of pouring a glass of beer you made yourself. Let’s get ready to transform simple ingredients into a fantastic homebrewed ale.
Essential Gear for Beginner Homebrewing
Before you dive into the brewing process, gathering all your necessary equipment is crucial. The video showcases the specific components of a Craft A Brew kit, which are designed to simplify your initial experience. Having everything laid out and ready ensures a smooth brewing day, minimizing interruptions. Furthermore, some items, like ice and additional bottles, are not included in the kit but are vital for successful brewing and bottling.
Here’s a detailed list of what you’ll need to get started:
- Large Bucket or Pitcher: Essential for accurately mixing your no-rinse sanitizer.
- 1-2 Gallon Pot: Your primary vessel for steeping grains and boiling the wort. A stainless steel pot is highly recommended for its durability and heat distribution.
- 10lb Bag of Ice: Crucial for rapidly chilling your wort after the boil. Quick chilling is vital for clear beer and to prevent off-flavors.
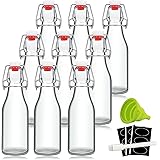
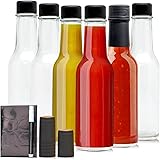
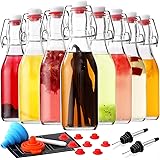
- Bottles & Caps: You’ll need enough bottles (typically 10-12 standard 12oz bottles for a 1-gallon batch) and caps for carbonating your finished beer. Always use bottles designed for carbonated beverages, like beer bottles, to prevent explosions.
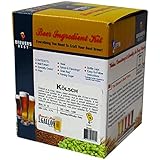
Inside Your Craft A Brew Kit
A well-designed homebrewing kit, like the one featured in the video, provides most of the specialized equipment you need. Understanding each component’s role will enhance your brewing experience. These tools are specifically chosen to make the homebrewing process straightforward and efficient for beginners.
- Instruction Booklet: Your primary guide with step-by-step instructions tailored to your specific beer style.
- Three-Piece Airlock & Drilled Stopper: These create a seal on your fermenter, allowing CO2 to escape during fermentation without letting outside contaminants in.
- Adhesive Thermometer: Sticks to your fermenter to monitor fermentation temperature, which is critical for yeast health.
- Racking Cane: Used with a siphon hose for transferring beer, particularly during bottling, minimizing sediment transfer.
- Funnel: Helps transfer liquids, especially the wort into the narrow neck of the carboy.
- One-Gallon Glass Carboy: This is your primary fermenter, where your beer will transform.
- Muslin Grain Steeping Bag: Holds your specialty grains during the steeping process, similar to a giant tea bag.
- Dry Malt Extract (DME): The main source of fermentable sugars for your beer. The type and amount will vary based on the beer style you’re brewing.
- Hops: Divided into packets for specific additions (e.g., bittering, flavor, aroma). The video highlights “Perle” for bittering and “Cascade” for flavor/aroma.
- Yeast: The magical ingredient that converts sugars into alcohol and CO2.
- No-Rinse Sanitizer: Essential for sterilizing all your equipment to prevent bacterial contamination.
The Crucial First Step: Sanitization
The importance of sanitation in homebrewing cannot be overstated. It is arguably the most critical step to ensure a successful batch of beer. Any wild yeast or bacteria introduced to your wort can lead to off-flavors, sour beer, or even a batch that doesn’t ferment properly. The no-rinse sanitizer provided in your kit is designed for convenience and effectiveness.
To begin, open your packet of no-rinse sanitizer and pour it into your large bucket or pitcher. Add one gallon of water and stir thoroughly until the sanitizer is fully dissolved. This solution is now ready to sterilize your brewing equipment. Take your one-gallon carboy, pour a portion of the sanitizer inside, seal it with the stopper, and shake it vigorously to coat all interior surfaces. After a few minutes of contact, you can simply pour out the sanitizer. Remember, do not rinse the carboy afterward; the no-rinse formula is designed to evaporate without leaving harmful residues.
This process needs to be repeated for all equipment that will come into contact with your wort after it has been boiled and cooled. This includes your funnel, airlock, stopper, racking cane, bottling bucket, and bottling wand. A thorough sanitization routine prevents spoilage and guarantees a clean, delicious final product.
Brewing Day: From Grains to Wort
With sanitation complete, the exciting part of brewing begins. This stage involves extracting sugars from the grains, boiling them with malt extract and hops, and then cooling the mixture. Each step contributes to the flavor, color, and bitterness of your future beer.
Steeping the Grains
Start by filling your 1-2 gallon pot with a half-gallon of water. Open your muslin bag and pour in your specialty grains, then tie the bag securely. Submerge this grain bag into the pot of water. Heat the pot on medium-high heat, carefully monitoring the temperature with a thermometer until it reaches 160°F. This steeping process extracts color, aroma, and some complex sugars from the grains, contributing to the beer’s overall character. Once the water hits 160°F, lift the grain bag above the pot and gently squeeze out any remaining liquid. This flavorful liquid is now called “wort,” which is simply unfermented beer. Note that the color of your wort at this stage will vary significantly depending on the beer style you’re brewing.
The Boil and Hop Additions
After removing the grains, cover the pot and bring your wort to a gentle, rolling boil. Once boiling, it’s time to add your dry malt extract (DME). Slowly pour the DME into the pot while continuously stirring. This prevents the malt from scorching and sticking to the bottom of your pot. Scorched malt can introduce unwanted bitter, burnt flavors to your beer. Continue stirring until the extract is fully dissolved.
Now, your 60-minute boil officially begins. Add your first packet of hops, typically the “bittering” hops, like the Perle hops shown in the video. These hops are boiled for the full 60 minutes, contributing bitterness that balances the sweetness of the malt. Hops added at different stages of the boil contribute distinct characteristics. Longer boil times extract more bitterness, while shorter boil times preserve volatile aroma and flavor compounds. Near the end of the boil, some recipes might call for a second hop addition for flavor and aroma, though the video focuses on the initial bittering addition. After 58 minutes, carefully remove the pot from the heat.
Rapid Wort Chilling
Chilling your wort quickly after the boil is vital for two main reasons. Firstly, it prevents bacterial contamination that can occur as the wort slowly cools through a susceptible temperature range. Secondly, rapid chilling, also known as a “cold break,” helps to create clearer beer by causing proteins and other solids to drop out of solution. Fill a sink with ice and water, then carefully place your hot pot directly into the ice bath. Stir the wort gently in the pot (without splashing) and also stir the ice water around the pot to facilitate faster cooling. Use your thermometer to check the wort’s temperature. It needs to reach 75°F or cooler before you can safely add yeast. Pitching yeast into wort that is too hot will kill the yeast, preventing fermentation.
Fermentation: The Magical Transformation
Once your wort is chilled, it’s ready for its transformation into beer through fermentation. This is where the yeast gets to work, converting sugars into alcohol and carbon dioxide.
Setting Up Your Fermenter
Carefully pour the chilled wort into your clean and sanitized one-gallon carboy. Using a funnel with a fine mesh strainer at this stage is highly recommended. The strainer will help capture any lingering hop particles or sediment (often called “trub”) from the boil, resulting in a cleaner final beer. After transferring the wort, top off the carboy with fresh, clean water until it reaches the one-gallon mark. It’s common to lose some volume during the boil and transfer, so topping off ensures you hit your target batch size.
Next, it’s time to introduce your yeast. Open the yeast packet and sprinkle it directly onto the surface of the wort in the carboy. There’s no need to stir it in; the yeast will hydrate and begin its work on its own. Finally, seal the carboy with your drilled stopper and insert the three-piece airlock. Fill the airlock with sanitizer solution up to the designated fill line. This allows the CO2 produced during fermentation to escape without allowing oxygen or contaminants to enter.
Patience is a Virtue
With everything sealed, find a stable environment for your fermenter. Store your carboy in a location where the temperature remains consistently between 60°F and 75°F. This temperature range is ideal for most ale yeasts, promoting healthy fermentation and preventing off-flavors. Too cold, and the yeast will become sluggish; too hot, and it can produce undesirable fruity or solvent-like flavors. Now comes the hardest part: waiting! Allow your beer to ferment for two full weeks. During this time, you’ll see bubbling in the airlock, a clear sign that the yeast is actively working. This activity will slow down and eventually stop as fermentation completes.
Bottling and Carbonation: The Grand Finale
After a patient two weeks, your beer has fermented and is ready for bottling. This final stage prepares your beer for carbonation, giving it the delightful fizz and head that is characteristic of craft beer.
Preparing for Bottling
Before bottling, sanitize all your bottling equipment thoroughly. This includes your priming sugar packet, bottling bucket, bottling wand, and siphon hose. Just like at the start, meticulous sanitation here prevents contamination of your finished beer. Open your priming sugar packet and pour the contents into your sanitized bottling bucket. Priming sugar, typically dextrose or corn sugar, provides a small amount of additional sugar for the yeast to consume in the sealed bottles, creating the CO2 needed for carbonation. Add a small amount of water (as shown in the video) and stir to dissolve the sugar completely. This ensures even carbonation across all your bottles.
Siphoning Your Beer
Position your fermenter (the carboy) on a higher surface than your bottling bucket. This gravity-fed setup makes siphoning easy. Carefully insert your racking cane into the carboy, ensuring that the end of the siphon is about two to three inches above the bottom. This crucial distance prevents the transfer of “trub” – the sediment of spent yeast and hop particles at the bottom of the carboy – into your bottling bucket. Trub can lead to cloudy beer and unwanted flavors. Initiate the siphon and let the beer flow gently into the bottling bucket, mixing with the dissolved priming sugar. The priming sugar will be evenly distributed throughout the beer in the bucket.
Filling and Capping
Attach your sanitized bottling wand to your sanitized siphon hose. You are now ready to fill your bottles. The bottling wand is a clever tool; it’s spring-loaded, so beer flows only when you press it against the bottom of a bottle. Insert the wand all the way to the bottom of each bottle. When you lift the wand off the bottom, the flow will stop automatically, leaving a consistent one-inch gap at the top. This gap is called “headspace” and is necessary for carbonation to occur safely. Repeat this process until all your bottles are filled.
Once filled, place a cap on each bottle. Use your bottle capper to securely seal each bottle. A good seal is paramount to ensure that the CO2 produced during carbonation remains trapped in the bottle, giving your beer its fizz. Store your capped bottles in a stable environment, again between 60°F and 75°F, for two more weeks. Colder temperatures will significantly slow down the carbonation process. This secondary fermentation in the bottle is what transforms your flat beer into a sparkling brew. After two weeks, your homebrewed beer is ready to be chilled, opened, and enjoyed!