Did you know that with a little patience and a few simple steps, you can transform ordinary grains into delicious homemade malt right in your own kitchen? The process, which involves soaking, sprouting, drying, and toasting, takes approximately 36 to 48 hours for germination and then a few more days for drying and processing. This ancient technique unlocks the sugars within grains, making them perfect for brewing beer, making spirits, or even adding unique flavors to baked goods.
As demonstrated in the accompanying video, malting is an accessible and rewarding DIY project. While barley is a traditional choice, this guide focuses on creating your own homemade rice malt, a fantastic option if you’re in a region where rice is plentiful, like Thailand. Let’s delve deeper into the fascinating world of malting and how you can achieve fantastic results, even without specialized equipment.
The Science Behind Homemade Malt: Why We Malt Grains
Malting might seem like a complex process, but its core purpose is quite simple: to awaken the dormant enzymes within a grain. When a seed germinates, these enzymes begin breaking down complex starches into simpler, fermentable sugars.
For homebrewers, this transformation is crucial. These newfound sugars are what yeast consumes to produce alcohol and carbon dioxide, turning a humble grain into a flavorful beer or other fermented beverage. Without the malting process, much of the starch in raw grains would remain inaccessible to the yeast, resulting in a less efficient and less flavorful fermentation.
Choosing Your Grain: Beyond Just Barley
While barley is the undisputed king of malting grains in many parts of the world, other grains like wheat, rye, and, as shown in the video, rice, are excellent candidates. The choice often depends on local availability, cost, and the specific flavor profile you’re aiming for.
Rice malt, for example, can impart a lighter body and a unique, subtly sweet flavor to your brews. It’s an ideal choice for those looking to experiment with traditional Asian-inspired beers or simply to utilize a locally abundant resource. Each grain offers a distinct character, inviting you to explore and customize your homemade malt.
Your Step-by-Step Guide to Making Homemade Malt
Creating your own homemade malt is a hands-on journey that begins with carefully preparing your chosen grains. The process outlined here mirrors the video’s instructions, providing additional context and tips for success.
1. Soaking the Seeds: Kicking Off Germination
The first crucial step is to rehydrate your grains, signaling them that it’s time to sprout. Take your selected seeds – whether it’s rice, barley, or wheat – and place them in a clean container. Cover them generously with water.
Allow the seeds to soak for one night, typically 8-12 hours. This initial soak washes away impurities and, most importantly, provides the necessary moisture for the enzymes to start activating within the kernel. You might notice the water turn slightly yellow by morning, which is normal as some soluble compounds leach out.
2. The Germination Game: Sprouting Your Grains
After their overnight soak, drain the yellow water and thoroughly wash your seeds. Transfer them to a new, clean container. This next phase, germination, requires a dark environment and consistent moisture.
Place the container in a dark spot, away from direct light. To ensure even moisture and prevent mold, you must mix the grains every 8 to 12 hours. This aeration helps the seeds breathe and prevents them from compacting. After approximately 36 hours, you’ll begin to see tiny sprouts emerging, indicating successful germination. The grains are typically well-germinated after 48 hours, with some sprouts becoming quite long.
3. Drying Your Sprouted Grains: Halting Growth
Once your grains are perfectly germinated, it’s time to stop the sprouting process and lock in their enzymatic potential. This step, often called kilning, removes moisture and stabilizes the malt.
Spread your sprouted grains thinly under the sun for at least two to three days until they are completely dry and brittle. If you’re concerned about birds or other critters, cover the grains with a light mesh or netting while they dry. This natural drying method works beautifully, ensuring your DIY malt is ready for the next stage.
4. Toasting for Flavor: Developing Base Malt
With your seeds thoroughly dried, the next step is to toast them. Toasting at a lower temperature develops the basic malt flavor and color, forming what brewers call base malt. The video suggests toasting around 80 degrees Celsius (176°F) for one hour and 30 minutes.
If you have an oven, set it to 80°C and prop the door open slightly with a spoon for better air circulation, ensuring an even toast. If you’re like many homebrewers without an oven, a large pot on the stovetop works just as well. Continuously monitor the temperature, using a thermometer, and stir the grains every 15-20 minutes to prevent scorching. Aim for a consistent 80°C for the full 90 minutes. This slow, gentle heating creates a pale, enzymatic malt perfect for many beer styles.
5. Roasting for Color: Crafting Specialty Malt
For those looking to create darker beers, like the “red beer” mentioned, some of your toasted malt can be further roasted. Roasting involves higher temperatures for shorter periods, caramelizing sugars and developing richer, darker colors and more intense flavors.
Using a pot over a fire, roast a portion of your toasted rice malt. Continuously stir the seeds with a spoon for about five minutes. You’ll notice a distinct aroma and some smoke, indicating the grains are caramelizing and darkening. It is highly recommended to do this step outdoors due to the smoke. This process creates specialty malts that add depth, color, and complex flavors like caramel, toast, or even chocolate to your brews.
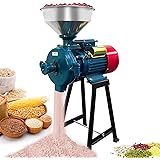
6. Crushing Your Homemade Malt: Ready for Brewing
The final step in preparing your homemade malt is to gently crush it. This exposes the inner starches and sugars, making them readily accessible during the brewing process without turning the malt into a fine flour. A proper malt mill achieves this perfectly.
However, as the video demonstrates, if you don’t have a specialized mill, a kitchen mixer can serve as an effective alternative. Place small batches of your malt into the mixer and pulse for just a few seconds. The goal is to crack the husks and expose the interior, not to pulverize it into flour. Too fine a grind can lead to a “stuck mash” during brewing, making liquid separation difficult. Your crushed malt is now ready to be used in your next brewing adventure, whether it’s for a traditional rice beer or any other creative concoction.