Crafting a truly crisp, clean, and refreshing German Pils at home can seem like a challenging endeavor, especially when striving for the iconic bright clarity and delicate balance of hop and malt that defines the style. Many homebrewers encounter hurdles in achieving authentic lager characteristics, from managing precise fermentation temperatures to preventing common off-flavors. Fortunately, with meticulous attention to detail and a methodical approach, brewing a classic German Pilsner is well within reach, transforming your garage into a small-scale German brewery. The video above provides an excellent visual guide, and this accompanying article will delve deeper into the technical nuances and scientific principles behind each crucial step, offering expanded insights and practical tips for homebrewers looking to master this rewarding style.
Understanding the German Pilsner: Ingredients and Characteristics
A German Pilsner stands apart in the lager family, celebrated for its exquisite balance and profound drinkability. It emphasizes delicate malt character, noble hop bitterness, and unparalleled clarity. The cornerstone of its profile lies in its authentic German ingredients.
For a traditional German Pils, the malt bill is straightforward yet critical: 100% German Pilsner malt. This malt provides a light, sweet, and bready backbone, free from complex roast or caramel notes. Its simplicity demands precision in the mash to fully extract its potential, leading to a golden, pale straw color in the final beer.
Hops are equally vital, with Hallertau often taking center stage. Hallertau is one of the revered “German noble hop” varieties, known for imparting mild floral, herbal, and spicy aromas and a clean, refined bitterness. Noble hops are characterized by their lower alpha acid content, making them ideal for providing aroma and a gentle, not overwhelming, bitterness that complements the delicate malt profile. Other noble hops like Tettnang, Spalt, and Saaz (though Czech, often used in Pilsners) can also be employed to achieve similar aromatic complexity.
Mastering the Mash: Temperature, Water, and pH Control
The mash is where the magic begins, converting starches from the malt into fermentable sugars. For a 6-gallon batch of German Pils, the video highlights specific parameters that optimize extraction and enzyme activity. Using reverse osmosis (RO) water is a strategic choice, providing a clean slate for precise water chemistry adjustments.
The strike water is heated to 171°F, accounting for heat loss when transferring to the mash tun, aiming for a mash-in temperature of 156°F. This specific strike temperature is crucial as it sets the initial environment for enzymatic action. The primary mash rest then occurs at 148°F for 45 minutes. This lower temperature favors beta-amylase activity, producing more fermentable sugars and contributing to the beer’s characteristic dryness and crispness. Maintaining this temperature consistently is key to a successful mash, influencing both sugar conversion and the body of the final beer.
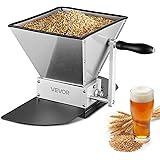
Milling the grain properly is also essential. The goal is to crack the grain kernels just enough to expose the starchy endosperm for water penetration, while keeping the husks largely intact. These husks later serve as a natural filter bed during the lauter, preventing a stuck sparge and ensuring efficient wort separation. Incorrect milling, such as grinding too finely, can lead to a cloudy wort and potential tannin extraction.
Water chemistry, though presented as a “fine-tuning” step for new brewers, becomes increasingly important for advanced brewers aiming for stylistic accuracy and optimal beer quality. The video mentions adding salts and 2ml of lactic acid to achieve a mash pH of 5.2-5.6. A pH measurement of 5.2 was confirmed, which is ideal for enzyme activity and flavor stability. Adjusting mash pH impacts enzyme efficiency, hop utilization, and the perceived bitterness and crispness of the beer. RO water, being neutral, allows for complete control over these mineral additions, mimicking the water profiles found in Pilsen or other historic brewing regions.
During the dough-in phase, slowly and evenly mixing the milled grain with the hot strike water prevents the formation of “dough balls” or dry pockets. These clumps can impede water penetration and sugar extraction, leading to lower efficiency. Recirculation, initiated after dough-in, involves continuously drawing wort from the bottom of the mash tun and returning it gently to the top. This clarifies the wort, sets the grain bed, and helps maintain a consistent mash temperature throughout the rest.
Lautering and Sparging: Efficient Sugar Extraction
After the mash rest, the lauter begins, focusing on separating the sweet wort from the spent grains. The mash temperature is first raised to 168°F. This “mash out” step increases the fluidity of the wort by reducing its viscosity and deactivates enzymes, preventing further sugar conversion. This preserves the fermentable sugar profile established during the mash rest.
The video describes a fly sparge technique, which is common for all-grain brewing. This involves slowly rinsing the grain bed with hot sparge water (170°F) while simultaneously transferring wort to the boil kettle. For a 6-gallon batch, an additional 7 gallons of water heated to 170°F with 1ml of lactic acid is prepared for sparging. The critical aspect of a fly sparge is to match the sparge water inflow rate to the wort outflow rate. This ensures the grain bed remains covered, preventing it from compacting and becoming dry, which could lead to channeling and poor sugar extraction. A transfer rate over approximately 40 minutes is indicated as effective for this system.
Rushing the sparge process can significantly reduce brewing efficiency, leaving valuable sugars behind in the grain bed. Pre-boil gravity measurements, like those taken with the Anton Paar EasyDens, are vital for assessing mash efficiency. This digital hydrometer allows brewers to quickly and accurately measure wort density, providing immediate feedback on how effectively sugars were extracted, enabling adjustments for future batches.
The Boil: Hop Additions, Clarity, and DMS Prevention
A 90-minute boil is employed for this German Pils, a deliberate choice with scientific backing. The extended boil, particularly for light-colored, all-Pilsner malt recipes, is crucial for reducing the risk of Dimethyl Sulfide (DMS). DMS is an off-flavor that imparts a cooked corn or cabbage aroma, often arising from a precursor compound (S-methylmethionine or SMM) naturally present in malt, especially Pilsner malt. The longer boil volatilizes DMS, boiling it off and preventing its presence in the final beer. A pre-boil volume of 9.25 gallons is targeted to account for boil-off over the 90 minutes, ensuring the desired post-boil volume.
Hop additions are precisely timed to build complexity. An initial quarter-ounce addition of Hallertau hops early in the boil contributes approximately 3 IBUs, providing a foundational bitterness. Subsequent additions at 30 minutes, 60 minutes, and 10 minutes from the end of the boil build layers of hop character, ranging from bitterness to aroma. The final hop addition occurs during a 5-minute whirlpool, extracting maximum aroma and flavor while minimizing bitterness contribution.
Clarity in a German Pilsner is paramount. A Whirlfloc tablet, added with 15 minutes remaining in the boil, aids in flocculating proteins and other haze-causing compounds, promoting a clear wort. Yeast nutrient, added in the final 10 minutes, provides essential micronutrients for healthy yeast fermentation, especially important for lagers which ferment at colder temperatures and require robust yeast activity. An anti-foaming agent is also used at the start of the boil to prevent boil-overs, ensuring safety and reducing mess.
Following the boil, a 5-minute whirlpool rest, after the final hop addition, helps consolidate trub (protein, hop matter, and other solids) into a cone at the center of the kettle. A subsequent 10-minute undisturbed rest allows the trub cone to fully settle, making it easier to transfer clearer wort to the fermenter, further contributing to final beer clarity.
Cooling and Fermentation: The Art of Lager Brewing
Knocking out, or rapidly cooling the wort, is a critical step. A plate chiller, connected to groundwater, is used to bring the wort temperature down efficiently. However, if groundwater temperatures are high (as in Southern California, per the video), a glycol chiller connected to the fermenter can provide the additional cooling needed to reach the target fermentation temperature of 50°F. The goal is to chill the wort to about 2°F below the desired fermentation temperature, preparing it for yeast pitching.
Oxygenating the wort before pitching yeast is indispensable for healthy fermentation, particularly for lagers. Yeast require oxygen to synthesize sterols and unsaturated fatty acids, crucial components of their cell membranes. For a 6-gallon batch, 60-90 seconds of oxygenation at a flow rate of 1 liter per minute via a carb stone on a unitank is recommended. Target oxygen levels are typically 10-15 ppm. Under-oxygenated wort can lead to sluggish fermentation, incomplete attenuation, and off-flavors.
Pitching a sufficient quantity of healthy lager yeast is perhaps the most important factor in brewing a successful German Pils. Lagers, due to their colder fermentation temperatures, are more susceptible to off-flavors from stressed yeast. The video emphasizes the need for a large pitch rate, equivalent to 2-3 pouches of yeast or a well-prepared yeast starter. A starter, grown 36 hours prior, ensures a large, active, and healthy yeast population ready to tackle the wort. Original gravity (OG) is measured with the EasyDens and recorded in the Brew Meister app, providing a baseline for calculating alcohol content and fermentation progress.
The fermentation schedule for this German Pils is precise: an initial fermentation at 50°F for approximately one week, or until the specific gravity reaches around 1015. At this point, the tank is allowed to “free rise” to 60°F. This diacetyl rest period allows the yeast to clean up any diacetyl (a buttery off-flavor) and other unwanted byproducts formed during the colder fermentation. Once fermentation is complete, often indicated by stable gravity readings, the yeast is dumped from the fermenter or the beer is transferred to a secondary fermenter.
Lagering: Patience for Perfection
Lagering is a defining characteristic of Pilsners and other lagers, and it is a process that cannot be rushed. The video details a slow cooling process, reducing the fermenter temperature at a rate of 2-3°F every 12 hours until a lagering temperature of 32-36°F is reached. This gradual temperature drop minimizes stress on the yeast, allowing them to remain active and continue to “polish” the beer, consuming lingering off-flavors and promoting clarity. Rapid cooling can shock the yeast, causing them to flocculate prematurely and leave undesirable compounds in suspension.
During the lagering process, adding one tablespoon of Biofine, a fining agent, further enhances clarity. Biofine effectively binds with haze-forming particles like proteins and yeast, causing them to settle out more rapidly. The beer is then allowed to lager for at least four weeks at the cold temperature of 32-36°F. This extended cold conditioning period is crucial for developing the clean, crisp flavor profile, improving mouthfeel, and achieving the brilliant clarity synonymous with a German Pilsner. It’s during this time that the beer truly matures, with flavors mellowing and melding into a harmonious whole.
The Final Product: A Taste of Tradition
The reward for meticulous brewing and patient lagering is a beer of exceptional quality, as described in the taste test of a batch brewed two months prior. Key attributes of a well-made German Pils include crystal clarity, a bright white and persistent head of foam, and a complex yet delicate aroma. The particular batch showcased notes of sweet, toasted cracker malt, balanced by the distinctive floral and herbal characteristics of Hallertau hops. The beer is light and dry, with a noticeable but clean bitterness that lingers pleasantly.
While the brewer noted a preference for the spicier and slightly maltier Czech Pils, the simple elegance of this German Pils is undeniable. The dryness, potentially influenced by the 148°F mash temperature, could be further enhanced by mashing at slightly lower temperatures, such as 146°F, for an even crisper finish. Ultimately, this detailed process, from grain selection to lagering, culminates in a thoroughly satisfying German Pils that rivals commercial examples and showcases the art of homebrewing. Embrace the journey of brewing a classic German Pilsner, and you will be rewarded with a truly refreshing and well-crafted beer.
From Mash Tun to Mug: Your German Pils Q&A
What is a German Pilsner beer?
A German Pilsner is a crisp, clean, and refreshing type of lager beer. It is known for its delicate balance of malt and noble hop flavors, as well as its clear appearance.
What are the main ingredients used to brew a German Pilsner?
The primary ingredients are 100% German Pilsner malt, which provides a light, bready flavor, and noble hops like Hallertau, which contribute mild floral, herbal, and spicy aromas.
Why is a long boil important when brewing a German Pilsner?
A longer boil, typically 90 minutes, is important for German Pilsners to reduce the risk of an off-flavor called Dimethyl Sulfide (DMS). DMS can make the beer taste like cooked corn or cabbage.
What is ‘lagering’ and why is it important for German Pilsners?
Lagering is a process where the beer is stored at very cold temperatures (around 32-36°F) for several weeks. This extended cold conditioning helps the beer mature, develop its clean and crisp flavor, and achieve brilliant clarity.