Many aspiring brewers dream of crafting their own beer, yet the journey often seems fraught with complexity and significant upfront investment. Traditional homebrewing tutorials frequently showcase elaborate setups, requiring substantial amounts of expensive equipment and yielding enormous batches—typically between 25 to 30 litres per brew. For a beginner, this scale can be daunting, not only in terms of financial outlay but also the sheer volume of liquid to manage and store. Imagine the pressure of potentially spoiling 30 litres of beer, a scenario that often discourages newcomers before they even begin. This is precisely why the small-batch approach, exemplified in the accompanying video, offers such an appealing and practical alternative for diving into the world of home beer brewing.
By starting with smaller volumes, such as the 5-litre batch demonstrated, novice brewers gain invaluable room for experimentation and learning without the overwhelming pressure of commercial-scale production. This method significantly reduces the initial investment in equipment and ingredients, transforming an intimidating hobby into an accessible and enjoyable pursuit. Furthermore, the flexibility afforded by small batches allows for frequent experimentation with diverse ingredients and styles, from lagers and ales to unique seasonal brews like pumpkin or elderflower and nettle beers, as the presenter highlights. The “brew in a bag” (BIAB) method further simplifies the process by consolidating mashing and boiling into a single pot, making it an ideal entry point for anyone keen to explore homebrewing.
The Allure of Small-Batch Home Beer Brewing
Small-batch home beer brewing addresses several critical pain points for beginners, making it an increasingly popular method for budding enthusiasts. Unlike larger operations, where mistakes can lead to costly and extensive waste, a 5-litre batch minimizes potential losses, fostering a less stressful learning environment. This approach is particularly advantageous for those with limited space, as storing multiple gallons of fermenting liquid or finished bottles can quickly become a logistical challenge in a typical home setting. Consequently, the compact nature of small-batch brewing alleviates concerns about fridge storage and overall footprint.
Moreover, the reduced scale encourages a hands-on, iterative learning process. Brewers can swiftly move from one batch to the next, applying lessons learned and refining techniques with greater agility than if they were tied to lengthy, large-volume productions. This quick feedback loop accelerates skill development, transforming complex brewing science into an intuitive and enjoyable craft. Ultimately, small-batch brewing is not just about convenience; it’s about empowerment, providing a low-barrier entry point to a rewarding hobby that champions creativity and learning over intimidation.
Essential Gear for Your 5-Liter Brew in a Bag Setup
Embarking on your small-batch home beer brewing journey requires a surprisingly modest list of equipment, much of which you might already own or can acquire affordably. The beauty of the brew in a bag method lies in its minimalist approach, streamlining the necessary tools for a 5-litre batch. Having the right equipment ensures both efficiency and hygiene, critical elements for successful brewing outcomes. As highlighted in the video, a foundational set of tools will set you up for success without breaking the bank.
Here’s a breakdown of the key items you will need for your small-batch setup:
- 5-litre Glass Demijohn with Bung and Airlock: This serves as your primary fermentation vessel. The airlock allows carbon dioxide to escape while preventing airborne contaminants from entering, maintaining a sterile environment for your wort to transform into beer.
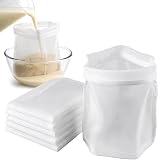
- Brew Bag: Specifically designed for malt, this bag allows for easy removal of grains after mashing, simplifying the process and making cleanup significantly easier. Its use is central to the “brew in a bag” method.
- Small Muslin Bags: These are essential for containing hops during the boil, preventing loose hop particles from muddying your wort and making removal straightforward.
- Large Stockpot with Lid (approx. 11 litres): This is your workhorse for both mashing and boiling. An 11-litre pot provides ample space for 6 litres of water and 1 kilogram of malt, preventing boil-overs and allowing for comfortable stirring.
- Siphon (Optional but Highly Recommended): A siphon allows for gentle transfer of beer from the demijohn to bottling vessels, minimizing disturbance to the sediment and ensuring a clearer finished product.
- Thermometer: Crucial for monitoring and maintaining precise temperatures during mashing and cooling, directly impacting enzymatic activity and yeast health. A standard meat thermometer often works perfectly.
- Funnels: Invaluable for neatly transferring wort into the demijohn, preventing spills and maintaining a clean brewing environment.
- Large and Small Colanders: These are useful during the sparging phase, particularly when pressing liquid from the brew bag, and for general straining tasks.
Core Ingredients for a Crisp Czech-Style Lager
Beyond the equipment, the essence of your Czech-style lager lies in selecting quality ingredients. Each component plays a vital role in developing the beer’s distinct character, from its malty backbone to its delicate hop aroma. For a classic lager profile, simplicity and quality are paramount, allowing the individual flavors to shine through in the final brew. The video specifies a fundamental ingredient list that serves as an excellent starting point for this refreshing style.
The essential ingredients for your 5-litre batch include:
- Crushed Lager Malt (Pilsner Malt): This forms the base of your beer, providing fermentable sugars, body, and a clean, crisp malt profile characteristic of lagers. The specific quantity, 1 kilogram, ensures a balanced sweetness.
- Hops (Saaz Hops): Saaz hops are quintessential for Czech-style lagers, offering a noble hop character with earthy, spicy, and floral notes. Their contribution provides bitterness for balance and a subtle aromatic complexity.
- Lager Yeast: A specific lager yeast strain is crucial for authentic lager fermentation. Unlike ale yeasts, lager yeasts ferment at colder temperatures, producing a cleaner, crisper flavor profile with fewer fruity esters.
- Brewing Sugar (Optional): While not strictly necessary for the primary fermentation of a well-made wort, a pinch of priming sugar added to bottles during bottling is essential for carbonation, creating that satisfying fizz and head retention.
Understanding the interplay of these ingredients is key to successful brewing. The malt provides the canvas, the hops add the artwork of bitterness and aroma, and the yeast is the invisible artist transforming sugar into alcohol and flavor compounds. With these foundational elements, you are well on your way to crafting a delicious homemade lager.
Step-by-Step Guide to Crafting Your Lager
Brewing a Czech-style lager using the brew in a bag method involves several distinct phases, each critical to the final product’s quality. Following these steps meticulously, as outlined in the video, ensures proper conversion of starches, efficient hop utilization, and healthy fermentation. Attention to detail, particularly regarding temperatures and sanitation, will be your most valuable tools throughout this process.
Water Purification and Mashing Mastery
The first step, and often underestimated, is water purification. Chlorine and other contaminants in tap water can impart off-flavors to your beer, so removing them is crucial for a clean taste. Utilizing a water filter, like the LARQ filter mentioned in the video, effectively eliminates these impurities. Subsequently, prepare your mashing setup by placing a small colander at the bottom of your stockpot to prevent direct contact between the brew bag and the heat source, which could scorch the malt. Secure the brew bag around the pot, add 6 litres of purified water, and heat it to 75°C. Keeping the lid on minimizes evaporation, ensuring you retain the necessary water volume for your 5-litre yield.
Once the water reaches 75°C, carefully add 1 kilogram of crushed pilsner malt into the brew bag, ensuring it’s thoroughly mixed to avoid clumps. The goal is to bring the temperature down to a steady 65°C, which is the optimal range for the enzymes in the malt to convert starches into fermentable sugars. Maintaining this 65°C temperature for 60 minutes is critical for proper sugar extraction and body development. Following this, raise the grain temperature to 75°C for 20 minutes; this “mash out” step halts enzymatic activity and thins the wort, making it easier to extract sugars and preparing it for the boil. It’s imperative not to let the water boil at this stage, as excessively high temperatures can denature desirable compounds.
Boiling, Hop Additions, and Wort Preparation
After the mash, carefully remove the brew bag containing the spent grains. This is where your large colander comes in handy to gently press out as much remaining “wort” (the sugary liquid) as possible back into the pot. Be extremely cautious, as the liquid and grains are very hot. The spent grains can then be composted. Next, bring the wort to a vigorous boil, keeping the lid on to prevent excessive evaporation. This boil serves multiple purposes: sterilizing the wort, concentrating sugars, and, most importantly, isomerizing hop acids for bitterness and aroma.
During the boil, you’ll introduce your hops. Add 20 grams of Saaz hops, contained within a small muslin bag, once the wort is boiling. Allow this to boil for 45 minutes with the lid on. Subsequently, add another bag containing 10 grams of Saaz hops, allowing both bags to boil for an additional 15 minutes, resulting in a total boil time of 60 minutes. This two-stage hop addition contributes both a foundational bitterness and a more delicate aromatic finish. While the wort is boiling, it is absolutely essential to thoroughly sterilize your demijohn, bung, and airlock using a no-rinse sanitizer to prevent contamination later.
Rapid Cooling and Yeast Pitching
Once the 60-minute boil is complete, carefully remove the hop bags from the wort. The next crucial step is to cool the wort rapidly down to approximately 10°C. This rapid cooling, often referred to as a “cold break,” helps to precipitate unwanted proteins and also minimizes the window of opportunity for wild yeasts and bacteria to infect your beer. The video suggests an effective method: filling your sink with cold water and placing the hot pot directly into it, stirring the wort to facilitate heat transfer. Replacing the sink water as it warms up accelerates this process, ensuring you reach the target temperature quickly.
Pitching the yeast at the correct temperature is paramount for a successful fermentation. If the wort is too hot, it can kill or damage the delicate yeast cells, leading to stalled fermentation or off-flavors. Once the wort is cooled to around 10°C, carefully pour it into your sterilized demijohn using a funnel to prevent spills and aeration. Then, “pitch” approximately 5 grams (half a packet) of lager yeast directly into the cooled wort. The ideal fermentation temperature for lager yeast typically falls between 8-12°C, though specific instructions on your yeast packet should always be followed. Finally, add water to the airlock and fit the bung securely onto the demijohn, signifying the completion of the hot side of brewing.
The Art of Fermentation
With the yeast pitched and the airlock in place, your demijohn should be moved to a cool, dark place for primary fermentation. The presenter suggests an annex kitchen with a stable temperature of 17-18°C, which while slightly warm for a traditional lager fermentation, can still produce good results with certain lager yeast strains or by ensuring robust yeast health. Within 24 to 48 hours, you should observe vigorous activity in the airlock, a sign that the yeast is actively fermenting the sugars and producing carbon dioxide. This release of CO2 also serves to create a protective blanket over the beer, preventing oxygen and potential contaminants from entering the vessel.
Primary fermentation typically lasts for 6 to 7 days, during which the yeast converts most of the fermentable sugars into alcohol and other flavor compounds. As fermentation nears its end, the activity in the airlock will slow down considerably, eventually ceasing. This indicates that the yeast has completed its primary work, and the beer is ready for the next stage. It is important to resist the urge to open the demijohn during this period, as exposure to oxygen can lead to oxidation and off-flavors in the finished beer. Patience is a key virtue in successful home brewing.
Bottling, Carbonation, and Conditioning
When primary fermentation is complete and no more CO2 is escaping, it’s time to bottle your beer. This process requires careful attention to hygiene and minimizing sediment transfer. Begin by sterilizing a separate clean pot and your chosen bottles or keg. Carefully remove the bung from the demijohn and use a siphon to transfer the beer into the clean pot, making every effort to leave behind as much yeast sediment as possible. This sediment, while harmless, can impart undesirable flavors and cloudiness if transferred into the final product. As you approach the bottom of the demijohn, exercise extreme caution to avoid drawing up the sediment.
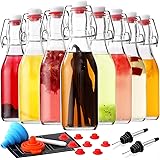
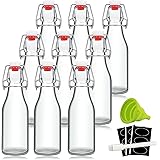
For bottling, flip-top bottles are highly recommended due to their affordability and ability to create a tight, secure seal, crucial for proper carbonation. Before sealing each bottle, add a small pinch of sugar. This “priming sugar” provides a final food source for the residual yeast, allowing it to produce a small amount of additional carbon dioxide within the sealed bottle. This process, known as bottle conditioning, naturally carbonates your beer, giving it that satisfying fizz and creamy head retention upon opening. Once bottled, place your sealed bottles in the fridge for at least 2 weeks. This crucial bottle conditioning period allows the flavors of your lager to mature and mellow out, resulting in the clean, crisp taste that defines a well-crafted Czech-style lager. Following this, thorough cleanup and sterilization of all equipment are essential for future successful brews.
Beyond the Recipe: Brewing Log and Creative Experimentation
Once you’ve successfully brewed your first batch, the journey of home beer brewing truly begins. One of the most invaluable practices you can adopt is maintaining a detailed brewing log or journal. Documenting every step of your process, from water treatment and ingredient quantities to mashing temperatures, boil times, and fermentation activity, creates a comprehensive record of each batch. This meticulous logging not only helps you replicate successful flavor profiles but also provides critical data for troubleshooting when a batch doesn’t quite meet expectations. Consider noting specific gravity readings, pH levels (if measured), and even subjective tasting notes at various stages.
Furthermore, remember that brewing is as much an art as it is a science, and there is immense room for creativity and personal expression. Do not hesitate to experiment with different levels and types of ingredients once you understand the basic process. Adjusting hop varieties and their addition times can drastically alter the beer’s bitterness, aroma, and flavor profiles. Similarly, experimenting with various yeast strains or pitching rates can influence the beer’s body, alcohol content, and subtle flavor nuances. Perhaps try a slightly different malt bill for a darker lager or introduce a unique adjunct like rice or corn for a lighter body. The objective of home beer brewing is not merely to follow a recipe, but to understand its principles and then boldly innovate, leading to uniquely satisfying brews. This iterative process of brewing, tasting, and tweaking is where the true joy and skill of home beer brewing reside.
Fermenting Your Doubts: Small Batch Czech Lager Q&A
What is small-batch home beer brewing?
Small-batch brewing involves making smaller quantities of beer, typically around 5 liters, rather than large commercial-scale volumes. This approach is designed to be more accessible and less daunting for new brewers.
Why is small-batch brewing good for beginners?
It reduces the initial cost for equipment and ingredients, minimizes potential waste if a batch goes wrong, and requires less space for storage. This allows beginners to experiment and learn without overwhelming pressure.
What is the ‘brew in a bag’ (BIAB) method?
The ‘brew in a bag’ (BIAB) method simplifies the brewing process by allowing both the mashing and boiling steps to happen in a single pot. This reduces the amount of equipment needed and makes cleanup easier.
What are the essential ingredients needed to brew a beer like a Czech-style lager?
You will need crushed malt (like Pilsner malt) for fermentable sugars, hops (such as Saaz hops) for bitterness and aroma, and a specific lager yeast strain to ferment the beer.
What is bottle conditioning?
Bottle conditioning is the process where a small amount of sugar is added to bottles of beer before sealing. This allows residual yeast to ferment the sugar, producing natural carbonation and fizz in the beer.