Brewing your own lager at home might seem like a daunting task, usually conjuring images of intricate temperature-controlled fermentation chambers and months of cold conditioning. However, as the accompanying video demonstrates, you can craft a delicious, all-grain lager right on your kitchen stove with minimal equipment and without the traditional lagering process. This guide unpacks the method, offering deeper insights and practical advice for every aspiring homebrewer, even those with limited space.
Defying Tradition: Crafting a Kitchen Stove Lager Without Lagering
The very word “lager” stems from the German “lagern,” meaning “to store,” referring to the traditional cold storage period that defines this beer style. This extended cold conditioning, typically one to two months at temperatures between one and two degrees Celsius, is a cornerstone for achieving the characteristic crispness, clean flavor profile, and sparkling clarity associated with classic lagers. It allows yeast and other particles to settle out, while also mellowing harsh flavors and promoting a smoother, more refined taste.
Understanding Lagering: Tradition vs. Pragmatism
While purists might raise an eyebrow, the video boldly skips the lagering phase, fermenting the beer at room temperature like an ale. This pragmatic approach addresses a common pain point for homebrewers: a lack of dedicated fridge space for a five-liter demijohn or mini-keg for weeks on end. Imagine trying to fit a bulky fermenter into your everyday kitchen fridge for over a month—it’s often simply not feasible for apartment dwellers or those with small living spaces.
Traditional lagering essentially provides a “finishing school” for the beer. During this period, residual yeast consumes diacetyl (a buttery off-flavor) and acetaldehyde (green apple notes), while proteins and polyphenols flocculate, contributing to brilliant clarity. Skipping this means relying on other factors to achieve an acceptable result, as explored in this recipe.
The W34/70 Yeast Advantage: Room Temperature Fermentation
The secret to this “no-lager” lager lies in the choice of yeast: SafLager W34/70. This specific dry lager yeast strain is a workhorse, renowned for its versatility and ability to perform well across a broader temperature range than many other lager yeasts. While it truly shines in colder fermentation environments (typically 8-15°C), experiments have shown it can produce a remarkably clean profile even at warmer, ale-like temperatures (around 18-22°C), minimizing the production of fruity esters and other off-flavors commonly associated with warm fermentation of traditional lager yeasts.
Think of it like a highly adaptable chef who can cook delicious meals even with less-than-ideal kitchen conditions. This yeast reduces the need for precise temperature control, making it an ideal choice for the beginner brewer experimenting with a kitchen stove lager. It offers a bridge between the ease of ale brewing and the desired characteristics of a lager.
Your Kitchen, Your Brewery: Essential Equipment for Stove-Top Lagers
One of the beauties of this stove-top method is its reliance on everyday kitchen items, minimizing the initial investment. You don’t need a dedicated brewing setup to start. You can transform your kitchen into a functional brewhouse with just a few key additions.
Brewing Essentials
- Large Pots: You’ll need at least two, such as an 8-liter and a 5-liter, for heating water and boiling wort. These are the main vessels for your brew. Consider them your kettles, crucial for both mashing and boiling.
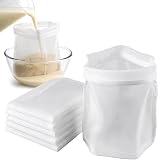
- Mashing Net: This simple, inexpensive mesh bag is a game-changer for all-grain brewing, acting like a giant tea bag for your malt. It contains the grains during mashing and simplifies the sparging process, making grain removal a breeze.
- Thermometer: Crucial for monitoring mash and cooling temperatures. Even a basic digital thermometer (often available for under three pounds) is sufficient to ensure accuracy during critical stages. Precision here is key; just a few degrees off can significantly impact your beer’s profile, much like baking.
- No-Rinse Sanitizer: This is arguably the most critical piece of “equipment.” Infection is the bane of any brewer, turning delicious wort into unpleasant vinegar. A no-rinse sanitizer simplifies the process, forming an invisible shield against unwanted microbes.
- Siphon: Essential for transferring your beer between vessels and into bottles without introducing oxygen or disturbing sediment. A pump-action siphon or an auto-siphon makes transfers effortless, preventing unwanted oxygen exposure which can stale your beer.
- Bottles or Mini-Keg: 500ml swing-top bottles are convenient, but any bottles rated for carbonation pressure (around 5 PSI) will work. A 5-liter mini-keg offers another excellent option, often providing better carbonation control and ease of serving.
- Funnel and Large Spoon: Simple, yet indispensable tools for transferring liquids and stirring the mash.
Non-Essentials & Smart Additions
- Bottled Water: While not strictly essential, using bottled water (or filtered water) can offer greater consistency, as tap water profiles vary widely and can impact beer flavor. It provides a clean slate for your recipe.
- Hydrometer: This allows you to measure the specific gravity of your wort before and after fermentation, letting you calculate the alcohol by volume (ABV) of your finished beer. It’s like having a progress report for your beer’s strength and fermentation efficiency.
- Spray Bottle: Filled with sanitizing solution, a spray bottle is perfect for quickly sanitizing small items or surfaces during the brew day.
- Ice: Two bags of ice are invaluable for rapid cooling of your wort after the boil. Speed is crucial here to prevent bacterial growth and the formation of off-flavors.
Crafting Your Brew: Ingredients for a Stove-Top Lager
An all-grain recipe puts you in control, allowing you to appreciate the transformation of simple raw materials into a complex beverage. For a 4.5-liter batch, this recipe keeps things elegantly simple.
The Malt Backbone: 100% Lager Malt
The foundation of this beer is 880 grams of 100% lager malt, typically Pilsner malt. This pale, low-kilned malt provides the fermentable sugars needed for alcohol production, alongside a light, biscuity base that allows the hop character and yeast profile to shine. It’s the canvas upon which your lager’s flavors are painted, contributing to a target ABV of around 5%.
Hops for Balance: The Saaz Profile and IBU
Saaz hops, 8 grams in this recipe, are a classic choice for lagers. Hailing from the Czech Republic, Saaz impart a noble, earthy, spicy, and floral aroma and flavor without being overly bitter. Hops are added at different stages of the 90-minute boil to achieve various effects:
- Early additions (e.g., 60 minutes): Contribute bitterness (alpha acids isomerize).
- Mid-boil additions (e.g., 30 minutes): Offer a balance of bitterness and flavor.
- Late additions (e.g., 5-10 minutes) or flameout: Primarily contribute aroma.
This recipe targets a bitterness of 15 IBU (International Bitterness Units). To put this in perspective:
- Budweiser and San Miguel: ~12 IBU (low bitterness)
- Heineken: ~22 IBU (medium bitterness)
- Stella Artois: ~30 IBU (higher bitterness for a lager)
At 15 IBU, this lager will offer a medium, balanced bitterness, enough to cut through the malt sweetness without overwhelming the palate. It’s a gentle handshake, not a punch, of bitterness.
Yeast: The Fermentation Engine
As discussed, SafLager W34/70 dry yeast (4.1 grams) is the star. It’s a highly respected lager yeast known for its reliable fermentation and clean flavor profile, even at warmer temperatures. Properly rehydrating your dry yeast can improve its performance, ensuring a healthy and robust fermentation.
The Finishing Touches: Finings and Carbonation
- Finings: Because this beer isn’t lagered, finings become incredibly useful for improving clarity. Finings, such as Mangrove Jack’s, are agents that help yeast and other particulate matter settle out of the beer more quickly, making your beer brighter and more visually appealing. They are added 24 hours before bottling, acting like tiny magnets that attract suspended particles.
- Carbonation Drops: These pre-portioned sugar drops (each around 3 grams of dextrose) simplify the bottling process by providing the exact amount of sugar needed for secondary fermentation in the bottle, producing natural carbonation. Alternatively, you can use priming sugar (dextrose) directly, but drops offer unparalleled convenience. Typically, you’d use one drop per 330ml bottle or two per 500ml.
The Brewing Process: Step-by-Step for a Perfect Lager (Almost)
Follow these steps closely, treating each stage as a critical component of your brewing operation. Attention to detail and hygiene are paramount.
Mashing: Extracting the Sugars
- Heat 4.5 liters of water in your larger pot and 4 liters in your second pot to 70°C.
- Fit the mashing net into the larger pot. Pour in 880 grams of lager malt. Stir thoroughly to break up any clumps, aiming for a consistent “porridge-like” consistency.
- Maintain the mash temperature as close to 64°C as possible for 60 minutes. This involves moving the pot on and off the heat and stirring every 10 minutes. This specific temperature range activates enzymes that convert starches in the malt into fermentable sugars, which the yeast will later consume. It’s like steeping tea, but for an hour, and with very precise temperature control.
Sparging: Rinsing for Efficiency
- After 60 minutes, lift the mashing net (with the spent grains) out of the pot and rest it on a rack or mesh over the pot.
- Use the 4 liters of hot water from your second pot (ensure it’s around 70°C) to slowly rinse the malt in the net. This process, called sparging, washes additional sugars from the grain bed into your brewing pot, maximizing your sugar extraction efficiency. The liquid collected is now called “wort.”
- Aim for a total wort volume of 6.5 liters.
The Boil: Hops, Sterilization, and Concentration
- Crank up the heat and bring your wort to a vigorous, rolling boil for 90 minutes. The boil sterilizes the wort, denatures unwanted enzymes, and concentrates the sugars.
- Add your Saaz hops at the predetermined intervals (refer to the video’s description for exact timings) to achieve your 15 IBU bitterness and desired aroma.
Cooling the Wort: The Race Against Infection
- Once the 90-minute boil is complete, remove the pot from the heat.
- Immediately place the pot into a sink filled with ice and water (an ice bath). Agitate gently to speed up cooling. Rapid cooling (chilling your wort from boiling to fermentation temperature as quickly as possible) is critical. This prevents the growth of wild yeasts and bacteria, which are particularly eager to infect warm, sugary wort, and also helps to set the “cold break” which aids in clarity.
- Chill the wort down to 22°C.
The Golden Rule: Meticulous Sanitization
From the moment your wort begins to cool, anything that touches it must be meticulously sanitized. This cannot be overstated. A single rogue microbe can ruin your entire batch. Sanitize everything: funnels, spoons, airlocks, bungs, siphon, bottles, and even your hands if they come into contact with the wort. Think of it as a sterile surgical environment for your beer. Prepare a sanitizing solution (warm water and no-rinse sanitizer powder) and soak all equipment.
Fermentation: The Yeast Takes Over
- Once cooled and sanitized, pour your wort through a sanitized funnel and mesh into your clean, sanitized demijohn (or fermenter). The mesh will catch any hop particulate or larger sediment.
- Aerate the wort by gently shaking the fermenter for a minute or two. This introduces oxygen, which the yeast needs for healthy cell reproduction before it switches to anaerobic fermentation (alcohol production).
- Add the 4.1 grams of SafLager W34/70 dry yeast. Shake again briefly to mix.
- Fit the sanitized bung and airlock (half-filled with sanitizing solution) onto the fermenter.
- Place the demijohn in a dark cupboard or similar area at room temperature for two weeks to ferment. Within a couple of days, you should observe bubbling in the airlock, a sign of active fermentation.
Bottling and Carbonation: The Final Stretch
- After two weeks of fermentation, it’s time to prepare for bottling. If you are using finings, add them 24 hours before you plan to bottle. Re-seal with the bung and airlock for this final day.
- Clean and sanitize all your bottles and the siphon thoroughly.
- Add carbonation drops to each bottle: one drop per 330ml bottle or two drops per 500ml bottle.
- Carefully siphon the beer from the fermenter into your bottles. Ensure the siphon hose reaches the bottom of each bottle to fill from the bottom up. This minimizes oxygen exposure, which can lead to stale flavors.
- Sanitize the bottle caps (or swing-top seals) and seal your bottles.
- Store the bottled beer in a dark place at room temperature for another two weeks. During this time, the yeast will consume the priming sugar, creating natural carbonation within the bottles.
Tasting the Fruits of Your Labor: Expectations and Reality
Two weeks later, your stove-top lager is ready to be tasted! The tasting session in the video offers an honest assessment of what to expect from this unique approach.
Clarity vs. Taste: A Brewer’s Perspective
Without the extended cold lagering period, you might expect some cloudiness, and indeed, the beer in the video exhibits a slight haze. This is completely normal and expected. For many homebrewers, clarity is secondary to taste and aroma. The use of finings helps significantly, but a perfectly crystal-clear lager usually demands time at cold temperatures. Don’t let a bit of haze deter you; often, the flavor remains uncompromised. It’s an analogy to a chef making a rustic, flavorful dish that isn’t perfectly plated but tastes incredible.
The Sweet Spot: Balancing Flavor and Fizz
The tasting panel notes a slight sweetness, balanced by a pleasant crispness, indicative of a final gravity around 1.008. While it won’t have the razor-sharp crispness of a traditionally lagered beer, it still offers a refreshing profile. Carbonation, too, can be a matter of personal preference. The recipe suggests one carbonation drop per 500ml bottle, but you might prefer a bit more fizz, which could be achieved with an extra drop or slightly more priming sugar.
The key takeaway from the tasting is that this stove-top creation is a genuinely decent, drinkable lager. It showcases that with the right yeast and careful execution, you can produce a satisfying beverage that impresses, even without a dedicated lagering fridge.
Beyond the Basics: The Path Forward for Your Homebrew Journey
This easy all-grain recipe for a stove-top lager serves as a fantastic entry point into the rewarding world of homebrewing. It demystifies the process, proving that great beer doesn’t require a commercial brewery or even a vast amount of specialized equipment. This journey is about experimentation, learning, and the simple joy of creating something delicious from scratch.
As the video hints, the next natural step is to compare this “non-lagered” version with one that undergoes traditional cold conditioning. This direct comparison will highlight the subtle differences that lagering imparts, providing invaluable experience for the budding brewer. Continue to refine your techniques, perhaps exploring different hop varieties, malt bills, or even other yeast strains to brew a lager that perfectly suits your palate. The comprehensive kit for this exact recipe, including malt, hops, finings, and carbonation drops, is available, making it easier than ever to embark on your own kitchen stove lager adventure.
Stovetop Sessions: Your Lager Brewing Q&A
What makes a beer a “lager”?
Traditionally, a lager is a type of beer that undergoes an extended period of cold storage, called “lagering.” This process gives lagers their characteristic crispness and clean flavor profile.
Can I brew a lager at home even if I don’t have special cold storage or complex equipment?
Yes, you can brew an all-grain lager right on your kitchen stove with minimal equipment. This method also allows you to skip the traditional cold lagering process.
What special ingredient allows me to ferment a lager at room temperature?
The secret ingredient is SafLager W34/70 dry yeast. This versatile strain can produce a remarkably clean lager profile even at warmer, room temperatures, unlike many other lager yeasts.
What are the most important pieces of equipment I’ll need to brew this stove-top lager?
Essential equipment includes large pots for heating and boiling, a mashing net for grains, a thermometer for temperature control, and no-rinse sanitizer to ensure hygiene throughout the process.