Every home brewer, from the novice to the seasoned veteran, shares a common goal: to craft exceptional beer while making the process as enjoyable and efficient as possible. The journey of brewing, though incredibly rewarding, often involves steps that can feel tedious or overly time-consuming. However, by adopting clever strategies and embracing innovative approaches, you can significantly streamline your brew day and enhance the overall quality of your final product.
In the accompanying video, Trent Musho of The Bru Sho shares five incredibly useful home brewing hacks designed to simplify your life and elevate your brewing game. These aren’t just minor adjustments; they are practical, real-world tips that can transform how you approach everything from equipment setup to flavor additions. Let’s delve deeper into each of these game-changing techniques, offering additional insights and expanding on why these particular hacks are so effective for brewers looking to save time, reduce effort, and consistently achieve excellent results.
Streamlining Your Brew Day with Smart Home Brewing Hacks
1. The Spigot Revolution: Ditch the Auto-Siphon for Good
One of the most common pain points for many home brewers is the cumbersome and often messy process of transferring liquid from one vessel to another. The traditional auto-siphon, while functional, can be prone to starting difficulties, introducing oxygen if not used perfectly, and adding another piece of equipment to clean. The video highlights a brilliant solution: installing spigots or ball valves on virtually all your brewing vessels, from kettles to fermenters. This simple modification dramatically simplifies liquid transfer, turning it into a gravity-fed operation that is both cleaner and more efficient.
Beyond easy transfers, a spigot on your fermenter offers another significant advantage: the ability to take small, precise samples without needing to open the lid. This minimizes the risk of exposing your precious wort or beer to oxygen, which can lead to off-flavors, or introducing unwanted microorganisms that could cause infection. Plastic spigots are indeed inexpensive and remarkably easy to install on plastic buckets or carboys, often requiring just a drill and a proper sealing washer. For those using stainless steel kettles or fermenters, while the installation of a ball valve might require a bit more effort and specialized tools, the long-term benefits in terms of ease of use and reduced cleaning are well worth the initial investment.
2. Sanitizer in a Spray Bottle: Your Spot-Sanitizing Secret Weapon
Maintaining a sterile environment is paramount in home brewing, as even the slightest contamination can ruin an entire batch. While full submersion sanitizing is essential for large items, the video points out that you frequently need to sanitize smaller items or surfaces quickly during your brew day. This is where a simple, one-dollar spray bottle filled with sanitizer solution becomes an absolute game changer. It enables instant spot sanitization, saving you time and reducing waste compared to preparing a fresh bucket of sanitizer every time you need a quick spray.
Imagine you’re transferring wort and a piece of tubing accidentally touches a non-sanitized surface; a quick spray can rectify the situation immediately. Sealing your fermenter lid? A spritz on the gasket ensures it’s clean. Handling small parts like airlock stoppers or stoppers? The spray bottle provides immediate peace of mind. A key tip highlighted in the video is to use distilled water when mixing your sanitizer solution, as this prevents mineral deposits and significantly extends the shelf life of the solution, ensuring it’s always ready for action when you need it most.
3. PBW for Labels and Beyond: The Cleaning Powerhouse
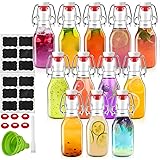
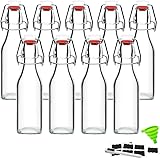
For many home brewers who opt to reuse glass bottles, the chore of removing old labels can be a maddening, hours-long scraping ordeal. Soaking bottles in hot water sometimes helps, but often leaves stubborn adhesive residue. The video introduces PBW (Powdered Brewery Wash) not just as an excellent internal bottle cleaner, but as a magical solution for effortless label removal. This specialized cleaner contains components that break down both organic soils and adhesives, making label scraping a thing of the past.
The process is incredibly simple: soak your used bottles in a hot PBW solution for approximately 15 minutes. After this brief soak, labels—even the most tenacious ones—often just slide right off with minimal effort, leaving behind a clean, residue-free surface ready for your next bottling day. This hack not only saves immense time and frustration but also ensures your bottles are impeccably clean inside and out, reducing any risk of off-flavors or infection from residual grime. Many brewers find it efficient to store up a batch of used bottles and then perform a large-scale cleaning and de-labeling session, optimizing the use of their PBW solution.
4. Optimizing Your Brewing Process: Shorter Mash and Boil Times
Fitting a full brew day into a busy schedule can be challenging, as traditional brewing protocols often suggest mash times of 60-90 minutes and boil times of 60 minutes or more. These periods, primarily dedicated to waiting, contribute significantly to the total brew day length, which can easily stretch to five or more hours. The video challenges these conventions, suggesting that through research and practical experience, you can safely shave time off both your mash and boil without compromising beer quality.
Understanding Mash Efficiency and Boil Dynamics:
- The Mash: Modern malts are highly modified, meaning the enzymes needed for starch conversion are readily accessible. The video correctly notes that a significant portion of the starch-to-sugar conversion happens within the first 20 minutes of the mash. While reducing mash length might slightly decrease mash efficiency (meaning you extract fewer sugars from your grains), this can be easily compensated for by simply adding a small amount of extra grain to your recipe. The time savings gained are often well worth this minor adjustment in grain bill.
- The Boil: The primary functions of the boil are hop isomerization (converting alpha acids into bittering compounds), sterilization, enzyme deactivation, and concentrating the wort through evaporation. The exact boil length can be adjusted based on your desired bitterness and the volume you need to boil off. If you shorten your boil, you might get slightly less bitterness from your hops, but this, too, can be easily counteracted by adding a few more hop pellets to achieve your target IBU (International Bitterness Units). Experimenting with shorter boils, perhaps 30-45 minutes, can drastically cut down your brew day without a noticeable difference in the final beer’s character, providing more time for other tasks or simply enjoying your day.
5. Precise Flavor Additions: The Dosing Syringe Method
Adding adjunct flavors like fruit extracts, tinctures, or spices to beer can be a delicate balancing act. The “wing it” approach, though common, often leads to either an overpowering flavor that masks the beer’s base profile or an underwhelming addition that goes unnoticed. Nothing is worse than dedicating hours to brewing a great beer only to ruin it with an overzealous flavor addition. The video introduces a professional-level hack for home brewers: using dosing syringes for precise flavor adjustments.
This method involves pulling several small, equal samples of your finished beer, then using a precise dosing syringe to add measured milliliters of your chosen flavor extract to each sample. By creating a spectrum of dosages in these small samples, you can taste and identify the exact ratio that achieves the perfect flavor balance. Once you’ve found your ideal dose, you simply scale that ratio up to the total volume of your batch. This eliminates the guesswork, prevents costly mistakes, and ensures that your hard work results in a perfectly flavored beer every single time. It’s an invaluable technique for anyone looking to experiment with new ingredients or consistently replicate successful recipes.
Bonus Hack: Build an Inexpensive Small Fermenter
The video concludes with a fantastic bonus tip for any brewer looking to expand their skills and experiment without committing a large batch to a new recipe: creating an inexpensive, small-volume fermenter for under $10. Having a dedicated small fermenter allows you to test new hop varieties, yeast strains, or adjunct combinations on a smaller scale, minimizing risk and maximizing learning. This is one of the greatest ways to improve your skills as a brewer, enabling rapid iteration and discovery of what works best for your palate and your system. Crafting your own budget-friendly fermenter frees you from the limitations of only brewing full-sized batches and encourages continuous innovation in your home brewing endeavors.
Hacking Homebrew: Your Queries Decrypted
Why should I install a spigot on my brewing vessels?
Installing spigots makes transferring liquids much easier and cleaner, turning it into a simple gravity-fed process. It also lets you take small samples from your fermenter without exposing your beer to oxygen.
How can a spray bottle help with sanitization during brewing?
A spray bottle filled with sanitizer allows for quick, on-the-spot sanitization of small items or surfaces. This saves time and ensures your equipment remains sterile throughout your brew day.
What is PBW, and how can it help with reusing bottles?
PBW (Powdered Brewery Wash) is a specialized cleaner that effortlessly removes stubborn labels and adhesive residue from used glass bottles. Soaking bottles in a hot PBW solution makes labels slide right off, preparing them for reuse.
Can I shorten my brewing time, specifically the mash and boil stages?
Yes, you can often safely reduce mash and boil times without compromising your beer’s quality, as modern malts convert quickly and boil functions can be achieved efficiently. This significantly cuts down the total time needed for your brew day.