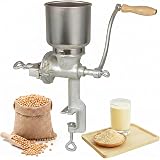
Setting up a new VEVOR All-in-One Brew Kettle for an all-grain brew day is a straightforward process that can significantly streamline your homebrewing experience. As seen in the accompanying video, the initial setup focuses on preparing the equipment for mashing in and ensuring a smooth start to your brew day. This guide will elaborate on these crucial steps, offering a deeper dive into component assembly, operational considerations, and how to maximize the efficiency of your VEVOR system.
All-in-one brewing systems, such as the VEVOR kettle, have gained immense popularity among homebrewers for their compact design and integrated functionality. These units typically combine a heating element, a pump for recirculation, and a grain basket, making the transition to all-grain brewing more accessible and manageable. Understanding each part and its role is key to a successful brew day.
1. Preparing for Your Brew Day: Water, Weather, and Recipe
Effective preparation is fundamental to any successful brew day, and this often begins with heating your water. It is observed in the video that cold water is used, with a target temperature of 154 degrees Fahrenheit being aimed for. Starting with cold water allows for a controlled ramp-up to strike temperature, and utilizing the full wattage of the VEVOR kettle ensures this process is efficient.
Brewing outdoors, as demonstrated in the video, is a practical solution for many homebrewers. This approach can help manage the distinct aromas of mashing and boiling, which some household members might find strong. On February 4th, with Michigan weather showing an unseasonably warm 45 degrees Fahrenheit and sunshine, the choice to brew outside was an excellent one, especially considering January’s noted low of just 23 hours of sun – approximately 8% of the month. Environmental factors like temperature and wind can impact heat retention, making a lid essential to maintain consistent temperatures and reduce heating times.
For this specific brew day, a “Moose Brown Ale” recipe from MoreBeer! was selected, calling for 6 gallons of water. The grain bill for this delicious beer includes a blend of malts designed to create a rich, flavorful brown ale: 9 pounds of two-row malt forms the base, providing fermentable sugars. Complementing this are 4 ounces of pale chocolate malt for color and subtle roasted notes, 4 ounces of caramel malt for body and sweetness, and 2 ounces of midnight wheat for deeper color without imparting excessive astringency. Understanding your recipe’s water volume and grain components is crucial for precise execution.
2. Deconstructing the VEVOR All-in-One Brew Kettle Components
Before assembly, it is beneficial to familiarize oneself with the core components of the VEVOR brew kettle, as each plays a vital role in the brewing process:
2.1. The Main Kettle
This is the primary vessel where water is heated, mashing occurs, and wort is ultimately boiled. It houses the heating element and connections for the pump and temperature probe. Its robust construction is designed to withstand the rigors of heating and boiling large volumes of liquid.
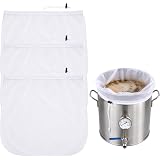
2.2. The Grain Basket
Often referred to as the “all-grain bin,” this perforated basket holds the crushed grains during the mash. It is designed to sit suspended within the main kettle, allowing hot water to circulate through the grain bed while preventing the grains from entering the pump or heating element. Its design, with side hooks, facilitates easy lifting and draining.
2.3. Screens and Supports
-
Bottom Screen: This screen forms the base of the grain basket, preventing grains from falling through. It is secured by a threaded nut at the bottom of a central rod. A lip on this screen is designed to face downwards to ensure a snug fit and proper drainage.
-
Top Screen (Recirculation Screen): Placed on top of the grain bed once the grains are mashed in, this screen helps to evenly disperse the recirculating wort. This ensures a more consistent mash temperature and improved extraction efficiency.
-
Central Rod and Cap: The central rod extends through the grain basket, connecting the bottom screen. A cap is placed on top of this rod during mashing to prevent grains from inadvertently entering the recirculation pipe, which could lead to blockages or inefficiencies.
2.4. The Integrated Pump
A key feature of all-in-one systems, the pump is used to recirculate wort during the mash, ensuring even temperature distribution and efficient sugar extraction. It is also instrumental in transferring the finished wort out of the kettle and into your fermenter.
3. Step-by-Step VEVOR Brew Kettle Assembly for Mashing
Once you have a good understanding of each component, assembly becomes intuitive. The process is designed for efficiency, ensuring your system is ready for the mash.
3.1. Assembling the Grain Basket
The first step involves preparing the grain basket for your malt. The central rod is inserted through the bottom of the grain basket, and the screen is placed over its threaded end inside the basket. A retaining nut is then threaded onto the rod from below, securing the screen in place. It is important to ensure the lip of the screen faces downwards, creating a secure seal against the basket’s internal rim. Concerns about sharp edges on these screens are sometimes mentioned by users; while the speaker in the video has not been cut, careful handling or wearing gloves during assembly is always a sensible precaution to prevent any nicks or scrapes.
3.2. Positioning the Grain Basket in the Kettle
With the bottom screen securely attached, the fully assembled grain basket is carefully lowered into the main VEVOR kettle. It must be ensured that the basket seats properly on the internal lip designed to support it. This critical step ensures the basket is elevated, allowing water to circulate freely beneath it and preventing direct contact between grains and the heating element. Placing the cap on the central rod within the basket at this stage prevents any grain particles from falling into the recirculation pipe once the grains are added.
3.3. Initial Water Heating and Grain Addition
Prior to adding grains, the required volume of cold water (6 gallons for the Moose Brown Ale) is added to the kettle. The lid is then securely placed on the kettle to facilitate rapid heating to the target strike temperature, especially when brewing in cooler outdoor conditions. Once the water approaches the target temperature (e.g., 154 degrees F), the grains can be mashed in. This involves slowly adding the crushed malt to the hot water in the grain basket, stirring thoroughly to eliminate dough balls and ensure all grains are fully saturated. This careful addition helps achieve optimal starch conversion.
3.4. Setting Up for Recirculation
After the grains have been mashed in, the top screen is placed over the grain bed. This screen helps to create an even flow of wort during recirculation. The recirculation hose from the pump is then positioned to drip or spray wort over the center of this screen. The pump is activated to gently draw wort from beneath the grain basket, through the external piping, and return it to the top of the grain bed. This continuous flow ensures consistent mash temperatures, clarifies the wort by filtering it through the grain bed, and helps to rinse sugars more efficiently, contributing to a higher mash efficiency.
4. Understanding Post-Boil Oxygenation
While the video primarily focuses on the initial setup, an important point regarding oxygenation during wort transfer is highlighted. When the pump is used to transfer the cooled wort from the brew kettle into the fermenter, it is perfectly acceptable for oxygen to be introduced, creating bubbles and foam. This initial aeration is highly beneficial because yeast, upon pitching, requires oxygen to multiply and conduct a healthy fermentation. The oxygen aids in sterol synthesis, which strengthens yeast cell walls, leading to a more complete and robust fermentation. Many brewers will purposefully aerate their wort at this stage through various methods, including splashing, using an aeration stone, or even dedicated oxygen systems.
However, it is critically important to cease adding oxygen once fermentation has actively begun and alcohol has been produced. Introducing oxygen to fermented beer (or wort post-fermentation) can lead to oxidation, which results in undesirable off-flavors such as cardboard, sherry, or stale notes. Therefore, careful handling is advised when transferring from a primary fermenter to a secondary, or into a bottling bucket or keg, to minimize any exposure to oxygen at those later stages.
By understanding these operational nuances and following a structured setup, brewers using the VEVOR All-in-One Brew Kettle can ensure a productive and enjoyable brew day, from heating water to the final wort transfer, all contributing to crafting excellent homebrewed beer.
Brewing Up Answers: Your VEVOR Brew Kettle Q&A
What is a VEVOR All-in-One Brew Kettle?
It is a compact brewing system that integrates a heating element, a pump for recirculation, and a grain basket into one unit. This design makes all-grain homebrewing more accessible and manageable.
What is the purpose of the grain basket in the VEVOR kettle?
The grain basket holds the crushed grains during the mash, allowing hot water to circulate through them to extract sugars. It prevents grains from entering the pump or heating element.
What does the integrated pump do in the VEVOR brewing system?
The pump is used to recirculate wort during the mash, ensuring even temperature distribution and efficient sugar extraction. It also helps transfer the finished wort out of the kettle.
What is the first step when preparing for a brew day with the VEVOR kettle?
The first step is to add the required volume of cold water to the kettle and begin heating it to your recipe’s target strike temperature. Using the lid helps heat the water efficiently.
Is it okay for oxygen to get into the wort when transferring it to the fermenter?
Yes, it is perfectly acceptable and beneficial for oxygen to be introduced when transferring cooled wort to the fermenter. Yeast requires oxygen at this stage to multiply and conduct a healthy fermentation.