Embarking on the journey of homebrewing can seem like a complex endeavor, filled with intimidating terminology and specialized equipment. Many aspiring brewers are eager to create their own delicious beer but often feel overwhelmed by where to begin. Fortunately, starting your homebrewing adventure does not have to be complicated, and with the right resources, anyone can craft excellent beer right from their kitchen.
As you may have gathered from the insightful video above, one of the most accessible and rewarding paths for beginners is through high-quality beer kits. Specifically, the Brewferm Beer Kits from Belgium stand out as an exceptional choice for novices. These kits simplify the brewing process considerably, allowing you to focus on the essential steps without getting bogged down by intricate ingredient measurements or advanced techniques.
Discovering the Excellence of Brewferm Beer Kits for Homebrewing Enthusiasts
Brewferm Beer Kits are highly regarded within the homebrewing community for their superior quality and the authentic flavors they produce. Unlike some generic kits that may offer a universal yeast strain for all styles, Brewferm provides specific yeast strains carefully selected to complement each unique beer profile. This meticulous attention to detail ensures that every batch you brew aligns perfectly with its intended style, capturing the true essence of Belgian brewing tradition.
The variety available within the Brewferm range is truly impressive, catering to a wide array of taste preferences. Whether you are drawn to crisp, refreshing options or rich, complex brews, there is a kit to match your desires. These include:
- Belgian Witbier
- Refreshing Saisons
- Classic Blondes
- Fruity Cherry Ale
- Distinctive Raspberry Ale
- Traditional Special Belge
- Bright Golden Ale
- Robust Imperial Stout
- Smooth English Porter
- Hoppy IPA
Furthermore, these kits offer flexibility in batch size, ranging from approximately 9 liters to 20 liters. This variation allows you to choose a volume that best suits your needs, whether you are experimenting with a new style or brewing a larger quantity of a proven favorite. The thoughtful design of Brewferm kits demonstrates a genuine commitment to helping you create genuinely good beer, full of character and flavor.
Essential Homebrewing Equipment: Your Starter Pack for Brewferm Beer Kits
To successfully embark on your homebrewing journey with Brewferm Beer Kits, a basic set of equipment is necessary. Fortunately, many starter kits bundle these essential items, providing everything you need to get going. Each piece plays a crucial role in ensuring a smooth and successful brewing process, making your experience enjoyable and efficient.
Here are the fundamental tools you will typically find in a beginner’s brewing setup:
- **Fermentation Bucket:** This primary vessel is where your beer will ferment, transforming sugars into alcohol.
- **Airlock:** Essential for fermentation, an airlock allows carbon dioxide to escape while preventing unwanted oxygen and contaminants from entering your brew.
- **Tap:** Attached to the fermentation bucket, this facilitates easy sampling and transfer of your beer.
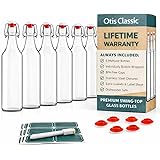
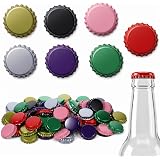
- **Capper & Caps:** Used for sealing your bottled beer, ensuring proper carbonation and freshness.
- **Sterilizer:** An indispensable component for cleaning and sanitizing all your brewing equipment, which is critical for preventing infection.
- **Bottle Brush:** Designed for thoroughly cleaning bottles before sterilization, preparing them for bottling your finished beer.
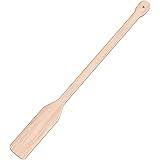
- **Beer Paddle:** A long-handled utensil used for mixing ingredients within the fermentation bucket, ensuring even distribution.
Acquiring these basic items provides a solid foundation, allowing you to focus on the brewing process itself rather than scrambling for individual components. These tools are designed to be user-friendly, making your initial brewing experiences straightforward and enjoyable.
Understanding the Core Components of Your Brewferm Beer Kit
When you open a Brewferm Beer Kit, you will discover the concentrated ingredients that form the foundation of your delicious homebrew. Understanding these components is key to appreciating the simplicity and effectiveness of kit brewing. These expertly formulated ingredients are designed to give you a head start, eliminating many of the complexities associated with all-grain brewing.
Firstly, the kit contains 1.5 kg of liquid malt extract (LME). This viscous liquid is essentially a concentrated form of wort, which is the sugary liquid extracted from malted grains that will become beer. Importantly, Brewferm’s LME often includes an isomerized hop solution already incorporated. This means the bitterness and hop flavor are pre-infused, removing the need for you to manage hop additions or complex boiling schedules during the initial stages.
Secondly, each kit provides a specific strain of brewer’s yeast, carefully selected for the particular beer style you are brewing. Yeast is a living microorganism responsible for fermentation, consuming the sugars in the wort and producing alcohol and carbon dioxide. The advantage of Brewferm using style-specific yeast cannot be overstated; it ensures that your beer develops the authentic esters and phenols characteristic of, for example, a Belgian blonde or a robust stout, rather than a generic flavor profile.
Enhancing Your Brew: Navigating Sugar Additions for Brewferm Kits
Enhancers play a vital role in adjusting the fermentable sugar content of your wort, which directly impacts the alcohol by volume (ABV) and body of your finished beer. For those just starting with Brewferm Beer Kits, the simplest and most recommended enhancer to begin with is dextrose, commonly known as brewing sugar. Using 1 kilogram of dextrose is a straightforward approach that provides reliable results for many kits.
Dextrose is a pure fermentable sugar, meaning the yeast readily converts it into alcohol without leaving behind much residual flavor or body. This makes it an ideal choice for beginners who want predictable outcomes and clean-tasting beer. The use of a full kilogram of dextrose also offers a practical advantage: any excess can be saved for bottle priming later, which is the process of adding a small amount of sugar to bottles to create carbonation.
While dextrose is an excellent starting point, other enhancers offer opportunities to fine-tune your beer as you gain experience. Brew Enhancer One, for instance, is a blend of dextrose and maltodextrin. Maltodextrin is a non-fermentable sugar that adds body and mouthfeel to the beer without increasing the alcohol content significantly. Brew Enhancer Two further expands on this by combining maltodextrin, dextrose, and spray malt, offering an even richer body and malt character. For those seeking the fullest malt flavor, using spray malt (dried malt extract) alone provides a more complex and authentic malt profile, though it is usually recommended for brewers who have a few batches under their belt and understand its impact on the beer’s final taste and body.
Mastering the “SAT” Principles: Sterilization, Aeration, and Temperature Control
Achieving consistently good homebrew relies heavily on mastering three fundamental principles, which can be easily remembered by the acronym “SAT”: Sterilization, Aeration, and Temperature control. Adhering to these guidelines with your Brewferm Beer Kits will drastically increase your chances of brewing a fantastic batch every time, minimizing common beginner mistakes.
1. Sterilization: The Golden Rule of Homebrewing
Sterilization is arguably the most critical step in homebrewing. Any equipment that comes into contact with your wort or beer after boiling must be thoroughly cleaned and sanitized. Microbes such as wild yeasts and bacteria are ubiquitous, and if they enter your brew, they can quickly infect it, leading to off-flavors, sourness, or even spoilage. A good quality sterilizer, often included in starter kits, effectively eliminates these unwanted organisms, creating a clean environment for your brewer’s yeast to thrive. Remember, cleanliness is paramount; even a seemingly clean surface can harbor invisible contaminants capable of ruining an entire batch.
2. Aeration: Fueling Your Yeast for a Strong Start
Aeration refers to introducing oxygen into your wort before pitching the yeast. While oxygen is generally detrimental to finished beer, it is crucial for yeast health at the very beginning of fermentation. Yeast cells require oxygen to reproduce robustly and prepare for the anaerobic process of converting sugars into alcohol. After adding the liquid malt extract and enhancer to water, a vigorous stirring of the wort introduces sufficient oxygen. This initial oxygen boost helps the yeast establish a strong, healthy colony, which leads to a more complete and efficient fermentation, contributing to a better-tasting beer.
3. Temperature Control: Guiding Your Fermentation Journey
Maintaining a stable and appropriate fermentation temperature is essential for producing high-quality beer. Yeast strains have specific temperature ranges in which they perform optimally, and deviations can lead to undesirable results. Too high a temperature can cause the yeast to ferment too quickly, producing excessive off-flavors like harsh alcohols or fruity esters that do not suit the style. Conversely, temperatures that are too low can lead to sluggish or stalled fermentation, leaving behind unfermented sugars and a sweet, unfinished beer. Aim to keep your fermenter in a stable environment, ideally around the temperature recommended for your specific Brewferm kit’s yeast strain, typically found in the kit instructions. Consistent temperature ensures the yeast works happily and produces the clean, desired flavors for your beer style.
Brewing Your First Brewferm Beer Kit: A Step-by-Step Guide
With your equipment sterilized and the “SAT” principles in mind, brewing your first Brewferm Beer Kit becomes a straightforward and enjoyable process. Following these steps will guide you from concentrated malt extract to a fermenting batch of delicious beer, ready to transform.
1. Preparing the Liquid Malt Extract
Firstly, begin by softening the liquid malt extract (LME) can in a sink or bucket of warm water. Aim for the water to be around 40 degrees Celsius (approximately 104 degrees Fahrenheit); this warmth reduces the LME’s viscosity, making it much easier to pour and rinse from the can. This simple preparation ensures you get every last drop of the valuable extract into your fermenter, maximizing your yield.
2. Assembling and Sterilizing Your Fermenter
Next, assemble your fermentation bucket by attaching the tap and ensuring both seals are correctly in place, one on the inside and one on the outside of the bucket. It is a wise practice to perform a water test at this stage by filling the bucket with water and checking for any leaks around the tap. Once confirmed watertight, thoroughly clean and sterilize the fermenter, lid, airlock, paddle, and any other utensils that will come into contact with your wort. This critical step prevents unwanted microbial contamination.
3. Mixing the Wort and Adding Enhancer
Now, open the LME can using a can opener and pour the softened contents into your sterilized fermentation bucket. Carefully rinse the can out with a small amount of boiled water, ensuring all the malt extract is transferred. Add your chosen enhancer, typically 1 kilogram of dextrose for beginners, into the bucket with the LME. Pour in an initial batch of warm water, then thoroughly mix the ingredients with your sanitized beer paddle until the malt extract and sugar are fully dissolved. Finally, top up the bucket with cool water to the specified volume mark for your kit, which could be 9 liters or 20 liters, depending on the kit’s instructions. This creates your “wort” or unfermented beer.
4. Measuring Starting Gravity (Optional for Beginners)
While not strictly necessary for your very first brew, measuring the starting gravity (SG) with a hydrometer is an important step for those interested in calculating their beer’s alcohol content. Starting gravity measures the density of sugars in your wort before yeast is added. To do this, take a sample of your mixed wort, allow it to cool, and then float your sterilized hydrometer in it, reading the number at the liquid’s surface. This reading will be compared to a final gravity reading later to determine ABV. Videos specifically on hydrometer use are available on the channel for further guidance.
5. Pitching the Yeast and Initial Aeration
After measuring the starting gravity, or once your wort is thoroughly mixed, give it a final vigorous stir with your sanitized paddle. This vital step introduces oxygen into the wort, which is essential for healthy yeast reproduction during the initial phase of fermentation. Then, carefully open the packet of style-specific yeast from your Brewferm kit, ensuring your scissors or knife and the packet exterior are sterile. Sprinkle the yeast evenly over the surface of the aerated wort. Do not stir it in; the yeast will hydrate and begin its work naturally.
6. Sealing the Fermenter and Monitoring Fermentation
Securely place the lid on your fermenter, ensuring it forms a tight seal, and insert the airlock. Fill the airlock halfway with water to create a barrier that allows carbon dioxide to escape while blocking oxygen and contaminants. Position your fermenter in a location where the temperature is stable and within the recommended range for your yeast, typically around 18-22 degrees Celsius (64-72 degrees Fahrenheit). Within 12-48 hours, you should observe bubbles emerging from the airlock, indicating active fermentation. This therapeutic bubbling sound signifies that the yeast is consuming the sugars and producing alcohol and carbon dioxide, a process that typically lasts around five days for most Brewferm Beer Kits.
Bringing Your Brew to Life: Packaging and Conditioning Your Homebrew
Once primary fermentation has completed, the final stages involve packaging your beer and allowing it to condition, a crucial period where flavors mature and carbonation develops. These steps are as important as the brewing itself, ensuring your efforts culminate in a truly enjoyable beverage.
1. Confirming Fermentation Completion and Measuring Final Gravity
After approximately five days, or when bubbling in the airlock has significantly slowed or ceased, it is time to check if fermentation is complete. Take a sample of your beer from the fermenter’s tap and measure its final gravity (FG) using your sterilized hydrometer. If the reading remains stable over two consecutive days, it indicates that the yeast has consumed all the fermentable sugars. This final gravity reading, combined with your starting gravity, allows you to calculate the precise alcohol by volume (ABV) of your homemade beer using an online calculator.
2. Priming for Carbonation
To achieve natural carbonation in your packaged beer, a small amount of priming sugar is added just before bottling or kegging. The yeast that remains in the beer will consume this sugar, producing carbon dioxide that dissolves into the liquid, creating effervescence. The exact dosage rate for priming sugar will be detailed in your Brewferm Beer Kit instructions, whether you are bottling or using a 5-liter maturing barrel. It is crucial to follow these guidelines precisely to avoid over or under-carbonation, which can impact both flavor and safety.
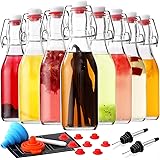
3. Packaging Your Beer
You have two main options for packaging your freshly brewed beer. The most common method involves bottling, which requires thoroughly cleaned and sterilized bottles, caps, and a capper tool. Carefully transfer your beer from the fermenter into the bottles, leaving adequate headspace, and then securely cap them. Alternatively, you can utilize specialized 5-liter maturing barrels, which offer a convenient way to store and dispense your beer. Whichever method you choose, ensuring all equipment is meticulously sterilized during this transfer is paramount to prevent any last-minute contamination that could spoil your efforts.
4. Conditioning Your Beer
After packaging, your beer needs to undergo a conditioning period, typically lasting one to two weeks, sometimes longer for certain styles. During this time, the yeast ferments the priming sugar, generating carbon dioxide and naturally carbonating the beer. Furthermore, flavors will meld and mature, any harshness will mellow, and the overall profile of your beer will become more refined and pleasant. Store your packaged beer in a cool, dark place during conditioning. Once this period is complete, your delicious homebrew is ready to be chilled and enjoyed, showcasing the quality and flavor achievable with Brewferm Beer Kits.
Hopping Into Homebrew: Your BrewFerm Beginner Q&A
What are Brewferm Beer Kits?
Brewferm Beer Kits are high-quality kits from Belgium designed to simplify homebrewing, especially for beginners. They help you easily brew delicious, authentic Belgian-style beer at home.
What essential equipment do I need to start homebrewing?
You’ll need basic items like a fermentation bucket, an airlock, a tap, a capper and caps for bottling, a sterilizer, and a beer paddle. Many beginner kits include all of these essential tools.
What main ingredients come inside a Brewferm Beer Kit?
Each Brewferm kit typically contains concentrated liquid malt extract (LME), often with hops already mixed in, and a specific strain of brewer’s yeast tailored for that beer style.
Why is it important to sterilize equipment when homebrewing?
Sterilization is crucial to prevent unwanted microbes, like wild yeasts and bacteria, from infecting your beer. These contaminants can cause off-flavors, sourness, or spoil your entire batch.
What is the easiest type of sugar to add to my Brewferm kit?
For beginners, dextrose, also called brewing sugar, is the simplest and most recommended enhancer. It provides reliable results and ensures a clean-tasting beer without adding complex flavors.