Discovering Essential Homebrew Beer Equipment for Every Brewer
Are you ready to embark on the rewarding journey of crafting your own beer, but feel overwhelmed by the sheer volume of homebrew beer equipment available? Whether you are brewing your very first batch or contemplating an upgrade to an all-grain system, understanding the necessary tools is paramount. This article serves as a comprehensive guide, building upon the insights shared in the accompanying video, to help you navigate the world of brewing supplies, ensuring you have everything required for a successful and enjoyable brewing experience. We will explore both the fundamental items that every beginner needs and the advanced gear that can elevate your brewing to professional levels.Basic Homebrew Essentials: Starting Your Brewing Journey
Initiating your homebrewing adventure requires a foundational set of equipment, which primarily focuses on boiling, fermenting, and sanitizing your brew. The most indispensable item on this list is a quality brewing kettle. Imagine if you tried to cook a gourmet meal without a proper pot; similarly, your kettle is the heart of your brew day. For beginners, a 4-gallon kettle, often available for around $20 at local stores, is perfectly adequate for partial mash or extract batches, allowing room for boiling while preventing boil-overs. For those aiming for larger 5-gallon batches from the outset, a 10-gallon kettle offers ample space and prevents the need for adding additional water to reach volume later. Once your wort is prepared, proper measurement and fermentation become critical steps. A refractometer is a handy, quick tool for measuring the sugar content (gravity) of your unfermented wort. However, it is crucial to remember that refractometers are not entirely accurate for measuring final gravity in alcoholic solutions without specific calibration over multiple batches, as alcohol affects the light refraction. Consequently, a hydrometer, which measures specific gravity directly by floating in a liquid sample, remains the gold standard for precise pre- and post-fermentation readings, allowing you to accurately calculate your beer’s alcohol by volume (ABV). Furthermore, securing a robust fermenter, typically a food-grade plastic bucket or glass carboy with a drilled lid and a 3/8-inch grommet, is essential for housing your beer during its transformation. An airlock, inserted into the lid, creates a one-way valve, allowing CO2 to escape while preventing airborne contaminants from entering, thereby protecting your precious brew. Maintaining impeccable cleanliness throughout the entire process is non-negotiable; sanitation is truly 90% of brewing good beer. Products like Star San, a popular no-rinse, acid-based sanitizer, effectively kill microorganisms without leaving harmful residues, making it ideal for all your brewing equipment. Conversely, while bleach can be used, it demands meticulous rinsing to avoid off-flavors and potential health risks. A reliable thermometer, such as an electric probe model, also becomes invaluable for accurately monitoring wort temperatures during various stages, especially when steeping grains or pitching yeast, as precise temperature control significantly impacts yeast health and fermentation characteristics. Finally, investing in a small storage tote to keep all your smaller basic homebrew beer equipment organized, like airlocks, hydrometers, and thermometers, will streamline your brew days considerably.Upgrading Your Brewing Setup: Efficiency and Quality Enhancements
As your passion for homebrewing deepens, you may find yourself desiring more control, efficiency, and consistency in your beer production. Transitioning from extract brewing to all-grain home brewing, for instance, introduces new equipment needs that significantly enhance your brewing capabilities. One notable upgrade is the wort chiller, an essential piece of advanced brewing equipment designed to rapidly cool your hot wort from boiling temperatures down to yeast pitching temperature. Imagine a scenario where you have just finished a lengthy boil, and instead of waiting hours for your wort to cool naturally, an immersion wort chiller can bring a 5-gallon batch down to temperature in 30 minutes to an hour by circulating cold water through a coiled copper or stainless steel tube submerged in the wort. This quick cooling is vital for achieving a good “cold break,” which helps clarify the beer, and for preventing the growth of unwanted bacteria that thrive in warm wort. For those venturing into all-grain brewing, where you extract sugars directly from malted barley, a mash tun becomes an indispensable item among your beer brewing supplies. Typically, a converted 10-gallon insulated cooler serves this purpose perfectly, maintaining the precise temperatures required for enzymatic conversion of starches into fermentable sugars during the mash process. This cooler is modified with a ball valve and a tube filter, often referred to as a “false bottom” or “manifold,” at the bottom to separate the liquid wort from the spent grains. The tube filter is especially critical, ensuring that the grain bed does not clog the valve as you perform a “vorlauf”—recirculating the wort to clarify it—or drain the wort into your boil kettle. Furthermore, a sturdy stirring stick, larger than a typical kitchen ladle, becomes essential for thoroughly mixing grains in a larger mash tun, ensuring an even temperature distribution throughout the grain bed. Beyond the brewing process itself, upgrading your bottling and transfer methods can dramatically improve efficiency and reduce potential messes. An auto siphon, when paired with a bottling wand, transforms bottling day from a tedious chore into a swift operation. This spring-loaded device starts the flow of beer easily, and the bottling wand automatically stops the flow when lifted from the bottle, preventing spills and making it simple to fill each bottle to the correct level. This advanced homebrew equipment greatly minimizes beer exposure to oxygen, which can cause undesirable off-flavors. These enhancements collectively represent a significant step up, providing more control over your brewing process and ultimately leading to higher-quality, more consistent results with your homebrew.Bottling, Kegging, and Sourcing Your Brewing Gear
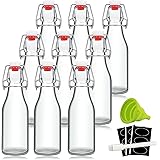
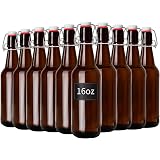
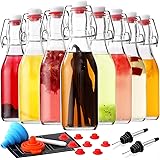
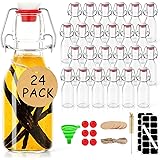
Once your beer has fermented, the next crucial step is packaging, whether through bottling or kegging, both of which require specific homebrew equipment. If bottling, you will need a supply of clean, reusable bottles, such as old Guinness bottles, which can be sterilized by running them through a dishwasher or boiling them. A bottle tree is an ingenious device that allows cleaned bottles to drain and air-dry efficiently, ensuring they are free of sanitizing solution residues and ready for filling. For thorough sanitation, a bottle cleaner, which sprays sanitizing solution directly into each bottle with a simple push, makes quick work of preparing many bottles. Furthermore, bottle caps and a reliable bottle capper are necessary to seal your beer airtight, preserving its freshness and carbonation. The final touch for bottled beer is priming sugar, which is added just before bottling to provide the yeast with a small amount of sugar for a secondary fermentation, creating natural carbonation within the sealed bottles. For those seeking a more advanced and convenient packaging solution, kegging represents a significant upgrade from traditional bottling. The video highlights mini kegs as an accessible entry point, offering similar advantages to full-sized kegs without requiring as much space or initial investment. A CO2 tank, such as a 5-pound tank often available through exchange programs at homebrew stores for an initial deposit around $75 and subsequent $15 refills, is central to a kegging system. This tank connects to a dual-gauge CO2 regulator, which allows you to monitor both the tank’s remaining pressure and the precise pressure being applied to your keg. A regulator is critical for consistent force carbonation and dispensing. Ball lock disconnects and appropriate tubing complete the system, providing a secure and flexible connection between your CO2 tank, regulator, and kegs, thereby enabling efficient force carbonation and easy serving of your homebrew. When it comes to acquiring all this essential homebrew beer equipment, several avenues exist. While many items can be purchased new from online retailers or dedicated homebrew shops, the speaker wisely suggests exploring used options. Platforms like Facebook Marketplace or local classifieds can yield fantastic deals on gently used gear from brewers who are upgrading or stepping away from the hobby. As long as items are in good, clean condition, used equipment can last for many years and significantly reduce your initial outlay. Tubing, for instance, is inexpensive at about a dollar a foot but should be replaced after about a dozen batches due to potential wear and buildup, even with thorough cleaning. Remember, whether you choose to buy new or used, investing in the right brewing gear is an investment in your brewing journey, promising countless hours of enjoyment and delicious results.Tapping into Knowledge: Your Homebrew Q&A
What are the most essential pieces of equipment for a beginner homebrewer?
For starting out, you’ll primarily need a brewing kettle for boiling, a fermenter to hold your beer during its transformation, and sanitizers to keep all your gear clean.
Why is sanitation so important when brewing beer at home?
Sanitation is crucial because it prevents unwanted microorganisms from contaminating your brew, which can ruin the taste and fermentation process. Keeping everything meticulously clean ensures your beer turns out delicious and free from off-flavors.
How do I measure the sugar content and potential alcohol in my homebrew?
You use a hydrometer to measure the specific gravity of your liquid before and after fermentation. This helps you track the sugar conversion and accurately calculate your beer’s alcohol by volume (ABV).
After my beer ferments, how do I package it for drinking?
Once fermented, you can package your beer by bottling it using clean bottles, caps, and a capper, or by transferring it to a kegging system with a CO2 tank. Both methods allow you to carbonate and store your finished beer.