Understanding the intricacies of homebrewing equipment is paramount for anyone venturing into this rewarding hobby, whether as a novice or an experienced artisan. As explored in the accompanying video, the journey from basic kit brewing to advanced all-grain methodologies necessitates a deliberate acquisition of specific tools and an understanding of their operational nuances.
Setting Up Your First Homebrew: Essential Equipment for Beginners
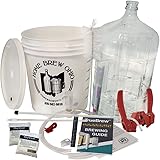
Embarking on a homebrewing journey does not necessitate a significant initial investment; rather, the fundamental elements are surprisingly accessible. For those merely contemplating the brewing of beer at home, a minimal setup is entirely feasible.
The Primacy of Sanitation in Homebrewing
The cornerstone of producing palatable beer, irrespective of the chosen method, is unwavering commitment to sanitation. Without meticulously cleaned and sanitized equipment, the risk of bacterial contamination leading to off-flavors or spoiled batches becomes an unfortunate certainty. A primary fermenter, often a simple food-grade pail, is indispensable. Accompanying this, a dedicated cleaner such as PBW (Powdered Brewery Wash) or Diversol is required to remove organic residues, while a no-rinse sanitizer, with Star San being a popular choice for its efficacy and ease of use, ensures microbial control. Iodophor presents an alternative, though its staining potential is a consideration for some brewers. Imagine if a surgeon neglected to sterilize their instruments; a similar principle applies to brewing, where microscopic invaders can ruin the endeavor.
Once fermentation has concluded, the beer must be transferred from the fermenter into a vessel for conditioning and eventual consumption. For the budget-conscious, a simple spigot installed on the fermenter, paired with an inexpensive bottling wand (typically a $4 investment), facilitates direct bottling. While this method is straightforward, it can disturb the sediment if priming sugar is agitated too vigorously within the primary fermenter. A more convenient approach, albeit slightly costlier at approximately $5, involves the use of Coopers carbonation drops, which are introduced directly into each bottle. This negates the need for a separate bottling bucket and simplifies the carbonation process significantly.
Regarding bottling vessels, both plastic and glass options are viable. Modern food-grade plastic bottles are engineered specifically for this purpose and are not generally associated with imparting off-flavors, contrary to some prevailing myths. If plastic is selected, twist-on caps are utilized, requiring no specialized tools. Conversely, glass bottles mandate the use of metallic caps and a capper for secure sealing. Beginning brewers are often encouraged to start with pre-hopped malt extract kits, such as those from Festa or Coopers, which demand little beyond clean water and potentially some additional dextrose or dry malt extract to initiate the brewing process.
Transitioning to Partial Grain: Expanding Your Brewing Horizons
For those whose interest in brewing beer deepens, the transition to partial grain brewing represents a logical next step, introducing more control over flavor and aroma profiles. While the foundational equipment from basic kit brewing remains relevant—the fermenter, cleaning supplies, and bottling apparatus—additional items are integrated into the process.
The Art of Steeping and Boiling
A crucial addition for partial grain brewing is a five-gallon pot, large enough to accommodate the partial boil volumes. This kettle is typically heated on a standard stovetop. The process involves steeping specialty grains in a mesh bag within approximately three gallons (around 12 liters) of water at a controlled temperature for about 30 minutes. This extracts desirable flavors and colors without the full complexity of an all-grain mash. Subsequently, liquid or dry malt extract is incorporated into the steeped wort, followed by a boil during which hops are added according to the recipe’s schedule. Once the boil is complete, the wort must be cooled rapidly to pitching temperature. An ice bath in a kitchen sink suffices for a nascent brewer, though an immersion chiller, while an investment, offers a far more efficient cooling mechanism.
Advanced Homebrewing Techniques: Exploring All-Grain Methods
The ultimate frontier for many homebrewers is all-grain brewing, a method that provides complete control over the fermentable sugars and, consequently, the final beer’s characteristics. This approach typically involves larger equipment and a more detailed understanding of the biochemical processes at play. Different systems exist to facilitate this advanced brewing, each with its own advantages and operational considerations.
Brew in a Bag (BIAB): Efficiency and Simplicity
Brew in a Bag, commonly abbreviated as BIAB, has revolutionized all-grain brewing by simplifying the process. This method significantly reduces the equipment footprint and procedural steps compared to traditional multi-vessel systems. For a typical five US gallon (approximately 19 liters) batch, a 10-gallon pot is generally recommended to provide ample volume for mashing without necessitating sparging—a core advantage of BIAB. The process entails lining the large pot with a specialized nylon bag, heating the mash water to the target temperature, and then adding the crushed grains directly into the bag. This mixture is then allowed to mash for about an hour, during which starches are converted into fermentable sugars. Some brewers employ insulating blankets around the pot to maintain a consistent mash temperature, though caution is advised if a heat source is still active.
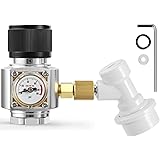
Given the larger volume of liquid—around 23 to 25 liters, depending on boil-off rates—a powerful heat source beyond a standard stovetop is often required. Propane burners, such as the KAB 4, are frequently utilized to achieve and maintain a vigorous boil. Once mashing is complete, the grain bag is simply lifted from the pot, allowing the wort to drain. While some brewers gently squeeze the bag to extract additional sugars, the concern about extracting tannins (which can lead to astringency) is largely considered negligible due to the relatively low pressures involved. Post-mash, the wort is brought to a boil, and hops are added as per the recipe. Enhancements such as Whirlfloc tablets, natural clarifiers costing approximately five to six dollars for a long-lasting supply, and yeast nutrient, similarly inexpensive at a few dollars for a half-teaspoon-per-batch dosage, are often introduced to promote a healthy fermentation and clear beer. Rapid cooling of the wort post-boil is critical to prevent the formation of off-flavors and minimize the risk of infection. An immersion chiller is highly recommended for all-grain batches, capable of reducing the wort to pitching temperatures in 15 to 20 minutes, though this duration is subject to the temperature of the available ground water.
The Classic Three-Vessel Setup: Precision and Scale
Historically, when all-grain brewing was contemplated, a three-vessel system often came to mind, a setup which could appear intimidating due to its array of equipment. This method, while more complex, offers unparalleled precision and the capacity for producing substantial batch sizes, with kettles of 30 gallons or more being commonly employed. The system typically comprises three distinct vessels:
-
Hot Liquor Tank (HLT): This vessel is dedicated to heating both the mash water and the sparge water to precise temperatures. The thermal control afforded by an HLT ensures optimal conditions for enzymatic activity during mashing and efficient sugar extraction during sparging.
-
Mash Tun: Often a converted insulated cooler, the mash tun is where the grains and hot water combine to form the mash. A critical component within this vessel is a false bottom or bazooka screen, which prevents grain solids from exiting with the wort during transfer. After the mash period, a ball valve on the mash tun allows the wort to be drawn off, or lautered, into the boil kettle.
-
Boil Kettle: As its name suggests, this is where the wort is boiled, hops are added, and other boil additions are incorporated.
Sparging, the process of rinsing the spent grains to extract residual sugars, is integral to this system. Two primary methods were prevalent: fly sparging, which involves continuously spraying hot sparge water over the grain bed while simultaneously draining wort into the boil kettle, with brewers aiming to match inflow and outflow rates; and batch sparging, a simpler technique where sparge water is added in one or more batches after the initial wort run-off, allowed to rest briefly, and then drained. Although once a standard, dedicated three-vessel systems are less common today, as more compact and integrated solutions have gained prominence.
Modern All-Grain Brewing: All-in-One Electric Systems
The landscape of all-grain brewing has been significantly transformed by the advent of all-in-one electric brewing systems, epitomized by units like the BrewZilla (e.g., Gen 3 or Gen 4 models) and the Grainfather. These systems consolidate multiple brewing steps into a single, relatively compact unit, enhancing convenience and efficiency. A key advantage of these electric systems is their versatility, permitting operation in diverse locations, from a kitchen to an outdoor deck, simply by plugging them into an appropriate power source.
These units feature an integrated control panel for precise temperature management during mashing and boiling, along with controls for an internal pump. A recirculation arm is utilized to continuously pump wort from beneath the grain bed back over the top, which contributes to exceptionally high mash efficiency, often yielding 75-80% sugar extraction. A false bottom within the main boiler unit prevents hop debris and grain particulates from interfering with the pump or transferring into the fermenter. The grain basket, a removable insert, holds the mashed grains. Once mashing is complete, the grain basket is typically raised and allowed to drain, with sparge water then poured over the grains to extract any remaining sugars. The boiling phase, including hop additions, occurs within the same vessel. Crucially, these all-in-one systems are usually equipped with an integrated chiller—either an immersion chiller or, in the case of the Grainfather, a counterflow chiller—facilitating rapid cooling of the wort to pitching temperatures directly within the unit.
The evolution of homebrewing equipment demonstrates a clear trajectory towards greater accessibility, efficiency, and precision. Whether one opts for the simplicity of extract brewing, the intermediate control of partial grain, or the comprehensive mastery offered by all-grain brewing, the investment in appropriate homebrew equipment is fundamental to crafting quality beer. The journey is a continuous exploration of technique and taste.
Brewing Up Answers: Your Homebrewing Q&A
What is the most important rule for brewing beer at home?
The most important rule is sanitation. Meticulously cleaning and sanitizing all your equipment prevents bacterial contamination that can spoil your beer.
What essential equipment do I need to start homebrewing?
You’ll need a primary fermenter, a cleaner like PBW, and a no-rinse sanitizer such as Star San. You also need bottles and a way to seal them, like twist caps for plastic bottles or a capper for glass.
How do I bottle my homebrewed beer?
You can use a spigot with a bottling wand and add priming sugar, or use convenient carbonation drops directly in each bottle. Both plastic and glass bottles are suitable options.
What ingredients are good for beginners to start brewing with?
Beginners are often encouraged to start with pre-hopped malt extract kits, like those from Festa or Coopers. These kits mainly require clean water and sometimes a bit of extra sugar to begin the brewing process.