Mastering the German Pilsner: An Expert Homebrewing Guide
Brewing a classic **German Pilsner** at home, even for advanced beginners, involves precision and understanding nuanced processes. The accompanying video demonstrates a streamlined approach, but let’s delve deeper into the expert techniques that elevate this iconic style from mere wort to a crisp, clean lager.The Foundation: Milling and Mashing for Your German Pilsner
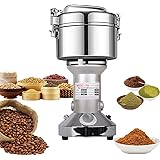
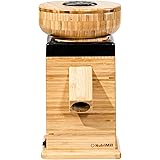
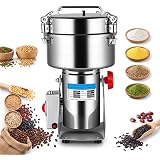
A successful **German Pilsner** begins with an optimized grain bill and a precise mash. The video highlights a simple kit, featuring 9 pounds of Pilsner malt and 1 pound of Great Chit from Riverbend Malthouse. This choice is deliberate; Pilsner malt provides the foundational clean, bready notes, while Great Chit, a hull-less malt, enhances body and head retention without contributing excessive color or harshness. Think of it as the canvas and a subtle textural brushstroke. Crushing the grains is the critical initial step. While many kits arrive double-crushed for convenience, a finer crush, achievable with a home grain mill, can significantly boost mash efficiency. A finer grist creates more surface area, allowing enzymes greater access to starches. This is akin to finely grinding coffee beans for optimal extraction. The mash itself, held at a steady 149°F (65°C) for 60 minutes, is where the magic of enzymatic conversion occurs. This specific temperature targets beta-amylase activity, producing highly fermentable sugars. The circulating wort, facilitated by a spray valve, is not merely a show; it ensures consistent temperature throughout the mash tun. This constant flow eliminates hot and cold spots, promoting uniform starch conversion. It’s like a conductor ensuring every section of an orchestra plays in perfect harmony. In our abbreviated video, a 30-minute mash sufficed for demonstration, but a full 60 minutes provides superior saccharification and improved efficiency.Maximizing Extraction: The Mash Out and Sparging
Following the mash, a mash out step is crucial for arresting enzyme activity. Raising the mash temperature to 169-170°F (76-77°C) effectively denatures the enzymes. This ensures that the sugar profile established during the mash phase remains stable, preventing further, undesirable conversion. Furthermore, the mash out decreases wort viscosity. This facilitates a more efficient runoff during the lautering process. Imagine rinsing a sponge; a warmer, less viscous liquid allows for a more thorough wash. Pressing the grain basket, as shown in the video, acts as a basic sparging technique, physically squeezing residual fermentable sugars from the grain bed. More advanced setups would employ a dedicated sparge, slowly rinsing the grains with hot water to further maximize yield.Hops for Character: The Art of First Wort Hopping in German Pilsner
Hops provide the characteristic bitterness and aroma in a **German Pilsner**. The video introduces a lesser-known technique: first wort hopping (FWH). Instead of adding hops only at the boil, FWH involves adding a portion of the hops to the kettle as it heats up. For our **German Pilsner**, a noble hop is chosen. This method results in a smoother, more integrated bitterness compared to a typical bittering addition. It’s like infusing a tea gently rather than steeping it aggressively. The prolonged contact time at lower temperatures helps preserve delicate hop aromatics that might otherwise flash off during a vigorous boil. This can also enhance head retention and contribute to a more complex hop aroma profile.The Boil: Clarification and Final Hop Additions
The boil serves multiple purposes beyond hop isomerization. Boiling sanitizes the wort, denatures proteins, and concentrates sugars. The 1650-watt, 120V system requires an insulation jacket and a slightly ajar lid during heat-up to expedite the process by allowing steam to escape while retaining heat. As the boil nears completion, specific additions fine-tune the beer. Whirlfloc, a carrageenan-based fining agent, promotes protein coagulation, leading to a clearer final product. Think of it as a magnet attracting cloud-forming particles. The final hop addition, Saphir hops in this case, contributes to the delicate, spicy, and floral aroma typical of a classic **German Pilsner**. These late additions are crucial for preserving volatile aromatic compounds.Rapid Cooling: The Plate Chiller’s Role in a Clean German Pilsner
Rapidly chilling the wort after the boil is paramount. A plate chiller, as demonstrated, efficiently drops the wort temperature. This quick cooling minimizes the risk of off-flavor formation, such as dimethyl sulfide (DMS), a cooked corn aroma. It also encourages the “cold break,” precipitating haze-forming proteins and polyphenols, essential for a brilliant **German Pilsner**. The plate chiller design maximizes heat exchange, swiftly bringing the wort to pitching temperature.Yeast’s Domain: Fermentation and Gravity
Once chilled, the sweet wort is transferred to a sanitized fermenter. Here, a crucial distinction is made: “brewers don’t make beer, yeast makes beer.” This truth underscores the vital role of yeast in converting sugars into alcohol and other flavor compounds. For a lager, especially when fermenting at cooler temperatures as with our “easy lager” method, pitching two packets of yeast ensures a robust, healthy fermentation. An underpitched lager can lead to sluggish fermentation, diacetyl production (buttery off-flavor), and incomplete attenuation. The original gravity (OG) reading, 1.039-1.040 in this instance, provides a baseline for calculating the final alcohol content. It’s a snapshot of the fermentable sugar concentration before yeast begins its work.The “Easy Lager” Method: Cold Fermentation for Your German Pilsner
The video’s “easy lager” method involves fermenting the **German Pilsner** at a cooler, stable temperature, such as in a crawl space. While this is not traditional lagering, it significantly reduces the production of fruity esters and fusel alcohols often associated with warmer ale fermentations. This cooler fermentation yields a cleaner flavor profile, bringing it closer to a true lager character. Traditional lagering, however, involves holding the beer near freezing (around 33°F or 0.5°C) for several weeks (7-8 weeks, as mentioned). This cold conditioning allows for the settling of yeast and proteins, further polishing the beer’s clarity and flavor. It provides a distinct maturation, smoothing rough edges and allowing delicate flavors to emerge. The video’s 4-day “lagering” is an abbreviated version, offering a taste of the potential. Skipping proper lagering might leave a slight “green” or fruity character, as noted in the tasting. However, even with this simplified approach, the resulting **German Pilsner** demonstrates the excellent potential of homebrewing.Zum Wohl! Your German Pilsner Homebrew Q&A
What is a German Pilsner?
A German Pilsner is a classic beer style known for its crisp, clean taste, often with bready notes and a distinct hop character. This guide explains how to brew one at home.
What is ‘mashing’ in the beer brewing process?
Mashing is the process where crushed grains are mixed with hot water to convert starches into fermentable sugars. These sugars are what the yeast will later turn into alcohol.
Why is it important to cool the wort quickly after boiling?
Rapidly chilling the wort after boiling helps prevent off-flavors, such as a cooked corn aroma, from forming. It also helps make the final beer clearer by settling out haze-forming proteins.
What is the ‘easy lager’ method for fermenting beer?
The ‘easy lager’ method involves fermenting your beer at a cooler, stable temperature. This helps produce a cleaner flavor profile with fewer fruity tastes, bringing it closer to a traditional lager.