Cooling the wort quickly prevents contamination. Two main methods are recommended:
- **Ice Bath:** Fill a sink with cold water and ice. Submerge your hot pot. Stir the water around the pot occasionally. Replace ice as it melts. This is generally the fastest way.
- **Refrigerator Method:** Place the kettle in your refrigerator. This takes longer. The video indicates about two hours to reach 70 degrees Fahrenheit.
Always cover the kettle during cooling. This minimizes exposure to airborne contaminants. Cleanliness is paramount in brewing. It prevents unwanted bacteria or wild yeasts from spoiling your beer.
Transferring and Aerating the Wort
Once the wort is around 70 degrees Fahrenheit, it is ready. Carefully transfer it to your fermenter. Try to leave behind any heavy sediment. This sediment is called trub. It consists of hop material and proteins. Do not worry if some trub makes it in. It will not ruin your beer. If needed, top off the fermenter. Use bottled water to reach the 1.25 gallon mark. Check the temperature again. It should be close to 70 degrees Fahrenheit. A small variance is fine. However, too high means more cooling is needed. Yeast thrive in specific temperature ranges.
Yeast needs oxygen to reproduce. This helps them effectively ferment. Aerate the wort by shaking the fermenter vigorously. Do this for about 60 seconds. Ensure the lid is sanitized and sealed. This prevents spills during shaking. Always sanitize your hands thoroughly. Brewers often use food-grade sanitizers for this. They are often spray-on and quick-drying.
Pitching the Yeast and Fermentation
Now, add your brewing yeast. This is the moment the magic begins. Yeast converts sugars into alcohol and CO2. This process is called fermentation. Secure the airlock. It allows CO2 to escape. It also prevents outside air from entering. Place your fermenter in a dark location. A stable temperature around 70 degrees Fahrenheit is ideal. Light, especially UV rays, can degrade beer quickly. Direct sunlight can cause “skunking.” This creates an unpleasant aroma. Fermentation typically lasts 7 to 10 days. The video recommends 14 days for optimal results. This ensures complete fermentation. It also prevents over-pressurized bottles later on.
Bottling Your Homebrewed Beer
After two weeks, fermentation should be complete. It is time to bottle your beer. This prepares it for carbonation and storage.
Sanitation and Bottle Preparation
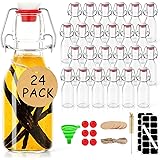
Sanitation is as crucial now as it was earlier. Every surface touching your beer must be sanitized. You will need a large pot of sanitizer for bottles. A smaller bowl is useful for caps. A bottle capper and caps are also necessary. You can reuse non-screw-top beer bottles. Wash them thoroughly first. Dishwashers with sanitize cycles work well. Allow bottles to air dry completely. Stage them near your fermenter. This makes bottling more efficient. For best practices, spray sanitizer into the bottling spigot. This ensures the first bit of beer does not pick up contaminants. Always dump sanitizer out of bottles before filling.
The Bottling Process: Methods and Priming
The video suggests filling bottles from the bottom up. This reduces oxygen exposure. Oxygen can lead to stale flavors. You can use a bottle filler attachment. This comes with many kits. It makes filling much easier. Alternatively, you can time the valve opening and closing. Filling from the top is possible. However, it is not recommended. It introduces more oxygen. This increases the risk of oxidation. Oxidation negatively affects beer flavor. It can make beer taste like wet cardboard.
To carbonate your beer, you need priming sugar. The easiest way is using priming sugar tablets. Add them to each bottle. Follow the directions precisely. Adding too much sugar will over-carbonate the beer. This could lead to exploding bottles. Imagine a “beer volcano” if you overdo it. Capping bottles is straightforward. Use a bottle capper as demonstrated in the video. Ensure a tight seal on each cap.
Conditioning Your Bottles for Carbonation
After bottling, store your beer. Place bottles in a dark, room-temperature spot. Allow them to condition for two weeks. During this time, residual yeast consumes the priming sugar. This creates CO2 inside the sealed bottles. The CO2 dissolves into the beer. This is how carbonation occurs. You will notice some sediment at the bottom. This is normal yeast sediment. Try not to shake the bottles. This prevents stirring up the sediment. Keep bottles chilled once carbonated. This slows down any remaining yeast activity. Then, pour and enjoy your very own delicious homebrewed beer.
Brewing Up Answers: Your Easiest Beer Questions
What is the easiest way to start making beer at home?
The easiest way to start homebrewing is by using a countertop extract kit, which simplifies the traditional brewing process for beginners. This method lets you create delicious beer right in your own kitchen.
What essential equipment do I need to begin homebrewing?
You will need a beginner-friendly countertop beer kit, which often includes a fermenter that doubles as a bottling vessel, along with basic kitchen supplies like a large stockpot.
What is ‘wort’ in homebrewing?
Wort is the sugary liquid created after steeping grains and dissolving malt extract. It is essentially unfermented beer that contains all the sugars yeast will consume during fermentation.
Why is it important to cool the wort after boiling?
Cooling the wort quickly after boiling is crucial to prevent contamination and to bring it down to the correct temperature for yeast. High temperatures would kill the yeast, preventing fermentation.
How does homebrewed beer get its carbonation?
After bottling, priming sugar is added to each bottle, which residual yeast consumes to create CO2 inside the sealed bottle. This CO2 dissolves into the beer over about two weeks, making it fizzy.
Hops contribute bitterness, flavor, and aroma. Their timing in the boil is key. The video details three additions:
- **60-Minute Hop Addition:** Add 4 grams of Citra hops. This happens as soon as the wort boils. These hops provide bitterness. They balance the malt’s sweetness. Citra hops are popular for their citrus profile.
- **15-Minute Hop Addition:** Add 8 grams of Citra hops. This occurs with 15 minutes left in the boil. These hops contribute more flavor. They also add some aroma.
- **Flame-Out Addition:** Add 18 grams of Citra hops. This happens when you turn off the heat. These hops are for maximum aroma. Their delicate flavors are preserved.
If you lack a scale, do not worry. Just split the hops proportionally. Follow the ratios suggested in the video. The kit should provide pre-measured packets for simplicity.
Cooling and Fermentation: Where the Magic Happens
After the boil, the wort needs cooling. This brings it down to yeast pitching temperature. This is a critical step. High temperatures will kill yeast.
Chilling the Wort Effectively
Cooling the wort quickly prevents contamination. Two main methods are recommended:
- **Ice Bath:** Fill a sink with cold water and ice. Submerge your hot pot. Stir the water around the pot occasionally. Replace ice as it melts. This is generally the fastest way.
- **Refrigerator Method:** Place the kettle in your refrigerator. This takes longer. The video indicates about two hours to reach 70 degrees Fahrenheit.
Always cover the kettle during cooling. This minimizes exposure to airborne contaminants. Cleanliness is paramount in brewing. It prevents unwanted bacteria or wild yeasts from spoiling your beer.
Transferring and Aerating the Wort
Once the wort is around 70 degrees Fahrenheit, it is ready. Carefully transfer it to your fermenter. Try to leave behind any heavy sediment. This sediment is called trub. It consists of hop material and proteins. Do not worry if some trub makes it in. It will not ruin your beer. If needed, top off the fermenter. Use bottled water to reach the 1.25 gallon mark. Check the temperature again. It should be close to 70 degrees Fahrenheit. A small variance is fine. However, too high means more cooling is needed. Yeast thrive in specific temperature ranges.
Yeast needs oxygen to reproduce. This helps them effectively ferment. Aerate the wort by shaking the fermenter vigorously. Do this for about 60 seconds. Ensure the lid is sanitized and sealed. This prevents spills during shaking. Always sanitize your hands thoroughly. Brewers often use food-grade sanitizers for this. They are often spray-on and quick-drying.
Pitching the Yeast and Fermentation
Now, add your brewing yeast. This is the moment the magic begins. Yeast converts sugars into alcohol and CO2. This process is called fermentation. Secure the airlock. It allows CO2 to escape. It also prevents outside air from entering. Place your fermenter in a dark location. A stable temperature around 70 degrees Fahrenheit is ideal. Light, especially UV rays, can degrade beer quickly. Direct sunlight can cause “skunking.” This creates an unpleasant aroma. Fermentation typically lasts 7 to 10 days. The video recommends 14 days for optimal results. This ensures complete fermentation. It also prevents over-pressurized bottles later on.
Bottling Your Homebrewed Beer
After two weeks, fermentation should be complete. It is time to bottle your beer. This prepares it for carbonation and storage.
Sanitation and Bottle Preparation
Sanitation is as crucial now as it was earlier. Every surface touching your beer must be sanitized. You will need a large pot of sanitizer for bottles. A smaller bowl is useful for caps. A bottle capper and caps are also necessary. You can reuse non-screw-top beer bottles. Wash them thoroughly first. Dishwashers with sanitize cycles work well. Allow bottles to air dry completely. Stage them near your fermenter. This makes bottling more efficient. For best practices, spray sanitizer into the bottling spigot. This ensures the first bit of beer does not pick up contaminants. Always dump sanitizer out of bottles before filling.
The Bottling Process: Methods and Priming
The video suggests filling bottles from the bottom up. This reduces oxygen exposure. Oxygen can lead to stale flavors. You can use a bottle filler attachment. This comes with many kits. It makes filling much easier. Alternatively, you can time the valve opening and closing. Filling from the top is possible. However, it is not recommended. It introduces more oxygen. This increases the risk of oxidation. Oxidation negatively affects beer flavor. It can make beer taste like wet cardboard.
To carbonate your beer, you need priming sugar. The easiest way is using priming sugar tablets. Add them to each bottle. Follow the directions precisely. Adding too much sugar will over-carbonate the beer. This could lead to exploding bottles. Imagine a “beer volcano” if you overdo it. Capping bottles is straightforward. Use a bottle capper as demonstrated in the video. Ensure a tight seal on each cap.
Conditioning Your Bottles for Carbonation
After bottling, store your beer. Place bottles in a dark, room-temperature spot. Allow them to condition for two weeks. During this time, residual yeast consumes the priming sugar. This creates CO2 inside the sealed bottles. The CO2 dissolves into the beer. This is how carbonation occurs. You will notice some sediment at the bottom. This is normal yeast sediment. Try not to shake the bottles. This prevents stirring up the sediment. Keep bottles chilled once carbonated. This slows down any remaining yeast activity. Then, pour and enjoy your very own delicious homebrewed beer.
Brewing Up Answers: Your Easiest Beer Questions
What is the easiest way to start making beer at home?
The easiest way to start homebrewing is by using a countertop extract kit, which simplifies the traditional brewing process for beginners. This method lets you create delicious beer right in your own kitchen.
What essential equipment do I need to begin homebrewing?
You will need a beginner-friendly countertop beer kit, which often includes a fermenter that doubles as a bottling vessel, along with basic kitchen supplies like a large stockpot.
What is ‘wort’ in homebrewing?
Wort is the sugary liquid created after steeping grains and dissolving malt extract. It is essentially unfermented beer that contains all the sugars yeast will consume during fermentation.
Why is it important to cool the wort after boiling?
Cooling the wort quickly after boiling is crucial to prevent contamination and to bring it down to the correct temperature for yeast. High temperatures would kill the yeast, preventing fermentation.
How does homebrewed beer get its carbonation?
After bottling, priming sugar is added to each bottle, which residual yeast consumes to create CO2 inside the sealed bottle. This CO2 dissolves into the beer over about two weeks, making it fizzy.
Did you know that homebrewing is a hobby enjoyed by millions worldwide? For many, the idea of brewing your own beer seems daunting. However, it does not have to be complicated. The video above shows you how to make beer using an easy countertop extract kit. This method simplifies the traditional brewing process. It lets beginners create delicious beer right in their own kitchens.
This comprehensive guide expands on the video’s steps. It provides extra insights for your first homebrewing adventure. We will walk you through each stage. You will learn everything from initial setup to bottling your finished brew. Get ready to discover the rewarding world of homebrewing!
Starting Your Homebrewing Journey: Essential Setup
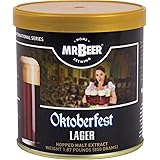
Your journey begins with gathering the right equipment. The video highlights a countertop beer kit. This kit is designed for absolute beginners. It contains most specialized items you will need. For example, it includes a fermenter that doubles as a bottling vessel.
You will need some basic kitchen supplies. A large stockpot is essential. Also, make sure to have measuring cups and spoons. Importantly, you will provide your own water. City water works fine for brewing. However, you might consider filtering it. This removes any off-flavors or chlorine.
Water Treatment for Better Beer Flavor
Water quality significantly impacts your beer’s taste. City water often contains chlorine or chloramine. These chemicals protect public health. However, they can create harsh, medicinal flavors in beer. The video suggests adding a small portion of a Camden tablet. Specifically, one-fifth of a tablet is used per 1.5 gallons of water. This tablet neutralizes chlorine instantly. It ensures a clean foundation for your brew. Well water is another option. Still, be cautious if it smells or tastes funky. This could transfer undesirable notes to your finished product.
The Brewing Process: From Grains to Wort
Making beer involves several distinct stages. Each step is important for quality. We start with steeping grains. Then we move to the crucial boil.
Steeping Specialty Grains
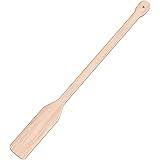
After heating 1.5 gallons of water to 160 degrees Fahrenheit, it is time to steep grains. The kit provides a muslin bag filled with specialty grains. These grains contribute color, aroma, and flavor. They do not add much fermentable sugar. You will immerse this bag in the hot water. Let it steep for 30 minutes. A pro tip: clip the bag to the pot’s side. This makes removal much easier. Think of it like making a giant tea bag.
Dissolving Malt Extract: Creating Wort
Once steeping is complete, remove the grain bag. Now, turn off the heat. Then, stir in the malt extract. The video specifies 1.5 pounds of extract. Stir until it is fully dissolved. Undissolved extract can burn on the pot’s bottom. This would create off-flavors. This sugary liquid now has a new name: wort. It is pronounced “wert.” Wort is essentially unfermented beer. It contains all the sugars yeast will consume.
The Boil: Hop Additions and Caution
The next step is boiling the wort. This serves several purposes. Boiling sterilizes the wort. It also concentrates sugars. Most importantly, it allows for hop additions. A 60-minute boil is common for many recipes. However, boil-overs are a real risk. The wort can foam up suddenly. It spills over the pot’s edge. This creates a sticky, burnt mess. Avoid walking away from your pot. Maintain a stable, gentle boil. This prevents boil-overs. It saves you from a difficult cleanup.
Timing Your Hop Additions
Hops contribute bitterness, flavor, and aroma. Their timing in the boil is key. The video details three additions:
- **60-Minute Hop Addition:** Add 4 grams of Citra hops. This happens as soon as the wort boils. These hops provide bitterness. They balance the malt’s sweetness. Citra hops are popular for their citrus profile.
- **15-Minute Hop Addition:** Add 8 grams of Citra hops. This occurs with 15 minutes left in the boil. These hops contribute more flavor. They also add some aroma.
- **Flame-Out Addition:** Add 18 grams of Citra hops. This happens when you turn off the heat. These hops are for maximum aroma. Their delicate flavors are preserved.
If you lack a scale, do not worry. Just split the hops proportionally. Follow the ratios suggested in the video. The kit should provide pre-measured packets for simplicity.
Cooling and Fermentation: Where the Magic Happens
After the boil, the wort needs cooling. This brings it down to yeast pitching temperature. This is a critical step. High temperatures will kill yeast.
Chilling the Wort Effectively
Cooling the wort quickly prevents contamination. Two main methods are recommended:
- **Ice Bath:** Fill a sink with cold water and ice. Submerge your hot pot. Stir the water around the pot occasionally. Replace ice as it melts. This is generally the fastest way.
- **Refrigerator Method:** Place the kettle in your refrigerator. This takes longer. The video indicates about two hours to reach 70 degrees Fahrenheit.
Always cover the kettle during cooling. This minimizes exposure to airborne contaminants. Cleanliness is paramount in brewing. It prevents unwanted bacteria or wild yeasts from spoiling your beer.
Transferring and Aerating the Wort
Once the wort is around 70 degrees Fahrenheit, it is ready. Carefully transfer it to your fermenter. Try to leave behind any heavy sediment. This sediment is called trub. It consists of hop material and proteins. Do not worry if some trub makes it in. It will not ruin your beer. If needed, top off the fermenter. Use bottled water to reach the 1.25 gallon mark. Check the temperature again. It should be close to 70 degrees Fahrenheit. A small variance is fine. However, too high means more cooling is needed. Yeast thrive in specific temperature ranges.
Yeast needs oxygen to reproduce. This helps them effectively ferment. Aerate the wort by shaking the fermenter vigorously. Do this for about 60 seconds. Ensure the lid is sanitized and sealed. This prevents spills during shaking. Always sanitize your hands thoroughly. Brewers often use food-grade sanitizers for this. They are often spray-on and quick-drying.
Pitching the Yeast and Fermentation
Now, add your brewing yeast. This is the moment the magic begins. Yeast converts sugars into alcohol and CO2. This process is called fermentation. Secure the airlock. It allows CO2 to escape. It also prevents outside air from entering. Place your fermenter in a dark location. A stable temperature around 70 degrees Fahrenheit is ideal. Light, especially UV rays, can degrade beer quickly. Direct sunlight can cause “skunking.” This creates an unpleasant aroma. Fermentation typically lasts 7 to 10 days. The video recommends 14 days for optimal results. This ensures complete fermentation. It also prevents over-pressurized bottles later on.
Bottling Your Homebrewed Beer
After two weeks, fermentation should be complete. It is time to bottle your beer. This prepares it for carbonation and storage.
Sanitation and Bottle Preparation
Sanitation is as crucial now as it was earlier. Every surface touching your beer must be sanitized. You will need a large pot of sanitizer for bottles. A smaller bowl is useful for caps. A bottle capper and caps are also necessary. You can reuse non-screw-top beer bottles. Wash them thoroughly first. Dishwashers with sanitize cycles work well. Allow bottles to air dry completely. Stage them near your fermenter. This makes bottling more efficient. For best practices, spray sanitizer into the bottling spigot. This ensures the first bit of beer does not pick up contaminants. Always dump sanitizer out of bottles before filling.
The Bottling Process: Methods and Priming
The video suggests filling bottles from the bottom up. This reduces oxygen exposure. Oxygen can lead to stale flavors. You can use a bottle filler attachment. This comes with many kits. It makes filling much easier. Alternatively, you can time the valve opening and closing. Filling from the top is possible. However, it is not recommended. It introduces more oxygen. This increases the risk of oxidation. Oxidation negatively affects beer flavor. It can make beer taste like wet cardboard.
To carbonate your beer, you need priming sugar. The easiest way is using priming sugar tablets. Add them to each bottle. Follow the directions precisely. Adding too much sugar will over-carbonate the beer. This could lead to exploding bottles. Imagine a “beer volcano” if you overdo it. Capping bottles is straightforward. Use a bottle capper as demonstrated in the video. Ensure a tight seal on each cap.
Conditioning Your Bottles for Carbonation
After bottling, store your beer. Place bottles in a dark, room-temperature spot. Allow them to condition for two weeks. During this time, residual yeast consumes the priming sugar. This creates CO2 inside the sealed bottles. The CO2 dissolves into the beer. This is how carbonation occurs. You will notice some sediment at the bottom. This is normal yeast sediment. Try not to shake the bottles. This prevents stirring up the sediment. Keep bottles chilled once carbonated. This slows down any remaining yeast activity. Then, pour and enjoy your very own delicious homebrewed beer.
Brewing Up Answers: Your Easiest Beer Questions
What is the easiest way to start making beer at home?
The easiest way to start homebrewing is by using a countertop extract kit, which simplifies the traditional brewing process for beginners. This method lets you create delicious beer right in your own kitchen.
What essential equipment do I need to begin homebrewing?
You will need a beginner-friendly countertop beer kit, which often includes a fermenter that doubles as a bottling vessel, along with basic kitchen supplies like a large stockpot.
What is ‘wort’ in homebrewing?
Wort is the sugary liquid created after steeping grains and dissolving malt extract. It is essentially unfermented beer that contains all the sugars yeast will consume during fermentation.
Why is it important to cool the wort after boiling?
Cooling the wort quickly after boiling is crucial to prevent contamination and to bring it down to the correct temperature for yeast. High temperatures would kill the yeast, preventing fermentation.
How does homebrewed beer get its carbonation?
After bottling, priming sugar is added to each bottle, which residual yeast consumes to create CO2 inside the sealed bottle. This CO2 dissolves into the beer over about two weeks, making it fizzy.