My journey into homebrewing began, much like many enthusiasts, with a single kit and a sense of adventurous curiosity. Initially, the sheer volume of equipment and the steps involved seemed daunting. However, after several successful brewing experiences, including crafting a delightful brown ale, I discovered that certain practices and additional tools significantly streamline the process. The Craft a Brew 1-gallon brown ale kit offers an excellent starting point, but refining your technique and optimizing your setup can genuinely elevate your results.
This accompanying guide expands upon the insights shared in the video, providing a more detailed look into essential equipment, the critical role of sanitation, and crucial initial steps for brewing a quality brown ale. Mastering these fundamentals is vital for any aspiring brewer, ensuring your efforts culminate in a truly enjoyable beverage.
Essential Equipment for Your Homebrewing Journey
Embarking on the creation of your very own brown ale, especially with a convenient homebrew kit like the Craft a Brew 1-gallon version, starts with understanding your tools. The kit itself provides a solid foundation, yet a few supplementary items can dramatically enhance your brewing efficiency and experience. Possessing the right equipment ensures a smoother process from start to finish, mitigating common frustrations.
What Your Craft a Brew Kit Includes
Upon opening your Craft a Brew kit, you will discover a curated selection of items designed to get you started. This particular 1-gallon kit typically contains the following core components:
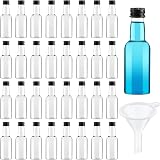
- A 1-gallon glass carboy, serving as your primary fermentation vessel.
- A funnel, which assists in transferring liquids.
- A racking cane, used for transferring beer while leaving sediment behind.
- Malt extract, providing the fermentable sugars for your brew.
- A small bag for grains, often called a “cheese sock condom” or “brewer’s do-rag.”
- Sanitizer packet, essential for preventing contamination.
- A three-piece airlock, allowing CO2 to escape during fermentation without letting air in.
- A stopper or bung, to seal the carboy.
- Bittering hops, which contribute to the beer’s bitterness and aroma.
- Yeast, the microscopic marvels that convert sugar into alcohol.
- A glass thermometer, crucial for monitoring temperatures throughout the brewing process.
Thoroughly inspect your kit upon receipt to confirm all listed components are present. On one occasion, a brewer received a kit with missing grains, highlighting the importance of this initial check. An organized approach sets the stage for a successful brewing session.
Recommended Additions for Enhanced Brewing
While the kit provides the basics, experience has shown that investing in a few extra pieces of equipment significantly improves the homebrewing experience. These additions address common pain points and make various stages of the brewing process more manageable. Consider these upgrades as valuable investments in your brewing future.
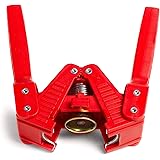
- Auto-Siphon: Transferring beer from the fermenter to bottles can be a “pain in the ass” with just a racking cane and tubing. Many brewers find an auto-siphon invaluable for the bottling phase. This tool, typically costing around $20, creates an easy vacuum, initiating the siphoning action effortlessly.
- Larger Funnel: A larger funnel facilitates easier pouring and straining, especially when adding ingredients or transferring wort. Its wider opening reduces spills and helps manage larger volumes of liquid efficiently. This simple upgrade streamlines your workflow significantly.
- Mesh Strainer: Essential for separating hops and other particulates from your wort after the boil. Even with extract brewing, hops are added directly to the boil. A fine mesh strainer prevents unwanted solids from ending up in your final beer, ensuring a cleaner product.
- Spray Bottle: A dedicated spray bottle for your sanitizer solution is incredibly convenient. Instead of submerging equipment in a bucket every few minutes, a quick spray ensures consistent sanitation for tools that frequently interact with your brew. This practice maintains a sterile environment throughout.
- Digital Thermometer: While the kit includes a glass thermometer, a digital alternative offers superior accuracy, faster readings, and durability. Digital thermometers are easier to clean and eliminate the concern of breakage, which can occur with fragile glass ones.
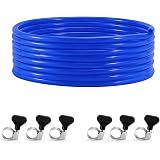
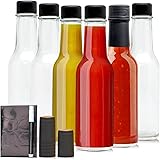
- Bottles and Caps: Unless you have a supply on hand, you will need swing-top bottles or standard bottles with caps and a capper for the bottling stage. The kit does not typically include these, so planning ahead is crucial for packaging your finished brown ale.
- Bottle Filler: This newest piece of equipment simplifies the bottling process by allowing for precise fills without overflow. A bottle filler, which you drop into the bottle, perfectly dispenses the beer until you lift it, ensuring consistent bottle headspace every time.
Prioritizing Cleanliness and Sanitation in Homebrewing
The cardinal rule of homebrewing, stressed universally by experienced brewers, is sanitation. A clean and sanitized environment prevents unwanted microbial infections that can ruin your brown ale’s flavor and aroma. Neglecting this crucial step can lead to off-flavors, often described as tasting “like shit.” Therefore, meticulous cleaning and sanitizing are non-negotiable for producing high-quality beer.
Cleaning Your Brewing Equipment with Easy Clean
Before any sanitization takes place, all equipment must be thoroughly cleaned. Cleaning removes visible dirt, grime, and brewing residues. The video demonstrates using Easy Clean, a common cleaning agent among homebrewers. For a 1-gallon volume, a single tablespoon of Easy Clean is dissolved in water. This solution effectively prepares your equipment for the next critical step.
You should clean a variety of items that will come into contact with your beer. This includes the spatula, tubing, mesh strainer, funnel, the 1-gallon carboy, and your stock pot. Employ a dedicated sprayer filled with your cleaning solution for convenience. This method helps maintain a continuous cleaning process, avoiding the need to repeatedly immerse items into a bucket.
The Indispensable Role of StarSan Sanitizer
After cleaning, sanitization eliminates microscopic organisms that could contaminate your beer. While the kit provides a sanitizer packet (half a packet per gallon of water, saving the other half for bottling), many brewers prefer StarSan. StarSan is a highly effective, no-rinse acid anionic sanitizer that ensures a sterile brewing environment. Its formulation creates a lasting film on surfaces, offering residual protection against microbes.
To prepare a StarSan solution, combine 1.2 teaspoons per gallon of water. Use a dedicated spray bottle for easy application to all surfaces and tools throughout your brew day. Even items that will be boiled, such as your wort, benefit from pre-sanitation, as it cultivates a habit of unwavering hygiene. This proactive approach minimizes the risk of infection and preserves the intended flavor profile of your brown ale.
Water Selection and Preparation for Brewing
The quality of your brewing water profoundly impacts the final taste of your beer. Understanding water’s role, from source selection to managing evaporation, is an important aspect of crafting a delicious brown ale. Deliberate consideration of your water source can prevent undesirable flavors in your finished product.
Choosing Your Water Source: Tap vs. Spring
When selecting water for your homebrew, you essentially have two main options: tap water or commercially purchased spring water. While tap water is readily available, it presents potential flavor challenges. Brewers often report that older city pipes can impart off-flavors into tap water, affecting the delicate balance of a brown ale. Therefore, many choose to bypass this risk entirely.
Consequently, utilizing spring water, often available at an affordable price, is a popular alternative. Spring water generally offers a cleaner, more consistent profile, which can lead to a more predictable and better-tasting beer. This choice minimizes variables, allowing the malt and hop flavors to truly shine. Selecting a reliable water source is a foundational step toward brewing excellence.
Accounting for Evaporation During the Boil
During the boiling process, a significant amount of water will evaporate. This is a natural and expected part of brewing. To compensate for this anticipated loss and ensure you achieve your target final volume, it is customary to start with slightly more than one gallon of water. This proactive measure prevents a reduction in your finished brew volume.
For instance, if your recipe calls for one gallon of finished wort, you might begin with approximately 1.25 gallons of water. This overage accounts for the water lost to steam during the boil, guaranteeing that you end with the desired concentration of sugars for fermentation. Accurately measuring your starting water volume sets you up for success.
Steeping Specialty Grains for Flavor and Color
Steeping specialty grains is a crucial step in extract brewing, imparting essential flavor, aroma, and color to your brown ale. This process, akin to making a large batch of tea, extracts desirable compounds from the grains without converting starches to sugars. The careful execution of this step contributes significantly to the character of your brew.
The Purpose of Specialty Malts
Specialty malts, distinct from base malts, primarily contribute non-fermentable sugars, complex flavors, and a specific color to the beer. In this homebrewing scenario, the brown ale kit includes specialty malt, which we steep rather than mash. This method effectively extracts flavor and color compounds without requiring the full mashing process used in all-grain brewing. Specialty malts contain minimal starch, which prevents a cloudy or starchy end product.
As the grains steep, they release their unique attributes into the hot water, enriching the wort. The resulting liquid will take on a deeper hue and a more nuanced flavor profile. For instance, a brown ale benefits immensely from specialty malts that contribute notes of caramel, toast, or chocolate, defining its characteristic depth. This steeping phase is instrumental in crafting the distinctive qualities of your brown ale.
Optimal Temperature and Duration for Steeping
Achieving the correct temperature and duration during steeping is vital for extracting the desired characteristics from your grains. You aim for a temperature of approximately 155 degrees Fahrenheit (68°C). Maintain this temperature consistently throughout the steeping period. However, slight fluctuations are common, especially on electric stovetops.
It is not uncommon for the temperature to briefly rise to 160°F or drop to 145°F when adding colder water. Monitor your stove’s heat carefully, adjusting it intermittently to stay within the ideal range. Steep the grains for a duration of 15 to 20 minutes. After steeping, remove the grain bag without squeezing it. Squeezing can extract unwanted tannins, which can introduce astringent, off-flavors into your brown ale. Careful removal ensures a clean flavor profile.
Achieving the Boil: Transition to Wort and Hop Addition
Following the steeping of specialty grains, the next critical phase in brewing your brown ale involves bringing the wort to a rolling boil. This stage is fundamental for several reasons, including sterilizing the wort, concentrating sugars, and most importantly, adding hops for bitterness and aroma. Effective temperature control remains paramount during this transition.
From Steeping to a Rolling Boil
Once you remove the steeped grains, return the pot of now-darkened wort to the burner. The objective is to rapidly increase the temperature to a vigorous boil, which occurs at approximately 212 degrees Fahrenheit (100°C) at sea level. This high temperature ensures the wort is completely sterilized, eliminating any remaining microbes that could jeopardize your brown ale’s integrity. It also isomerizes hop acids, extracting bitterness.
Continuous monitoring is essential as the wort heats up. Electric stoves, in particular, can be challenging for precise temperature control; they often retain heat and can overshoot desired temperatures quickly. Consequently, you must remain attentive to prevent scorching or boil-overs. Vigilant management of the heat source maintains the quality of your brew.
Incorporating Hops and Continued Sanitation
As the wort reaches its boiling point, you introduce the bittering hops. These hops, included in your Craft a Brew kit, contribute the initial bitterness that balances the sweetness from the malt. Furthermore, some brewers maintain their sanitation practices during the boil, even though the high temperature itself sterilizes the wort. They may give any utensils that contact the wort a quick spray of sanitizer.
While the boiling action itself provides sterilization, adhering to consistent sanitation habits throughout the entire brewing process is a best practice. It reinforces diligence and reduces the chances of errors later on when cooler temperatures create more opportunities for infection. Therefore, always maintain a mindset of meticulous cleanliness to ensure the successful creation of your homebrewed brown ale.
Fermenting Your Queries: A Brown Ale Homebrew Q&A
What is included in a typical Craft a Brew homebrew kit?
A typical Craft a Brew 1-gallon kit includes a glass carboy, funnel, racking cane, malt extract, grain bag, sanitizer, airlock, stopper, bittering hops, yeast, and a glass thermometer.
Why is sanitation so important when homebrewing?
Sanitation is crucial because it prevents unwanted microbes from contaminating your beer, which can lead to off-flavors and spoil your batch. All equipment that touches your beer after the boil must be clean and sanitized.
What kind of water should I use for brewing and why?
It’s generally recommended to use commercially purchased spring water for brewing because it often has a cleaner and more consistent profile than tap water. Tap water can sometimes contain impurities that might negatively affect your beer’s taste.
What is the purpose of steeping specialty grains in the brewing process?
Steeping specialty grains adds important flavors, aromas, and color to your brown ale. This process extracts desirable compounds from the grains, similar to making tea, without needing a full mashing process.
What happens during the boiling stage of brewing?
During the boil, the wort is sterilized, sugars are concentrated, and bittering hops are added to balance the malt sweetness and contribute to the beer’s aroma. It’s a critical step that ensures a clean and balanced flavor profile.